diy easter baskets.

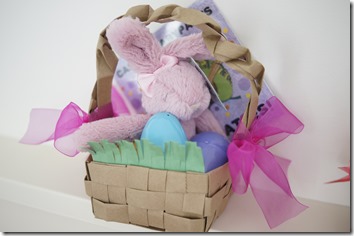
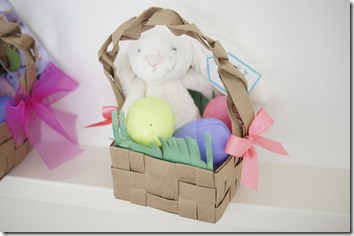
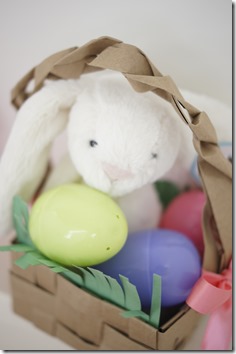
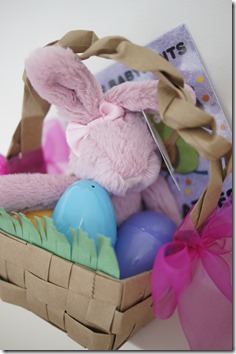
just wanted to share a pretty quick & easy DIY easter basket made from a paper grocery bag before Easter weekend. I made two last week – one for eloise & one for our niece charlotte. the finished basket is pretty small (like the size of a CD case) but perfect for just a little stuffed rabbit & some eggs.

DIY easter basket

{original pin: The Elli Blog}

_DSC5991_DSC5990


supplies:

  • paper bag
  • hot glue gun & glue sticks
  • scissors
  • ruler
  • pencil
  • ribbon (optional)
  • green construction paper (optional)

I followed the tutorial linked above (it’s a pretty good one). I always forget how hard hot glue can be to use & gave myself a blister, so be careful! I also found the handles to be tricky to attach.

I added a bit of grass to two of the sides of the basket without handles. I cut a piece of paper the same width as the basket & then randomly cut the edge of it (a few inches) to make blades of grass. then I trimmed the bottom of the paper & glued it inside the basket so the blades stuck out. repeat for the other side.

_DSC5994

{a little white bunny for eloise}

_DSC5993

{a little ballerina bunny for charlotte}

note: both bunnies are JellyCat.

how are you celebrating easter with your little ones?

M

diy baby bandanas.

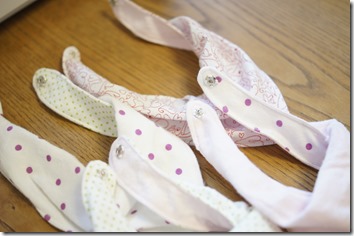
as many of you, with & without babies, know – babies drool & spit up. a lot. from a pretty early age kiddos are drooling for a variety of reasons, but what mamas notice is that onesies & shirts get really wet & it isn’t practical to change baby’s clothes multiple times a day for drool. some bibs do the trick, but at least for eloise, they are so large that its looks obnoxious & is just way too much fabric. luckily, I wasn’t the only one who thought a bandana would be the perfect solution & I was able to find lots of patterns & tutorials on pinterest.

IMG_1056

{via White & Bright blog}

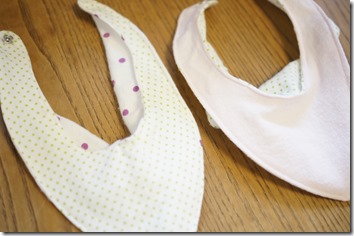
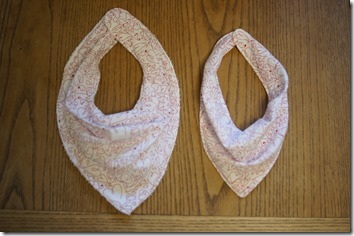
I ended up liking the look of the bandanas from the tutorial linked above, but the first set based on the original pattern were pretty big. for the next round I shrunk the entire pattern by an inch & think it’s a better size for eloise right now. {the finished sizes: original – 10” L & 7” W; shrunken – 9” L & 5.5” W}
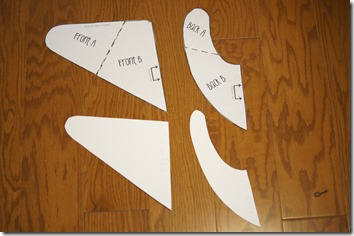
_DSC5740

{the original pattern on top & the shrunken pattern below}

supplies:

  • fabric – I used flannel, cotton, & terry cloth {you don’t need much more than a Fat Quarter!}
  • thread
  • fabric scissors {I have one set of scissors I only use for fabric & it makes a huge difference!}
  • pattern {see my smaller version here}
  • pins
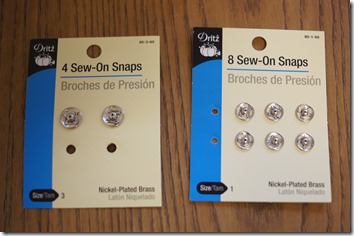
  • fasteners {I used sew-on snaps}

first wash & dry {& iron if needed} your fabric, especially if you are using two different types of fabric for one bandana {like I used terry cloth on the back with cotton or flannel on the front}.
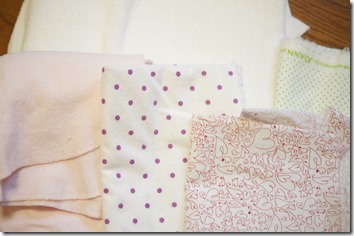
_DSC5741

then cut out your front & back pieces based on the pattern.

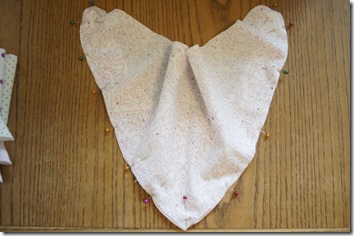
next pin your front & back pieces together. if there is a “right” side to the fabric, make sure it is facing in. I found the pinning to be the trickiest part since the two pieces aren’t identical. I started down at the bottom tip of the bib & moved up the sides. _DSC5742_DSC5743
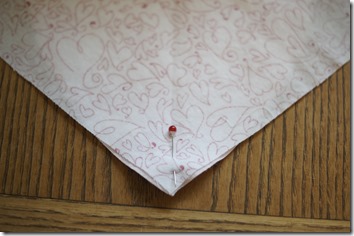
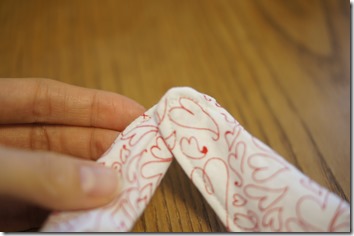
then I pinned the middle of the top of the bandana, and then pleated {two or three} the fabric. my advice is to just use lots of pins!
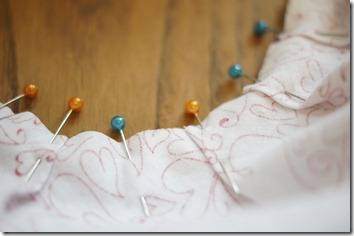
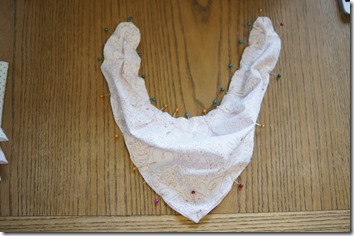
_DSC5745_DSC5746

sew around the edges of the bandana leaving a couple of inches to turn it right-side-out. once it is right-side-out you can press the seams {this is optional but it helps with the next step}. then top stich around the entire bandana.
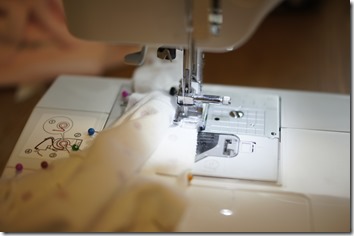
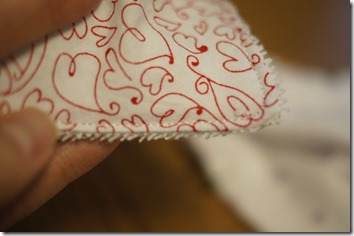
_DSC5747_DSC5749

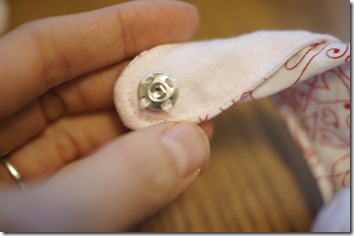
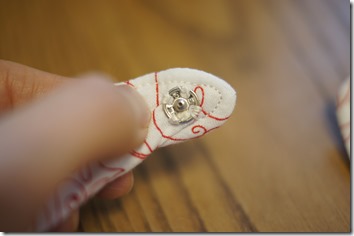
last add the snaps {or fasteners of your choice}. if you do use the sew-on kind, make sure you have the snaps facing in the right direction before you sew them on: the bottom snap piece will be on the top of the bandana end & the top snap piece will be on the bottom of the bandana end {see picture}. optional: you could also add another snap piece to make the bandana adjustable.
_DSC5751_DSC5752_DSC5753_DSC5754

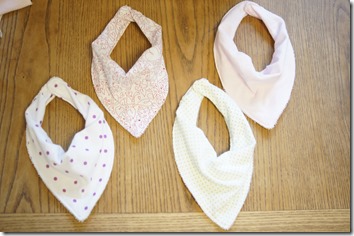
& you are done! fasten it on that little babe of yours & admire your handy work!
_DSC5755_DSC5756_DSC5757_DSC5758

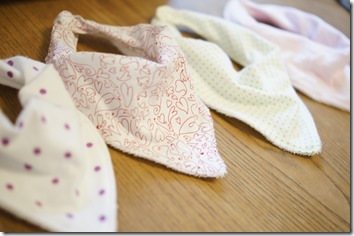
{it was fun to make all different bandanas. the bottom picture shows the fabric on the bottom side of the bib – a fun pop of pattern!}

these last pictures show the difference in the two bibs – the original versus the shrunken. the first picture of eloise is the shrunken version & the second is of her in the original.

_DSC5750_DSC5759_DSC5761

what have you been sewing lately?

M

a pinterest christmas: clothespin advent calendar.

Pinterest_Christmas_Logo

welcome to the final week of A Pinterest Christmas! see the first week’s post here, second week’s post here & the other years’ crafts here.

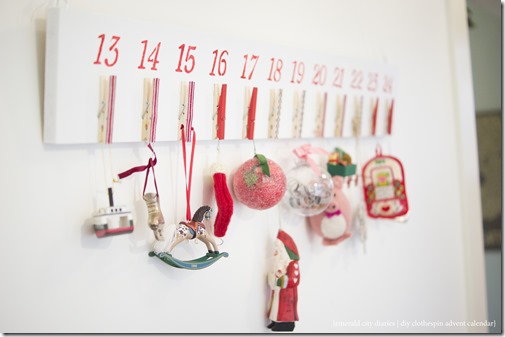
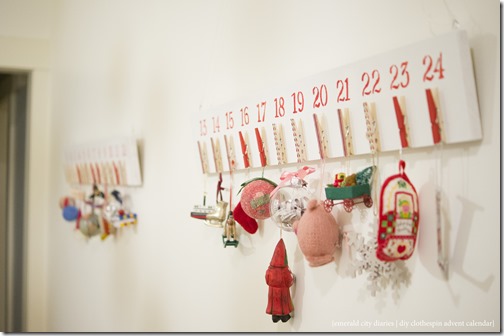
much like last year, i wanted to share my love of advent calendars by creating another one {you can never have too many, right?}. last year’s was focused on fun activities to celebrate the Christmas season, & this year’s focus is small gifts, or in my case, ornaments to hang on the tree each day.

in theory it would have been best to share this project during the first week {& it was my intention!} but painting the numbers took so much longer than i had anticipated. oh well, right? also, the original pin for this link wasn’t a tutorial, so i had to make things up as i went along.

DIY clothespin advent calendar

{original Pinterest link – candy cane advent calendar}

supplies:

  • wood board {i used a 1×6 Poplar board & had Home Depot cut it in half)
  • fine sandpaper
  • white paint {i used Behr primer & paint from this project}
  • paintbrushes & roller
  • 24 clothespins
  • number stencil {i used a Martha Stewart set i picked up from Michael’s with a coupon}
  • red craft paint {you could use any color, but i used red for some of the clothespins & the numbers}
  • sponge brush
  • wood glue (i used Contact Cement)
  • ribbon {i used two different kinds}
  • glue (i used Fabri-Tac)
  • picture hangers or d-rings

SONY DSC SONY DSCSONY DSCSONY DSCSONY DSCSONY DSC

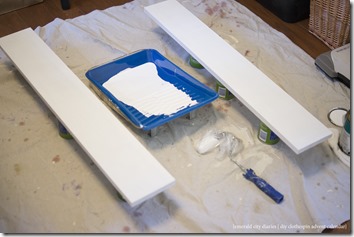
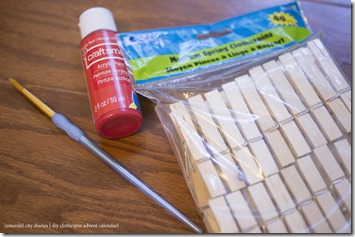
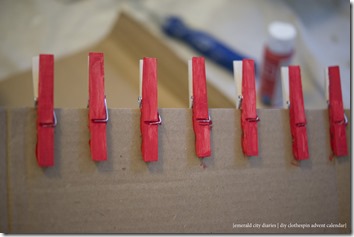
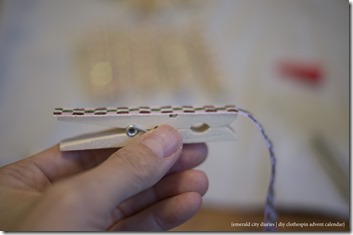
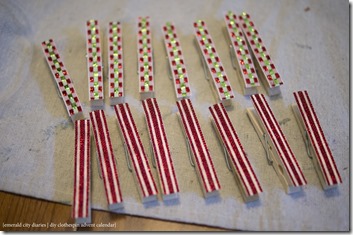
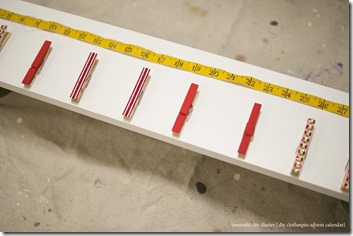
i started by prepping the boards – lightly sanding & rolling on three thin coats of white primer/paint. {note: i decided to do two boards instead of one long board for storage reasons.} then i prepped the clothespins: i painted about a third of them red & glued ribbon to the remaining pins. i found that clipping the pins onto a thick piece of cardboard made it much easier to paint; i also decided that i would just paint the top part of the pin & not the bottom. for the ribbon, i applied a thin coat of Fabri-Tac to the pin, laid a piece of ribbon down, & then cut the ribbon {as opposed to measuring & cutting all of the lengths of ribbon first & then trying to glue them on exactly right}. i laid the pins down on each board {12 per} & tried to get them as equally spaced as possible. then i glued each pin in place on the board.

SONY DSCSONY DSC

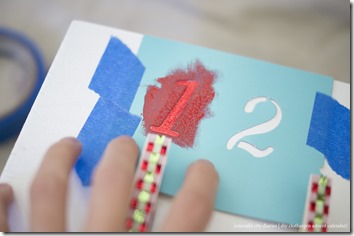
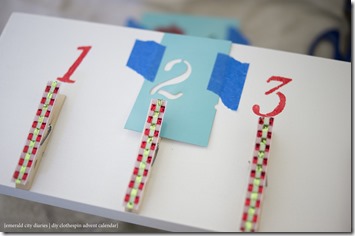
once the pins were adhered, it was time to stencil the numbers. it probably would have been easier to stencil before adding the pins so that the stencil could lay completely flat {or i should have just cut the bottom of the stencil!} but i thought it would be easiest for spacing to put the pins exactly where i wanted them & then add the numbers above. the first few numbers went really well with the stencil since the cardboard on the stencil was still fresh & not full of paint. i did every other number to begin with in order to make sure i had enough room to tape the stencil down without disturbing a previously painted number. it got trickier once i got into the teens & twenties since i needed the 1 & 2 stencil for each of those numbers – this is where the project really slowed down since i had to wait for the paint to dry on both the board & the stencil. in hindsight, i may have bought a plastic stencil instead that you could wipe the excess paint off of between numbers. i only did one coat of paint for each number {so there is a sponge-paint quality to the numbers}, but did also go in with a small paintbrush to touch up the edges where the stencil bled.

SONY DSC  SONY DSC SONY DSC     

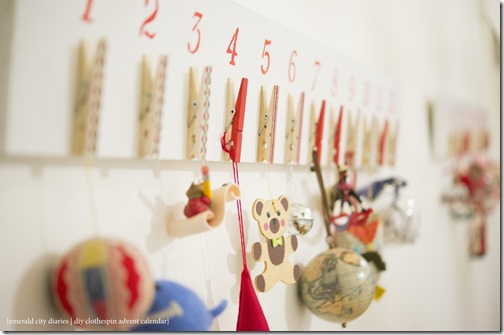
what i love about this calendar is that it can be different each year. one year it could hold little gifts for every day & another year it could hold handwritten cards about the reasons why we love the Christmas season! this year i thought it would be fun to leave 24 ornaments off of the tree & then add a new one each day until Christmas. one day in a few years i know eloise will love the tradition of this advent calendar!

For more projects and inspiration, check out the other blogs in the A Pinterest Christmas series [Emerald City Diaries | Greg & MaggiThe Gilbertson Family | The Pena Family | This Grey House | Without A Doubt]. Share your Pinterest Christmas projects with us! Comment on one of our blogs, link back to a post, or use #PinterestChristmas2014 on Instagram!

M

a pinterest christmas: eloise’s first ornaments.

Pinterest_Christmas_Logo_thumb[8][8]

welcome to the second week of A Pinterest Christmas! see the first week’s post here & the other years’ crafts here.

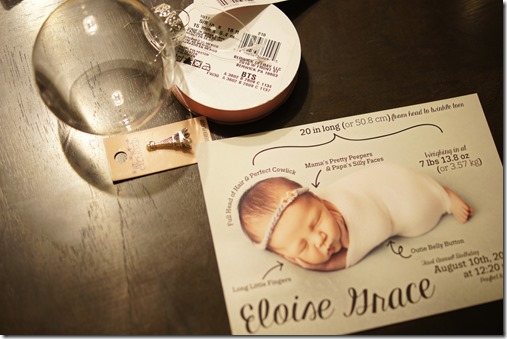
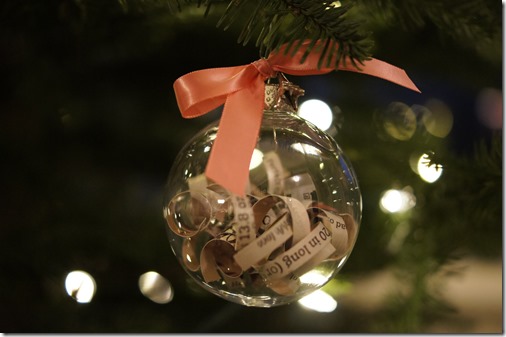
in celebration of a baby’s first Christmas there are always lots of ornaments to choose from. aaron & i have our own bets on how many Eloise may get this year, but i thought i would also add to the mix by making two of my own. one is with her birth announcement & the other with her footprint.

keepsake ornament

{original Pinterest link – wedding invitation ornament}

supplies:

  • clear plastic ornament (or you could use glass)
  • invitation or announcement
  • paper cutter or scissors
  • ruler
  • ribbon
  • charm
  • pencil

i made a version of this ornament for my first Pinterest Christmas project with our wedding invitation so i pretty much knew what i was doing.

_DSC5298 _DSC5299

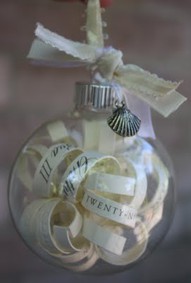
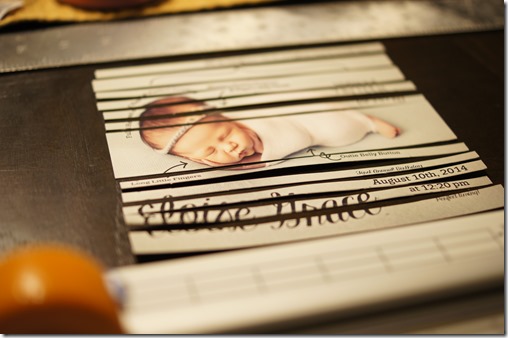
first, i decided which parts of Eloise’s announcement i wanted to use – i focused on her stats. then i measured & marked a 1/4 inch section around each part i wanted to include in the paper strips. i used a paper cutter & scissors to make the paper strips & wrapped the strips around a pencil to curl. once i had all of the strips cut & curled, i took off the top of the ornament & placed them inside. then i cut a length of ribbon, strung on the Eiffel Tower charm, & tied it in a bow on the top of the ornament.

_DSC5300    _DSC5384

footprint ornament

DIY baby's first Christmas ornament

{original Pinterest link – handprint ornament}

supplies:

  • clear plastic ornament (or you could use glass)
  • craft paint
  • ribbon
  • sponge paintbrush
  • ribbon – wired ribbon makes the best bows!

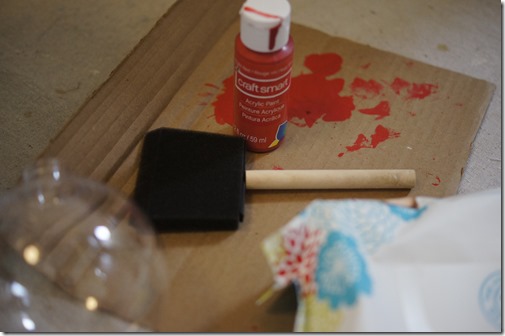
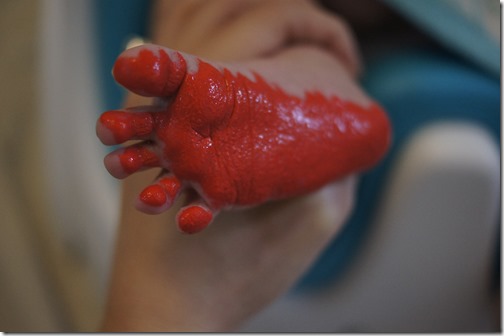
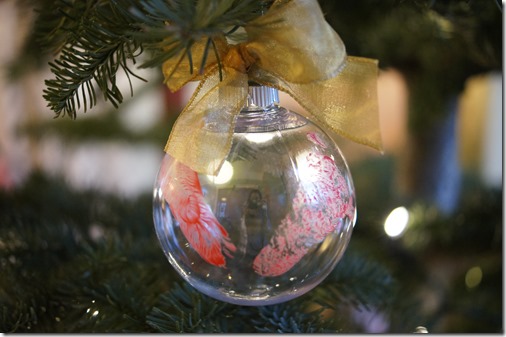
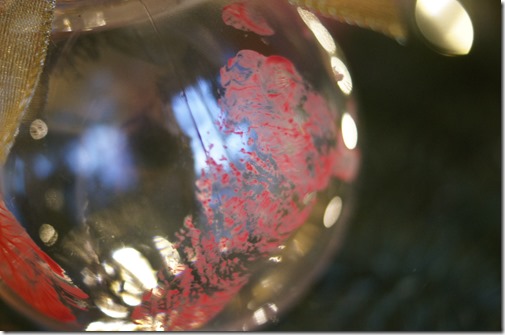
i modified this project in a few ways: i chose to do Eloise’s footprint instead of her hand (mostly because a footprint is so much easier!), & i used craft paint instead of embossing. the result wasn’t exactly what i was hoping since the footprints didn’t turn out that well. none-the-less, it is still a good representation of her feet on her first Christmas {which was the point, right?} & i have been doing ink prints of her footprints every month, so it isn’t like i won’t have her footprints in another form.

this was a really simple project. i sponged paint onto the bottoms of Eloise’s feet & then pressed them onto the plastic ornament. then i tied on a bow.

_DSC5386

_DSC5387

_DSC5389 _DSC5398

_DSC5400 

For more projects and inspiration, check out the other blogs in the Pinterest Christmas series [Emerald City Diaries | Greg & MaggiThe Gilbertson Family | The Pena Family | This Grey House | Without A Doubt]. Share your Pinterest Christmas projects with us! Comment on one of our blogs, link back to a post, or use #PinterestChristmas2014 on Instagram!

M

a pinterest christmas: family christmas stocking.

Pinterest_Christmas_Logo_thumb[8]

welcome to the first week of A Pinterest Christmas! i started this series as a fun way to share the Pinterest-inspired projects & crafts that i created for Christmas – my very favorite season of the year! check out the other years’ crafts here.

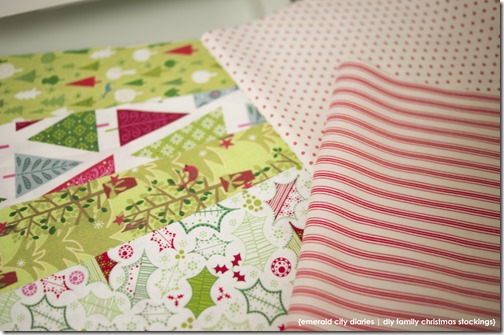
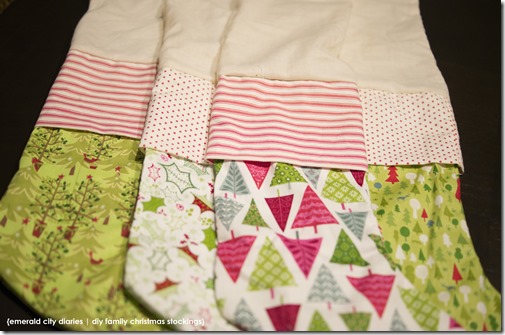
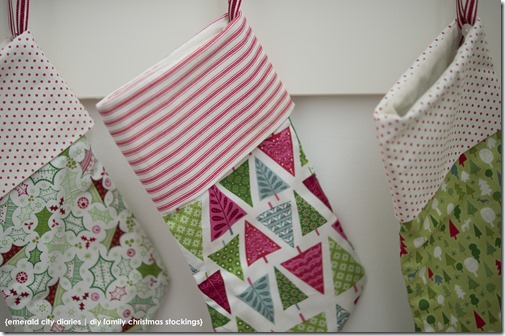
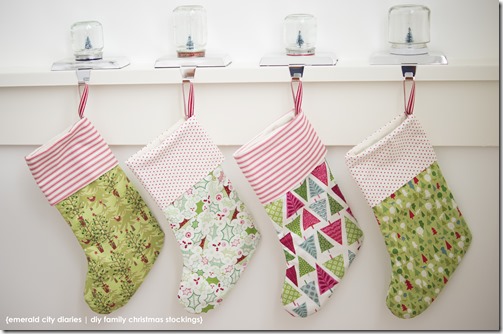
the year i started A Pinterest Christmas, i attempted to make stockings for our family at the time: me, Aaron, & Sadie. Sadie’s stocking turned out really well, but ours, not so much. ever since then i have been wanting to make us a new set of Christmas stockings. when Eloise joined our family this year i knew it would be the perfect opportunity! [& i went ahead & made four knowing that we would likely have another child at some point – no i am not pregnant! – & then i wouldn’t have to make a third set at that point!]

i followed two Pinterest pins – one for the stockings & linings & the other for the hangers.

Lined Stocking Tutorial.

{original Pinterest link – lined Christmas stockings}

Sew Scrumptious:One fat quarter of main fabric (patterned) One fat quarter of lining fabric (plain white fabric is fine) A small amount of contrasting fabric for Stocking Cuff A small amount of ribbon A button

{original Pinterest link – Christmas stocking hanger}

supplies:

  • Christmas-themed fat quarters
  • thread – i used white for the entire project
  • lining fabric – i used this fabric from our Christmas tree skirt project
  • ribbon
  • buttons
  • scissors
  • stocking pattern – i used a free one here
  • needle

SONY DSC

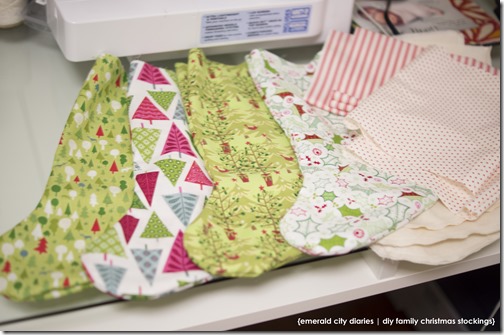
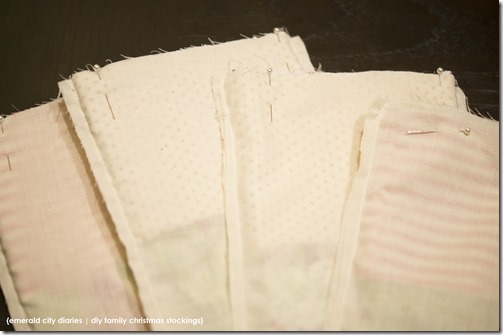
i started by ironing all of my fabric {nope, i didn’t pre-wash it – worst seamstress ever!} & cut out the stocking pattern – two stocking sides, 2 lining sides, & one cuff. i learned the hard way that you have to flip the pattern to make the cut out stocking side, or else you will have the back of the fabric on the backside of the stocking…

SONY DSC

SONY DSC

next i sewed all of the pieces. i made the cuff from a single piece of fabric – sewing one seam, flipping the fabric right-side-out, & then folding the fabric in half (as shown in the linked instructions). for the linings, i sewed around with a 1/2 inch seam, leaving a few inches on the long side of the stocking to flip everything right-side-out later on. for the stockings, i sewed the two pieces right sides together with a 1/2 inch seam & then flipped them right-side-out.

SONY DSC

SONY DSC

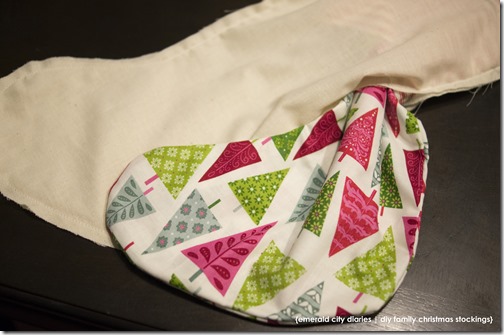
then i attached all the pieces. first, i sewed the cuffs to the stocking bodies, and then stuffed each stocking into the lining & attached. if you leave a small hole in the seam of the lining – just a few inches – then you can flip the entire stocking inside out & have a nicely finished stocking with a lining & no raw edges.

SONY DSC

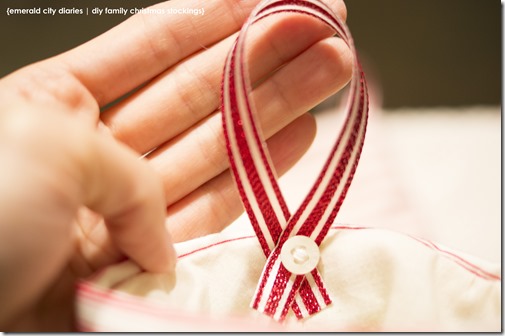
i then switched tutorials for the stocking hangers. i liked the look of a real cuff, & a ribbon hanger with a button so i combined the tutorials for the perfect stockings! i was able to round up four white buttons from my button box & use some Christmas-y ribbon that i picked up for another project (which you will see next week!). the nice part about adding a real cuff is that i could attach the ribbon & button, & hide the stitches underneath the cuff. SONY DSC

SONY DSC

SONY DSC

SONY DSC


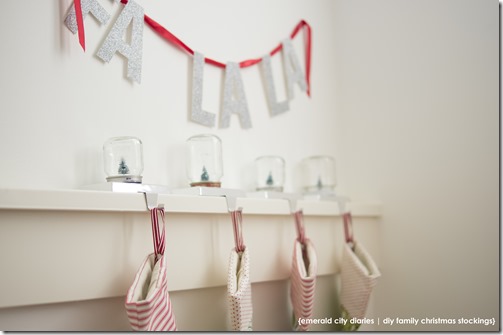
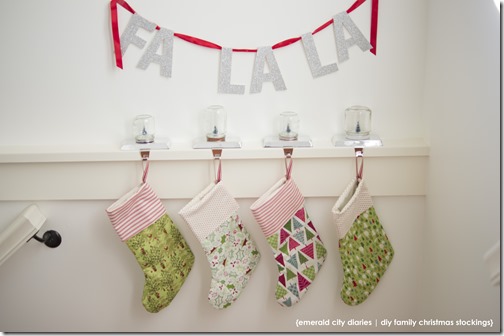
{also Fa La La sign & mason jar snowglobes}

For more projects and inspiration, check out the other blogs in the A Pinterest Christmas series [Emerald City Diaries | Greg & MaggiThe Gilbertson Family | The Pena Family | This Grey House | Without A Doubt]. Share your Pinterest Christmas projects with us! Comment on one of our blogs, link back to a post, or use #PinterestChristmas2014 on Instagram!

M

a pinterest christmas {2014}

Pinterest_Christmas_Logo

I am so excited to be co-hosting my fourth annual* Pinterest Christmas blog series happening in December! Each week the hosts will be sharing Pinterest-inspired projects related to the holiday season. The projects could be anything from decorations and crafts to traditions and recipes. Each of us will be sharing our projects in the weeks leading up to Christmas. We would love for you to join in on the fun. Plan your projects, post them, link back to one of our posts, and leave us a comment! Not a blogger? No problem, we’d love to see your projects on Instagram! Use the hashtag #PinterestChristmas2014

The hosts:

[Emerald City Diaries | Greg & MaggiThe Gilbertson Family | The Pena Family | This Grey House | Without A Doubt]

Need some inspiration? Check out the posts from the previous three years here.

Happy crafting!

M

*I originally started this series in 2011 & recruited others to join me over the past few years!

project baby {diy mid-century dresser update}

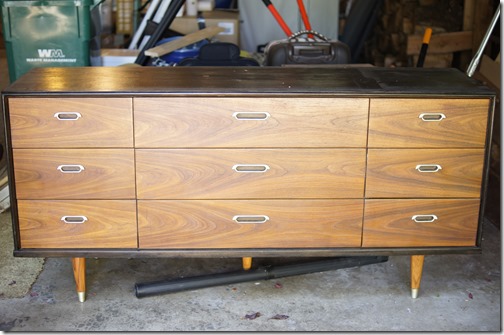
when I was planning & sourcing furniture for eloise’s nursery, I knew that I wanted to get a low-boy dresser that could not only double as a changing table, but also be used as eloise grows up. I scoured craigslist for weeks in search of a mid-century dresser that was in good shape, but reasonably priced. finally I found one & we drove down south to tacoma to pick it up. the dresser sat around for weeks until I finally had time to paint it & get it ready for the nursery (I was 38 weeks along at that point!). while this was a simple & straight-forward project, I loosely followed this young house love post.

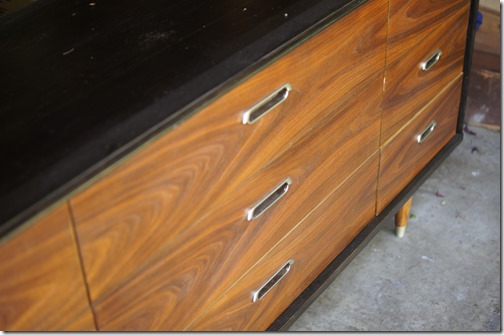
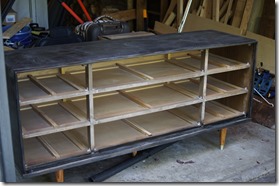
in its original state, the top & sides were super dark, almost black. the gentleman we bought it from told us that his sister had just refinished the dresser with this darker color. definitely not my favorite, but I loved the rest of the piece & knew that was an easy fix!

_DSC4545_DSC4547

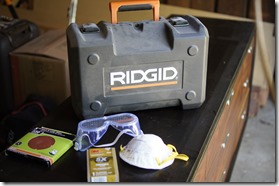
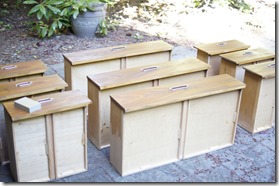
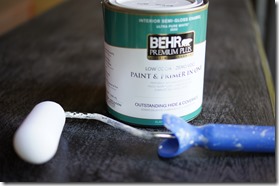
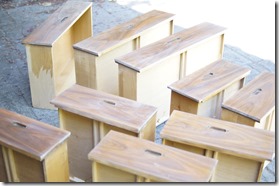
I started by taking out all of the drawers & sanding everything down. I used a palm sander for the main part of the dresser & hand sanded the drawer fronts with a block sander. then I wiped all the dust down & started painting the main dresser & removed the handles from the drawer fronts. I used this Behr Paint & Primer to save myself a separate priming step.

_DSC4544._DSC4548_DSC4549_DSC4551

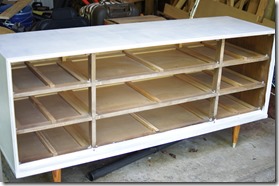
it ended up taking three thin coats of white to cover the dark wood & get the white color that I wanted. I rolled most of the coats, but used a brush for the smaller details along the front of the dresser.

_DSC4552_DSC4553

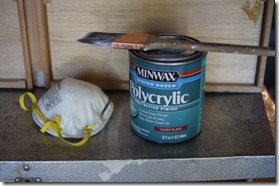
after the white paint was dry, I brushed on two coats of a polycrylic coat with a small brush. I also did two coats of poly on the drawer fronts.

_DSC4554

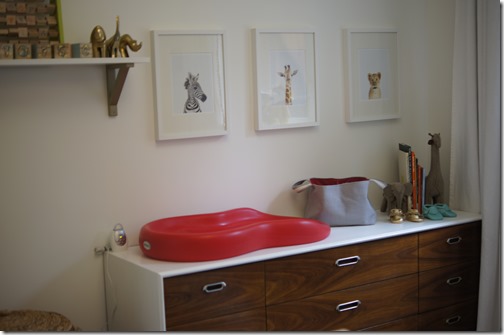
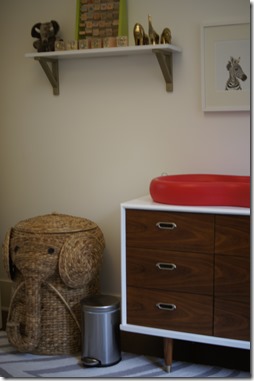
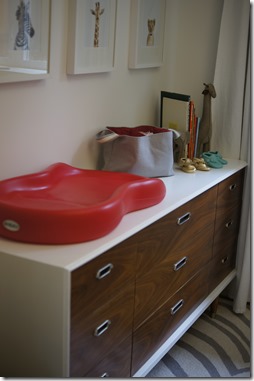
& here is the final product (again – you already would have seen these in the nursery reveal!). I am really, really happy with how this dresser turned out. it is such a great & timeless piece & is exactly the warmth I was looking for for this space. I also know that this will be such a great piece for eloise for years to come.

_DSC4984_DSC4996_DSC4977_DSC4994

have you refinished a craigslist find recently?

M
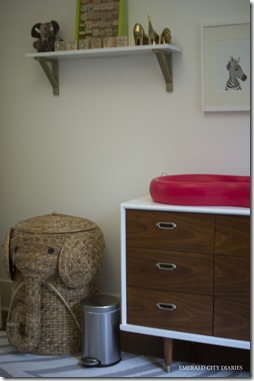
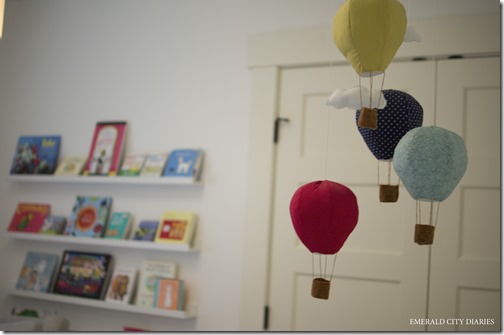
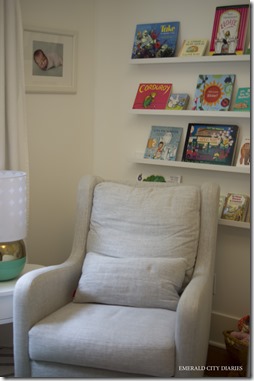
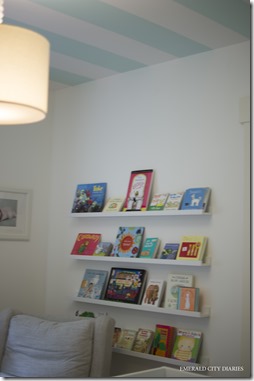
eloise {nursery reveal}

yay, eloise’s nursery is finally ready for its big reveal! last spring I shared the moodboard I created & looking back on it, it was pretty darn on point!

when I first envisioned this space, I knew that it was a room that I needed to love. new mamas & papas spend so, so much time in the nursery & it is important that they feel comfy in the space. the two requirements for me were: calming & sophisticated (in that it didn’t feel like a pre-school). plus, let’s be honest, nurseries – like first birthday parties – are much more for the parents than the babies.

I was a bit nervous about how this space would come together since I did so in bits & pieces, & really didn’t get everything together until the week before eloise was born (due to our on-going house remodel). I had to trust my instincts on what I thought would work & wouldn’t work, & I am so thrilled about how eloise’s nursery came together!

& what you have all been waiting for. enjoy!

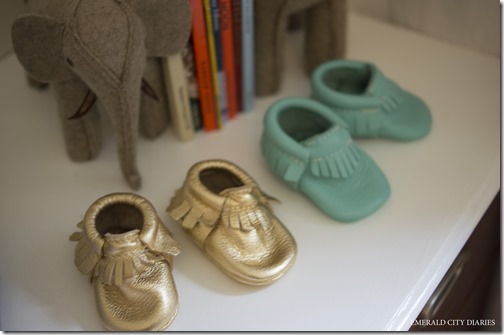
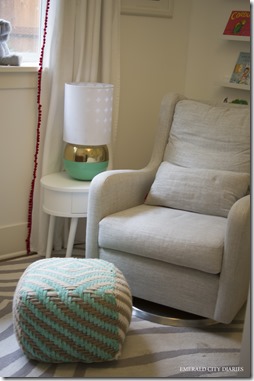
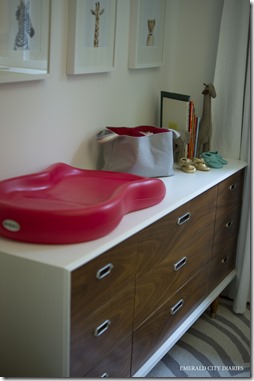
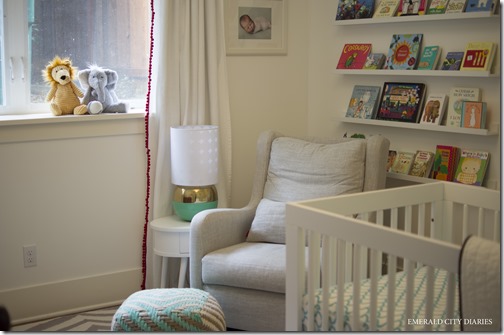
SONY DSCSONY DSCSONY DSCSONY DSCSONY DSCSONY DSCSONY DSCSONY DSCSONY DSCSONY DSCSONY DSCSONY DSCSONY DSCSONY DSCSONY DSCSONY DSC

source list:

rug: west elm safari

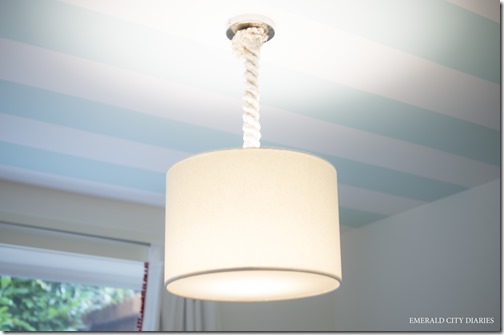
light fixture: west elm braided rope pendant

crib: babyletto hudson

crib sheet: american baby

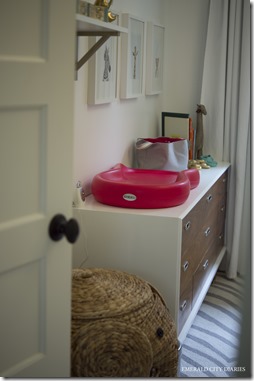
dresser: craigslist

glider: land of nod milo

ottoman: anthropologie (old)

table: overstock blake nightstand

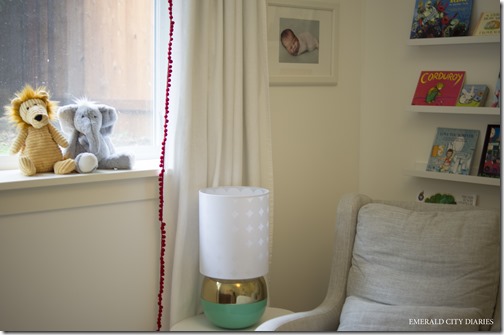
lamp: oh joy for land of nod

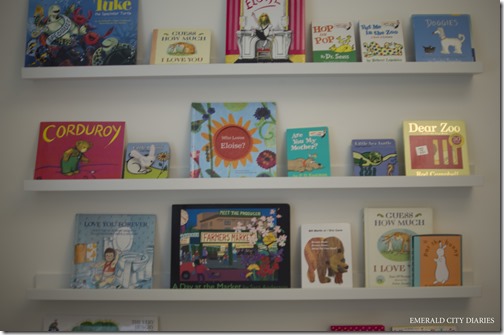
picture ledges: ikea ribba

baby animal prints: the animal print shop little darlings (zebra // giraffe // lion)

picture frames: ikea ribba

changing pad: keekaroo

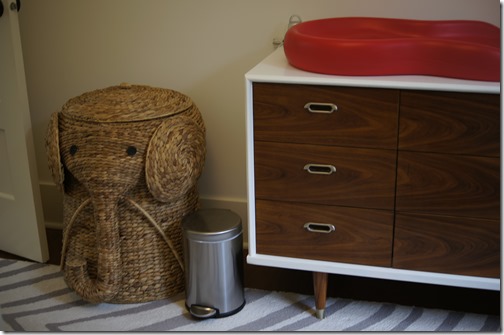
diaper basket: handmade by amanda

bookends: restoration hardware baby & child (elephant // giraffe)

curtains: ikea lenda with added pom trim

shelf: ikea ekby (brackets painted gold)

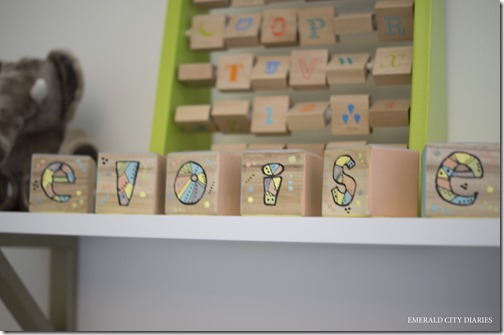
eloise blocks: handmade by e’s grammie

gold figurines: target (old)

abacus: land of nod

elephant hamper: home decorator’s collection

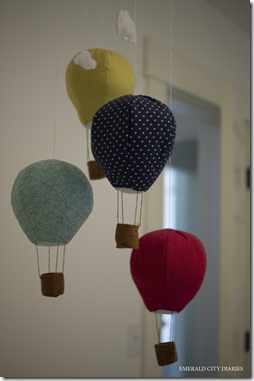
mobile: diy

moccasins: freshly picked (gold // turquoise)

paint colors: simply white by benjamin moore (walls & ceiling) & quartz stone by benjamin moore (ceiling)


if you have decorated a nursery for your little, what were your favorite design choices?

M
my {long holiday} weekend in pictures.

IMG_4981

{me & the bump celebrating the 4th of july.}

IMG_4982

{the land of nod store is under construction & has a pretty fun entryway right now.}

IMG_4985

{sadie’s new dog door at the house. pics to come later in the week of the rest of the house!}

IMG_4986

{we attended a very patriotic party to celebrate america’s birthday.}

IMG_4987

{the annual 4th of july parade in our neighborhood. such a treat!}

IMG_4988

{we stopped by to see andy & hailey, & sadie loved sleeping in the grass lake-side.}

IMG_4989

{sadie insisted on sitting right in between us during a small fireworks show. she didn’t last long before she wanted to be inside away from the noise. poor kid.}

IMG_4990

{we went to ikea to pick up a few things for the house. #nesting}

IMG_4991

{& amazingly it all fit in our car! sadie & I shared a seat in the back, but it worked. thank goodness we have a hatchback!}

IMG_4994

{I finally found some time to finish up a sewing project for baby lower that I started some time ago. hope to share pics soon.}

IMG_4998

{due to the many residual fireworks over the weekend, sadie got to sleep in bed with us. she hated it, obviously.}

what an awesome weekend. can every weekend be a three-day weekend, seriously? we got to sleep in, see lots of friends & family, & check some things off the ole’ to-do list – doesn’t get much better than that. we were a bit disappointed in the weather this weekend {rain when it wasn’t actually forecasted} but it is definitely feeling like summer here in the emerald city. I am still in shock that we are already so far into july – slow down summer!

how was your weekend?

M
my weekend in pictures.

IMG_4927

{cutting fabric is not my forte, but it needed to be done for an upcoming sewing project for baby lower.}

IMG_4928

{aaron & I spent most of the day saturday sourcing finishes for the house – wood floors, tile, paint, light fixtures.}

IMG_4929

{a bubble tea was much-needed after making a million decisions!}

IMG_4931

{rainer cherries are in season & we have been enjoying. this was a double one – crazy!}

IMG_4932

{baby’s first set of wheels! one of the only things for baby lower that we have put together.}

IMG_4933

{oh trader joe’s. I went in for one thing & ended up with ingredients for strawberry shortcake!}

IMG_4934

{dim sum lunch with friends on sunday. so delish!}

IMG_4935

{choosing paint at benjamin moore.}

IMG_4936

{I usually don’t like the I love mommy/daddy/etc. kids’ stuff, but I couldn’t resist this to give to aaron for his first father’s day!}

we had a really busy weekend, but super productive. things are moving right along with the house & it is exciting to be finally picking finishes for everything, plus a lot of things got checked of the big to-do list which is always a great feeling!

we were really low-key about celebrating father’s day today since it really doesn’t seem like we are parents. it is crazy to think about one year from now though & how we will be parents to an almost one year old!

happy father’s day to aaron, my dad, aaron’s dad, aaron’s grandfather, & all of the other dads out there. thanks for everything that you have done for us!

how was your weekend?

M