Pinterest Christmas: Toddler Fingerprint Tree Cards {Linky Party}.

Welcome to week one of the Pinterest Christmas series for 2015! I am SO excited to share my projects with you this month!

SONY DSC

First up is a {pretty} simple project I did with Eloise. I like to include her in cards I send out, like her feet in the shape of a heart for Valentine’s Day last year, or her footprint on her birthday thank you notes. This was the first time we used paint on her fingers, & I am glad the paint was non-toxic…

Toddler Made Christmas Tree Cards:

{original Pinterest link – Toddler-Made Christmas Cards}

Supplies:

  • {white} cardstock – for the cards; I cut each one into quarters
  • Paint – I used acrylic craft paint in 5 colors
  • Sponges (optional) – I picked up some cheap ones at the grocery store
  • Green paper – for trees; I used one dark green & one light green sheet
  • Scissors
  • Glue stick
  • Marker – I used a fine point Sharpie which is my go-to!
  • Wet wipes – to clean up messy hands!

This project is pretty straightforward, albeit messy, & I would suggest doing it with your toddler right after mealtime, or when he or she is the happiest!

SONY DSC

SONY DSC

First, I cut out all of the trees. I started by cutting my green paper into three strips (they were 12 x 12 sheets) & then eye-balled a good triangle shape. Then I cut out all of the trees. {In hindsight, I should have waited to cut the triangles out & let Eloise paint these longer strips. There may not have been as many “ornaments” on each tree, but she is little enough I think this would have been a better route.}

Then I cut my white cardstock into quarters. I was originally going to do a 4×6 or a 5×7 card, but it seemed so wasteful!

SONY DSC

SONY DSC

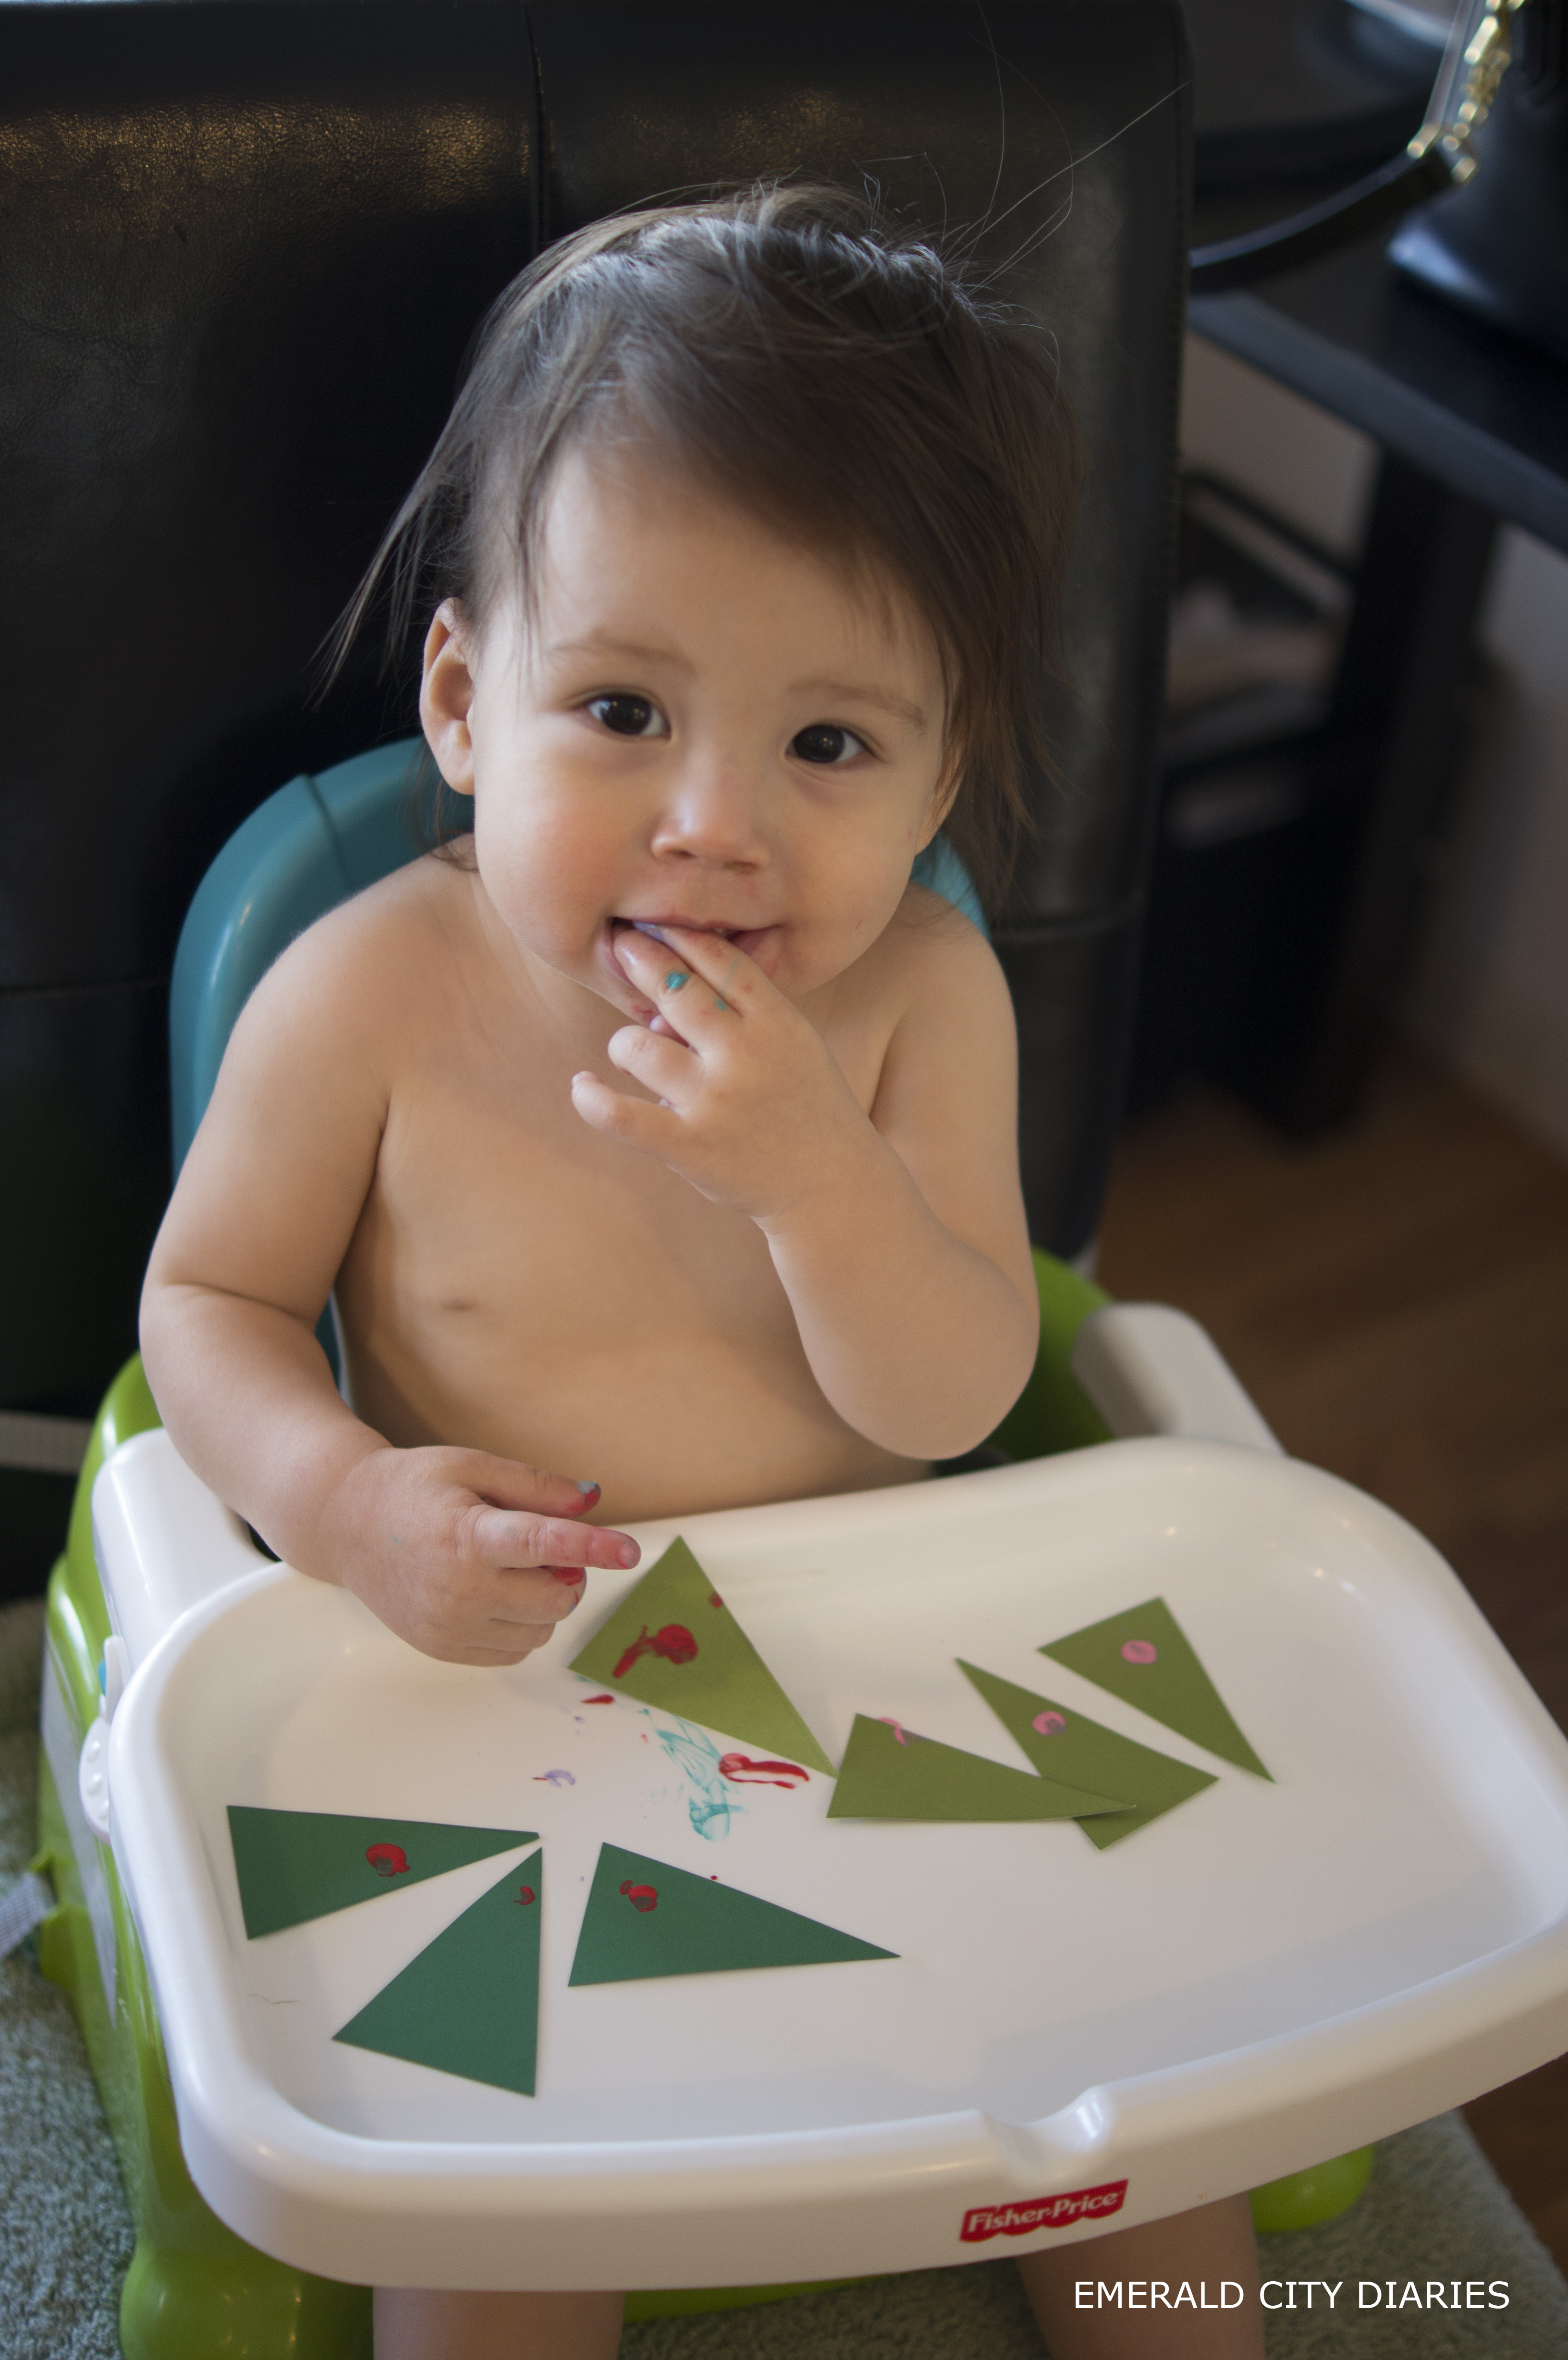
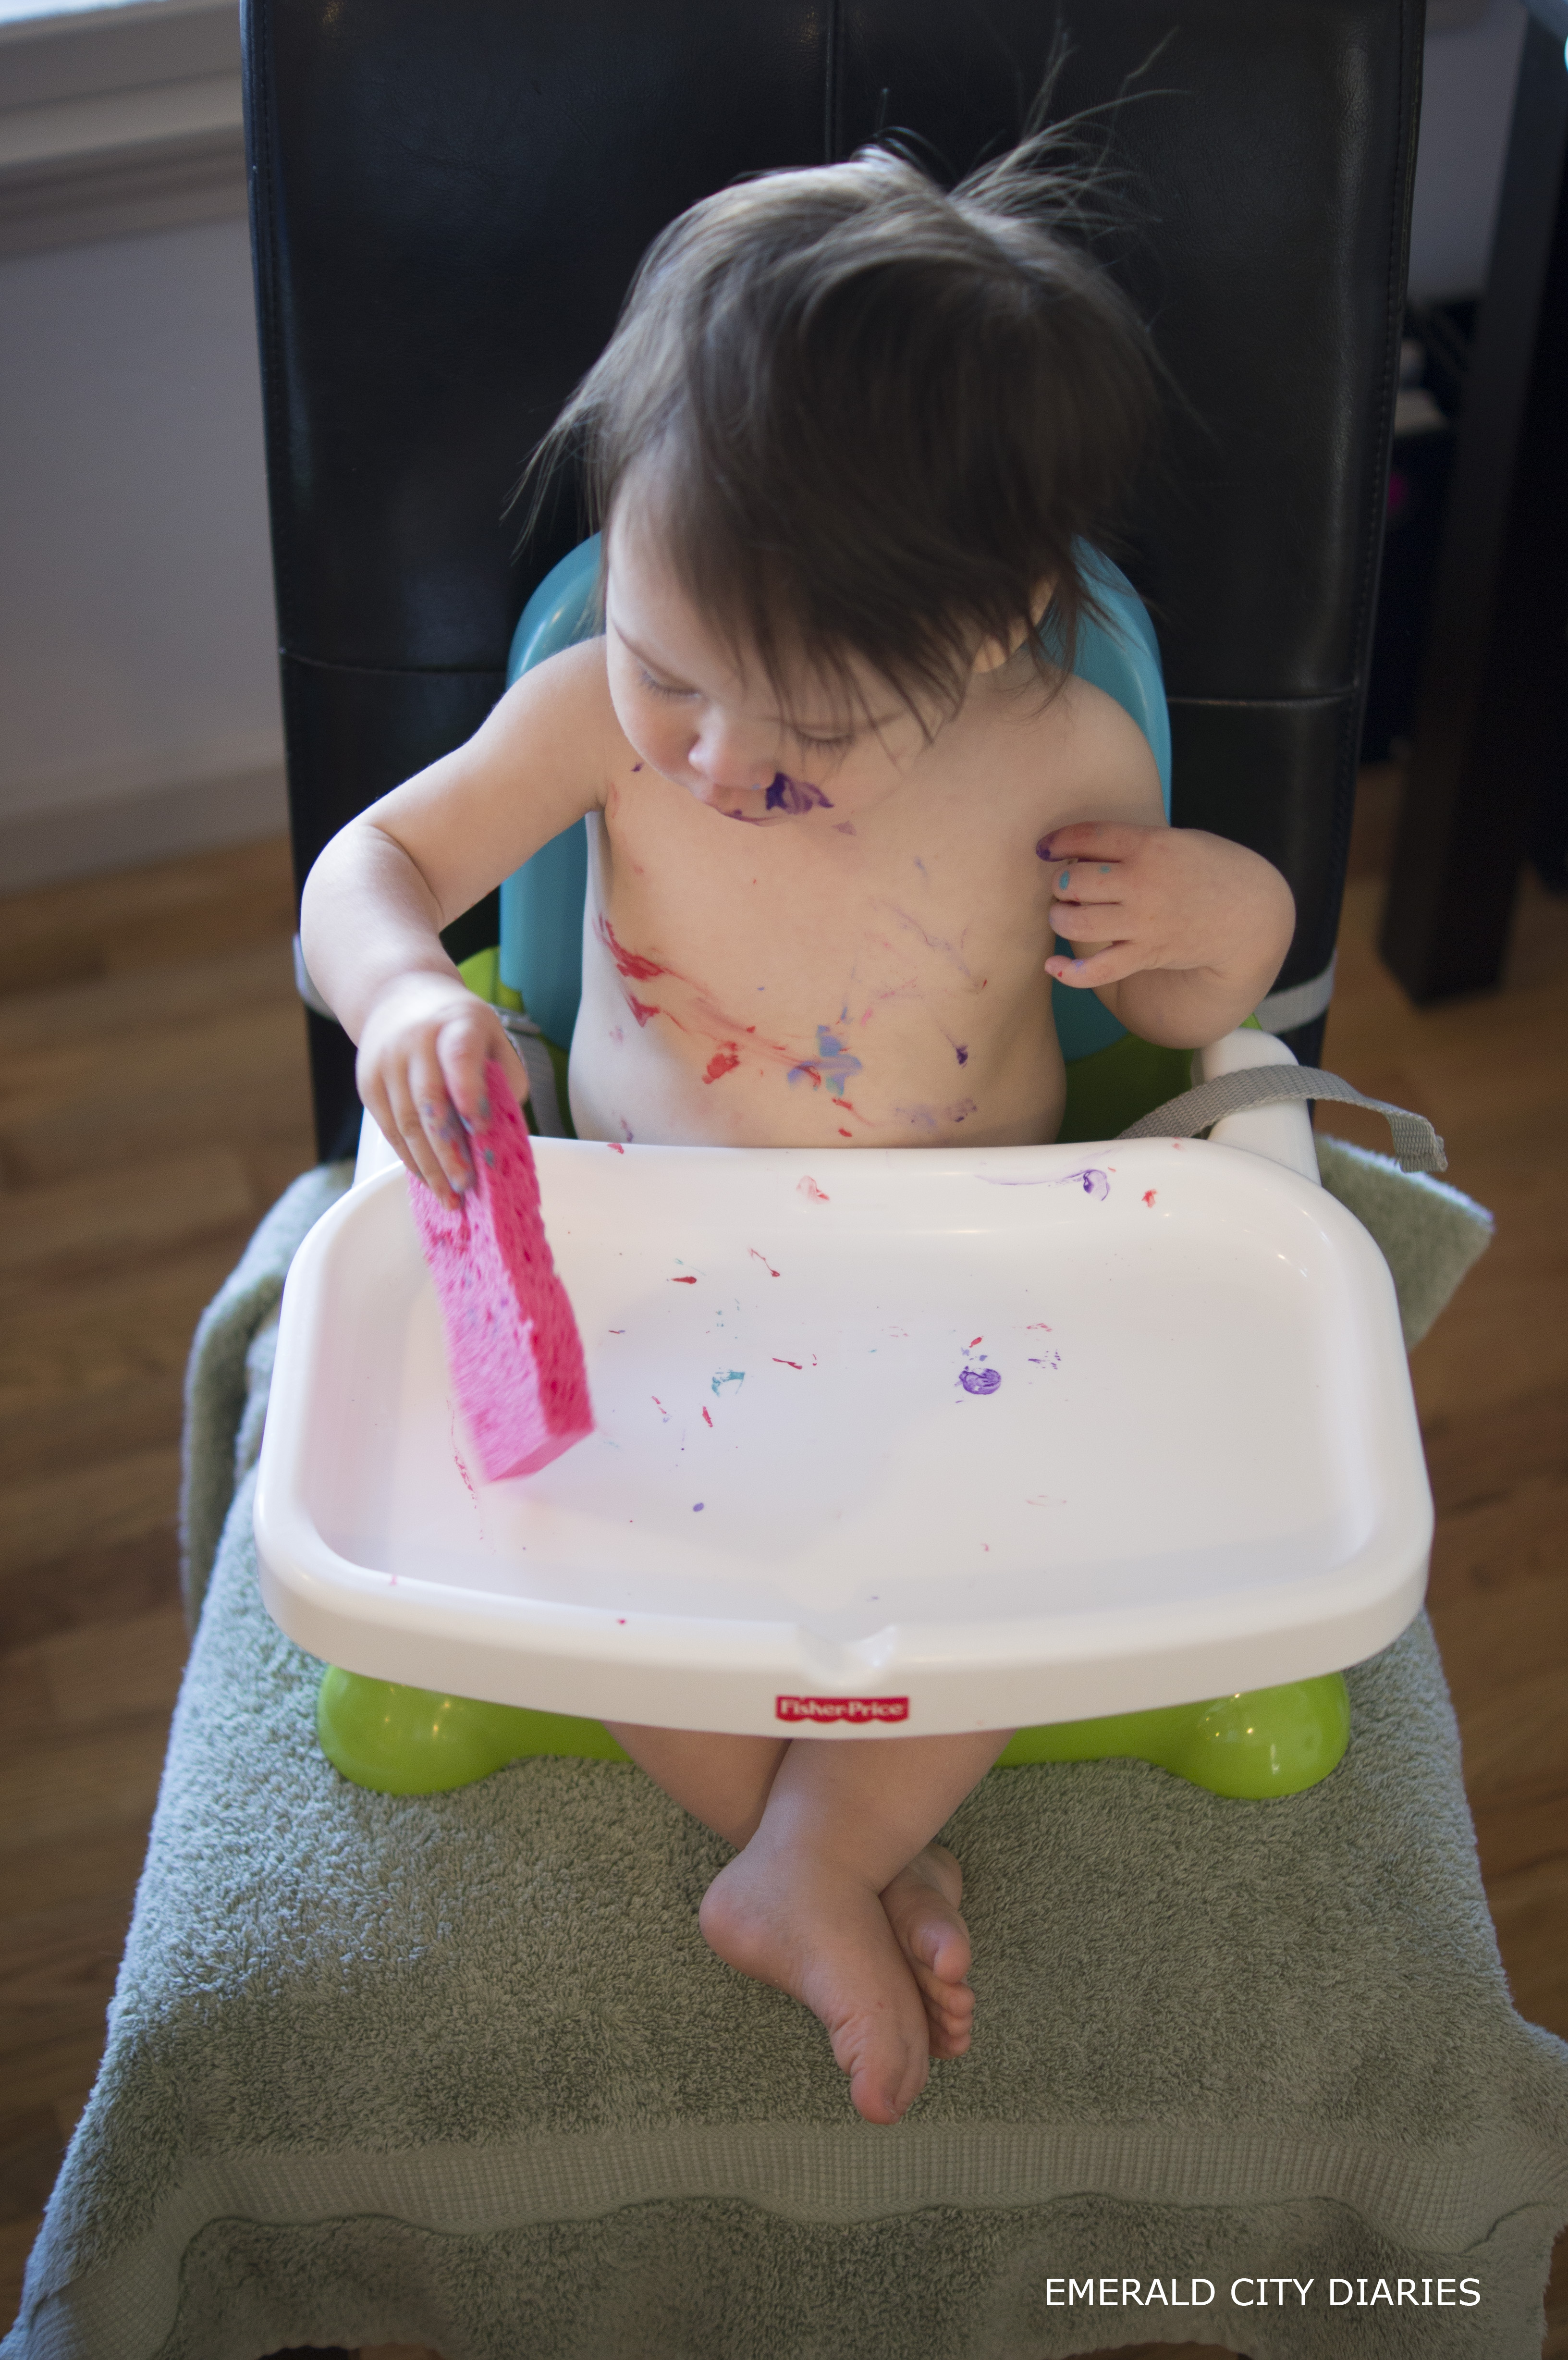
Next, I opted for painting. I squeezed a small blob of paint onto the sponge – three on one & two on the other. I let Eloise dip her pointer fingers into the paint (with some help) & then helped her press her fingers onto the trees. I tried to get about three or four prints on each tree. She was super interested in the sponge (so I gave her a clean one to play with in an attempt to keep paint from getting everywhere!) & also wanted to eat the paint. Big surprise. It was difficult for me to see her eat that paint (well, lick her fingers) because it definitely wasn’t organic, edible paint, but oh well!

SONY DSCSONY DSC

Because there was paint, well, everywhere, I placed each completed tree on newspaper to dry. Once dried, I glued three trees on each card, alternating the light & dark green trees. Finally I added “Love, Eloise 2015” on the bottom of each card.

SONY DSCSONY DSCSONY DSC

I saved one of the cards for our fridge (& it will ultimately go into Eloise’s baby box for safe keeping!) but the entire point of these cards was to include them with our holiday cards. We don’t have a lot of family that lives close by, so I think it is fun to send a little something special in the mail when we can!

Thinking about making this project? Feel free to leave questions in the comments or link your own in the Linky Party below! Also be sure to check out Kendra’s Pinterest Christmas projects over at The Gilbertson Family.

What are you DIY-ing for the holidays? Do you include your kiddos?

M
Pinterest_Christmas_Logo_Edit

Here are the instructions if you are a new to linky-party:
•click on the blue button at the bottom of this post – the one with the frog
•add a link to your Pinterest Christmas blog post in the URL field (please do not link to your home page but the specific post page)
•for “name” write a short descriptive name for your post
•if you would like to put the Pinterest Christmas button on the bottom of your post, we would love to see it there!

Pinterest Christmas 2015 {Join our Linky Party}.

The Pinterest Christmas blog series (in its fifth year!) started as a motivation to actually do some of the DIY projects we pinned on Pinterest & a way to share them with friends & family. Over the years other bloggers have joined & we have spent the month of December DIYing & sharing our Christmas projects. Sometimes the posts are tutorials with step-by-step instructions & other times it is simply sharing a completed project! You can check out past Pinterest Christmas projects here!

Pinterest_Christmas_Logo_Edit

This year we’d love you to join in on the fun of Pinterest Christmas! Kendra {from The Gilbertson Family} & I will be hosting a Linky Party set up for the entire month of December where you can share your own Pinterest-inspired projects & discover what bloggers are sharing too. And, we’d love to see the Pinterest Christmas graphic included in your posts!
Here is what you can do now to get started:
(1) Get on Pinterest & pin those holiday projects! (See our Pinterest Christmas board here)
(2) Get your craft on! If you want to do a tutorial, make sure to take pictures during each step.
(3) Write up your Pinterest Christmas blog post.
(4) Join in on our Linky Party! Click on the blue button below to add your blog link beginning December 1st! Feel free to add as many links as you’d like.
(5) Come back and see what other bloggers are creating.
(6) Tag your projects on FB, Twitter, Instagram with the tag #PinterestChristmas2015

Happy crafting!

M

a pinterest christmas: clothespin advent calendar.

Pinterest_Christmas_Logo

welcome to the final week of A Pinterest Christmas! see the first week’s post here, second week’s post here & the other years’ crafts here.

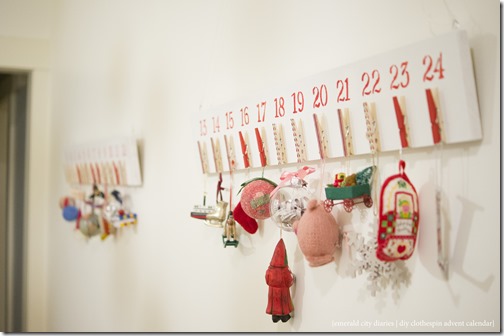
much like last year, i wanted to share my love of advent calendars by creating another one {you can never have too many, right?}. last year’s was focused on fun activities to celebrate the Christmas season, & this year’s focus is small gifts, or in my case, ornaments to hang on the tree each day.

in theory it would have been best to share this project during the first week {& it was my intention!} but painting the numbers took so much longer than i had anticipated. oh well, right? also, the original pin for this link wasn’t a tutorial, so i had to make things up as i went along.

DIY clothespin advent calendar

{original Pinterest link – candy cane advent calendar}

supplies:

  • wood board {i used a 1×6 Poplar board & had Home Depot cut it in half)
  • fine sandpaper
  • white paint {i used Behr primer & paint from this project}
  • paintbrushes & roller
  • 24 clothespins
  • number stencil {i used a Martha Stewart set i picked up from Michael’s with a coupon}
  • red craft paint {you could use any color, but i used red for some of the clothespins & the numbers}
  • sponge brush
  • wood glue (i used Contact Cement)
  • ribbon {i used two different kinds}
  • glue (i used Fabri-Tac)
  • picture hangers or d-rings

SONY DSC SONY DSCSONY DSCSONY DSCSONY DSCSONY DSC

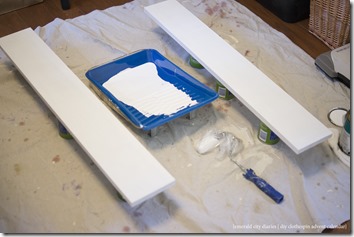
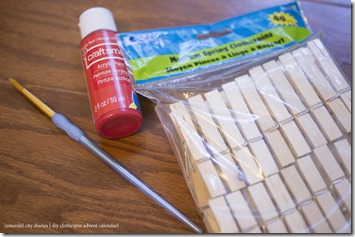
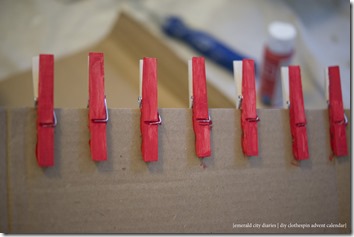
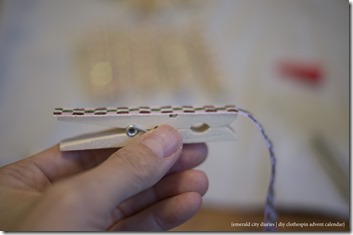
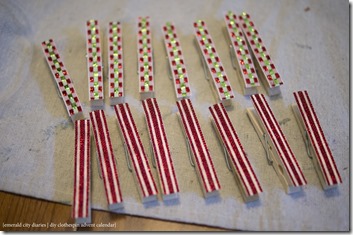
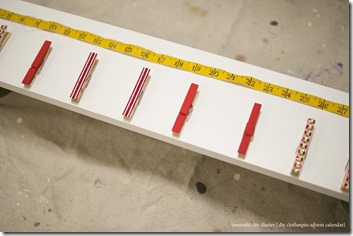
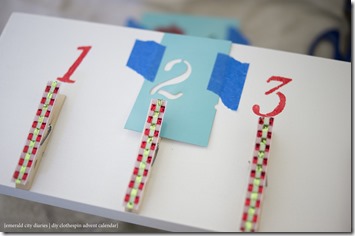
i started by prepping the boards – lightly sanding & rolling on three thin coats of white primer/paint. {note: i decided to do two boards instead of one long board for storage reasons.} then i prepped the clothespins: i painted about a third of them red & glued ribbon to the remaining pins. i found that clipping the pins onto a thick piece of cardboard made it much easier to paint; i also decided that i would just paint the top part of the pin & not the bottom. for the ribbon, i applied a thin coat of Fabri-Tac to the pin, laid a piece of ribbon down, & then cut the ribbon {as opposed to measuring & cutting all of the lengths of ribbon first & then trying to glue them on exactly right}. i laid the pins down on each board {12 per} & tried to get them as equally spaced as possible. then i glued each pin in place on the board.

SONY DSCSONY DSC

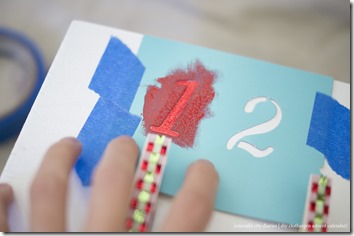
once the pins were adhered, it was time to stencil the numbers. it probably would have been easier to stencil before adding the pins so that the stencil could lay completely flat {or i should have just cut the bottom of the stencil!} but i thought it would be easiest for spacing to put the pins exactly where i wanted them & then add the numbers above. the first few numbers went really well with the stencil since the cardboard on the stencil was still fresh & not full of paint. i did every other number to begin with in order to make sure i had enough room to tape the stencil down without disturbing a previously painted number. it got trickier once i got into the teens & twenties since i needed the 1 & 2 stencil for each of those numbers – this is where the project really slowed down since i had to wait for the paint to dry on both the board & the stencil. in hindsight, i may have bought a plastic stencil instead that you could wipe the excess paint off of between numbers. i only did one coat of paint for each number {so there is a sponge-paint quality to the numbers}, but did also go in with a small paintbrush to touch up the edges where the stencil bled.

SONY DSC  SONY DSC SONY DSC     

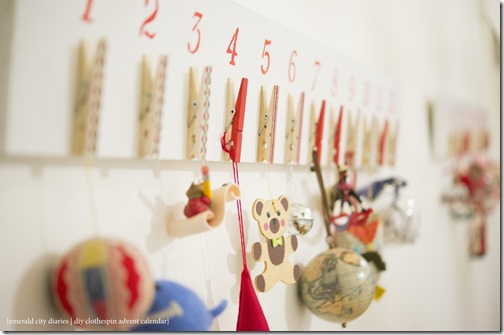
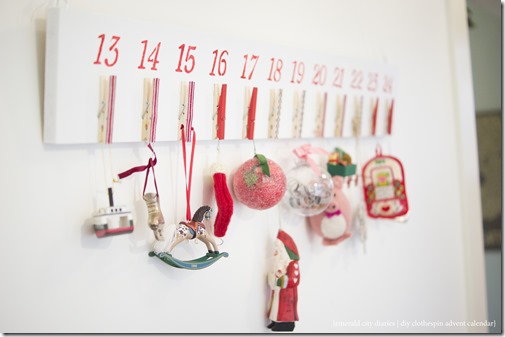
what i love about this calendar is that it can be different each year. one year it could hold little gifts for every day & another year it could hold handwritten cards about the reasons why we love the Christmas season! this year i thought it would be fun to leave 24 ornaments off of the tree & then add a new one each day until Christmas. one day in a few years i know eloise will love the tradition of this advent calendar!

For more projects and inspiration, check out the other blogs in the A Pinterest Christmas series [Emerald City Diaries | Greg & MaggiThe Gilbertson Family | The Pena Family | This Grey House | Without A Doubt]. Share your Pinterest Christmas projects with us! Comment on one of our blogs, link back to a post, or use #PinterestChristmas2014 on Instagram!

M

a pinterest christmas: eloise’s first ornaments.

Pinterest_Christmas_Logo_thumb[8][8]

welcome to the second week of A Pinterest Christmas! see the first week’s post here & the other years’ crafts here.

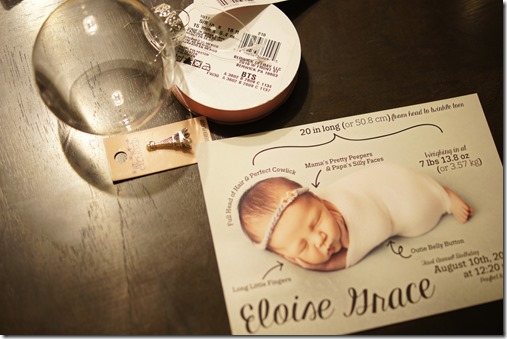
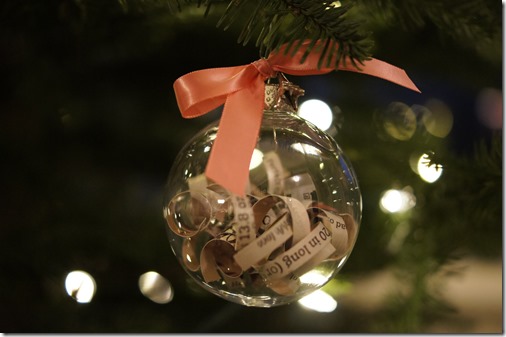
in celebration of a baby’s first Christmas there are always lots of ornaments to choose from. aaron & i have our own bets on how many Eloise may get this year, but i thought i would also add to the mix by making two of my own. one is with her birth announcement & the other with her footprint.

keepsake ornament

{original Pinterest link – wedding invitation ornament}

supplies:

  • clear plastic ornament (or you could use glass)
  • invitation or announcement
  • paper cutter or scissors
  • ruler
  • ribbon
  • charm
  • pencil

i made a version of this ornament for my first Pinterest Christmas project with our wedding invitation so i pretty much knew what i was doing.

_DSC5298 _DSC5299

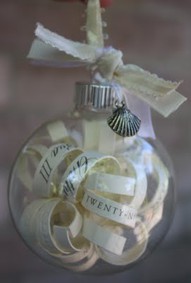
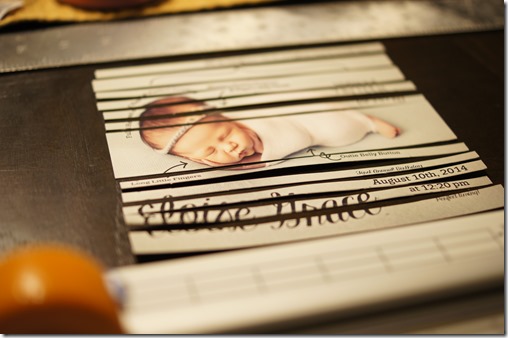
first, i decided which parts of Eloise’s announcement i wanted to use – i focused on her stats. then i measured & marked a 1/4 inch section around each part i wanted to include in the paper strips. i used a paper cutter & scissors to make the paper strips & wrapped the strips around a pencil to curl. once i had all of the strips cut & curled, i took off the top of the ornament & placed them inside. then i cut a length of ribbon, strung on the Eiffel Tower charm, & tied it in a bow on the top of the ornament.

_DSC5300    _DSC5384

footprint ornament

DIY baby's first Christmas ornament

{original Pinterest link – handprint ornament}

supplies:

  • clear plastic ornament (or you could use glass)
  • craft paint
  • ribbon
  • sponge paintbrush
  • ribbon – wired ribbon makes the best bows!

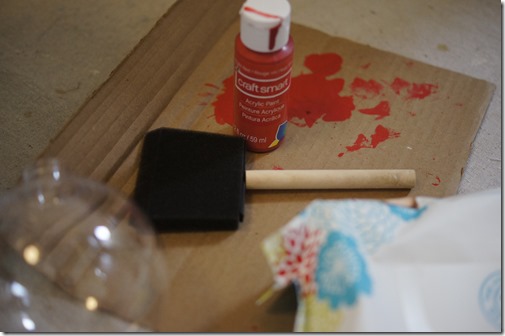
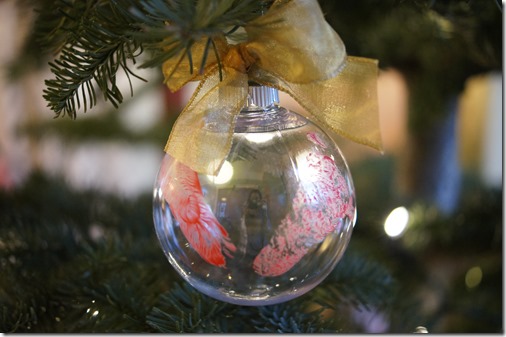
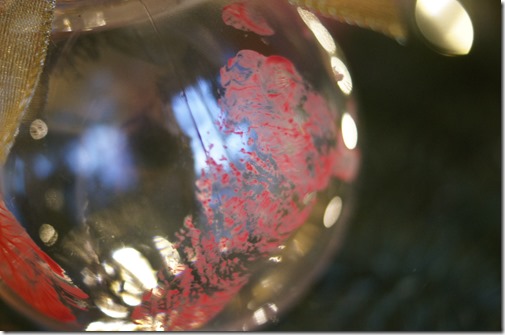
i modified this project in a few ways: i chose to do Eloise’s footprint instead of her hand (mostly because a footprint is so much easier!), & i used craft paint instead of embossing. the result wasn’t exactly what i was hoping since the footprints didn’t turn out that well. none-the-less, it is still a good representation of her feet on her first Christmas {which was the point, right?} & i have been doing ink prints of her footprints every month, so it isn’t like i won’t have her footprints in another form.

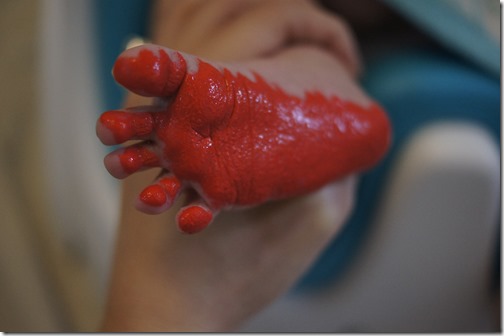
this was a really simple project. i sponged paint onto the bottoms of Eloise’s feet & then pressed them onto the plastic ornament. then i tied on a bow.

_DSC5386

_DSC5387

_DSC5389 _DSC5398

_DSC5400 

For more projects and inspiration, check out the other blogs in the Pinterest Christmas series [Emerald City Diaries | Greg & MaggiThe Gilbertson Family | The Pena Family | This Grey House | Without A Doubt]. Share your Pinterest Christmas projects with us! Comment on one of our blogs, link back to a post, or use #PinterestChristmas2014 on Instagram!

M

a pinterest christmas: family christmas stocking.

Pinterest_Christmas_Logo_thumb[8]

welcome to the first week of A Pinterest Christmas! i started this series as a fun way to share the Pinterest-inspired projects & crafts that i created for Christmas – my very favorite season of the year! check out the other years’ crafts here.

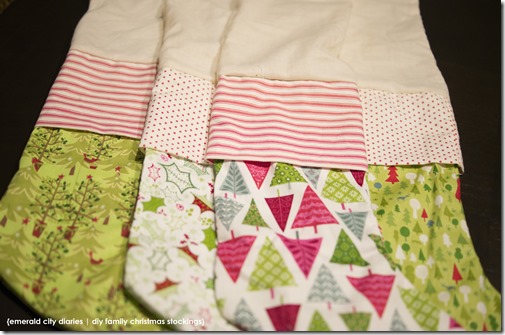
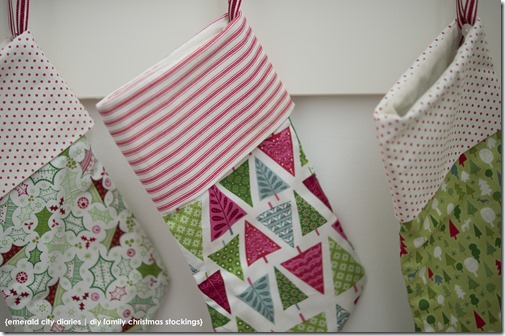
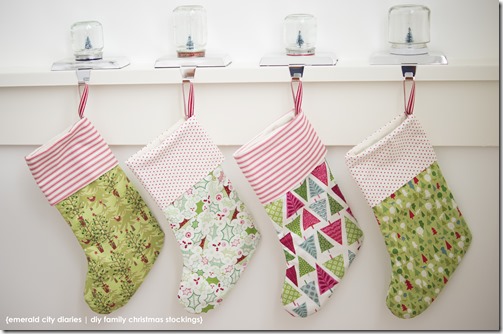
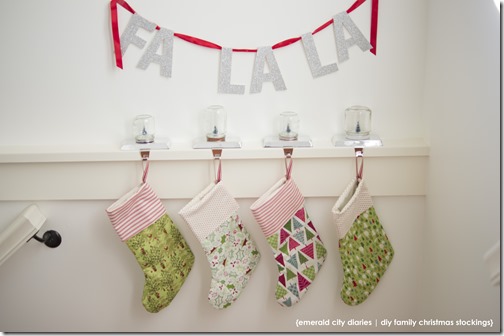
the year i started A Pinterest Christmas, i attempted to make stockings for our family at the time: me, Aaron, & Sadie. Sadie’s stocking turned out really well, but ours, not so much. ever since then i have been wanting to make us a new set of Christmas stockings. when Eloise joined our family this year i knew it would be the perfect opportunity! [& i went ahead & made four knowing that we would likely have another child at some point – no i am not pregnant! – & then i wouldn’t have to make a third set at that point!]

i followed two Pinterest pins – one for the stockings & linings & the other for the hangers.

Lined Stocking Tutorial.

{original Pinterest link – lined Christmas stockings}

Sew Scrumptious:One fat quarter of main fabric (patterned) One fat quarter of lining fabric (plain white fabric is fine) A small amount of contrasting fabric for Stocking Cuff A small amount of ribbon A button

{original Pinterest link – Christmas stocking hanger}

supplies:

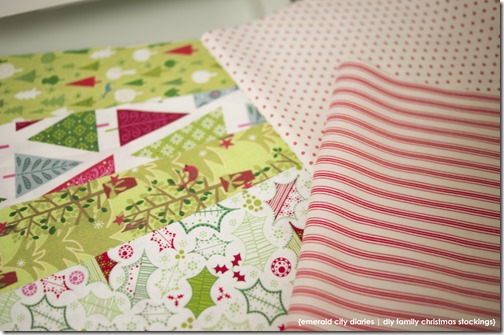
  • Christmas-themed fat quarters
  • thread – i used white for the entire project
  • lining fabric – i used this fabric from our Christmas tree skirt project
  • ribbon
  • buttons
  • scissors
  • stocking pattern – i used a free one here
  • needle

SONY DSC

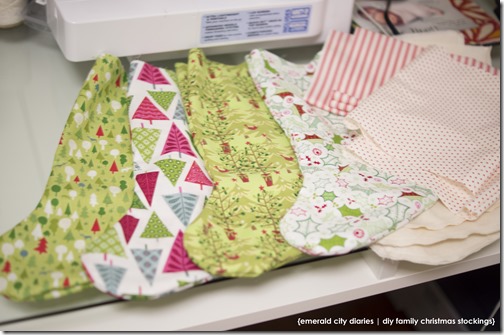
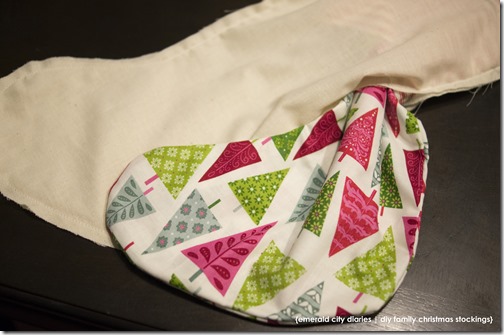
i started by ironing all of my fabric {nope, i didn’t pre-wash it – worst seamstress ever!} & cut out the stocking pattern – two stocking sides, 2 lining sides, & one cuff. i learned the hard way that you have to flip the pattern to make the cut out stocking side, or else you will have the back of the fabric on the backside of the stocking…

SONY DSC

SONY DSC

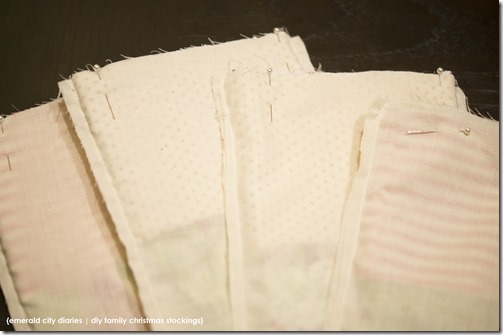
next i sewed all of the pieces. i made the cuff from a single piece of fabric – sewing one seam, flipping the fabric right-side-out, & then folding the fabric in half (as shown in the linked instructions). for the linings, i sewed around with a 1/2 inch seam, leaving a few inches on the long side of the stocking to flip everything right-side-out later on. for the stockings, i sewed the two pieces right sides together with a 1/2 inch seam & then flipped them right-side-out.

SONY DSC

SONY DSC

then i attached all the pieces. first, i sewed the cuffs to the stocking bodies, and then stuffed each stocking into the lining & attached. if you leave a small hole in the seam of the lining – just a few inches – then you can flip the entire stocking inside out & have a nicely finished stocking with a lining & no raw edges.

SONY DSC

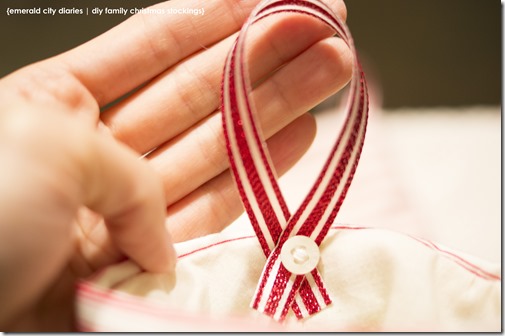
i then switched tutorials for the stocking hangers. i liked the look of a real cuff, & a ribbon hanger with a button so i combined the tutorials for the perfect stockings! i was able to round up four white buttons from my button box & use some Christmas-y ribbon that i picked up for another project (which you will see next week!). the nice part about adding a real cuff is that i could attach the ribbon & button, & hide the stitches underneath the cuff. SONY DSC

SONY DSC

SONY DSC

SONY DSC


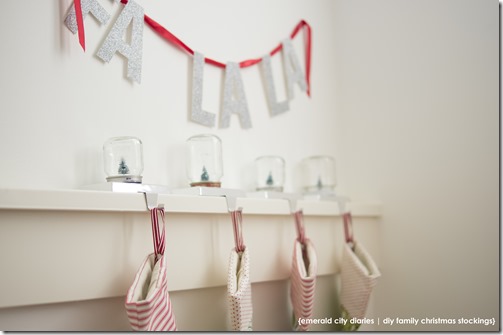
{also Fa La La sign & mason jar snowglobes}

For more projects and inspiration, check out the other blogs in the A Pinterest Christmas series [Emerald City Diaries | Greg & MaggiThe Gilbertson Family | The Pena Family | This Grey House | Without A Doubt]. Share your Pinterest Christmas projects with us! Comment on one of our blogs, link back to a post, or use #PinterestChristmas2014 on Instagram!

M

a pinterest christmas {2014}

Pinterest_Christmas_Logo

I am so excited to be co-hosting my fourth annual* Pinterest Christmas blog series happening in December! Each week the hosts will be sharing Pinterest-inspired projects related to the holiday season. The projects could be anything from decorations and crafts to traditions and recipes. Each of us will be sharing our projects in the weeks leading up to Christmas. We would love for you to join in on the fun. Plan your projects, post them, link back to one of our posts, and leave us a comment! Not a blogger? No problem, we’d love to see your projects on Instagram! Use the hashtag #PinterestChristmas2014

The hosts:

[Emerald City Diaries | Greg & MaggiThe Gilbertson Family | The Pena Family | This Grey House | Without A Doubt]

Need some inspiration? Check out the posts from the previous three years here.

Happy crafting!

M

*I originally started this series in 2011 & recruited others to join me over the past few years!

highlights of 2013.

2013 2014

{via}

happy 2014!

i’ve said it before, & i’ll say it again!, yearly recaps are always my favorite kinds of blog posts. its a small way to sum up your year & to see how much the last 365 days have brought. as i look forward to the New Year, i am humbled & grateful by all of the wondrous events of 2013. here’s the rundown of ours:

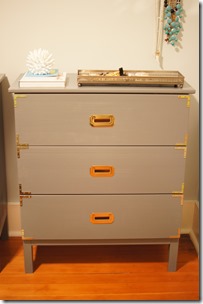
january: I started out the new year with a bout of the flu. we hosted our first blog giveaway! we installed the west elm hanging capiz chandelier over our dining room table. I framed my diy polaroids for our bedroom walls. amanda & I met john & sherry from young house love during their book signing tour! I diy-ed campaign dressers for our bedroom.

DSC02562

IMG_3140

DSC02640

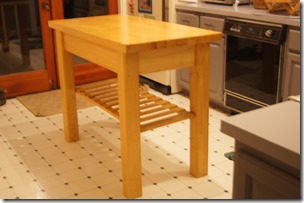
february: I did lots of diy-ing for valentine’s day {here, here, & here} I celebrated my birthday! we bought a kitchen island. I tried to be better about getting in front of the camera!

DSC02663

DSC02679

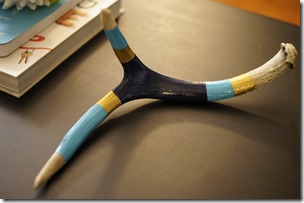
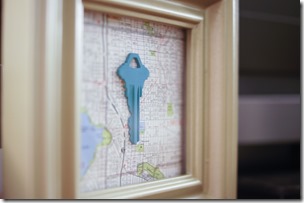
march: I tried my hand at painting an antler {& was so impressed with the results!}. we took my 91-year-old grandmother to target for the first time! amanda & I diy-ed framed house keys on maps. we sold jez the jetta & bought a new car.

_DSC2697

SONY DSC

jez

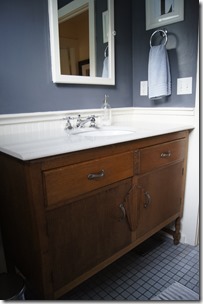
april: we updated our bathroom vanity with a converted antique sideboard. we updated the closet doors by stripping off the old paint in a crock pot. we celebrated our one year anniversary in our house & I reviewed all of the house diys!

_DSC2727

SONY DSC

SONY DSC

may: we finally got some good weather in seattle! I painted the ceiling & hallway walls. we celebrated aaron’s thirtieth birthday with a beer tasting party! we had a fun-filled memorial day weekend. we were featured in west elm’s blog front & main.

_DSC2821

_DSC2849

_DSC2851

front and main

june: aaron replaced our toilet. sadie was featured in the seattle dog spot blog. my parents visited for a long weekend en route to the olympic peninsula. my diy his & hers maps were featured. we finally got some summer weather!

_DSC2935

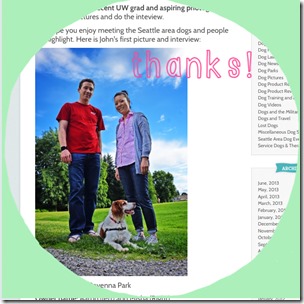
seattle dog blog thank you

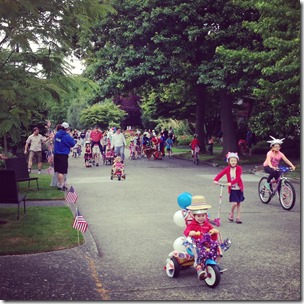
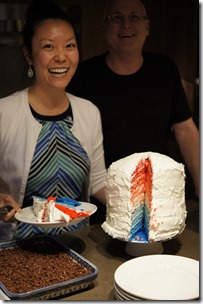
july: we celebrated the long Fourth of July weekend with a holiday parade, fireworks, & time with friends. I made a nine layer ombre cake! we replaced our kitchen track lights with globe pendants from west elm. we road-tripped to idaho for my ten-year high school reunion. we started growing our first eggplant.

IMG_3657

_DSC2993

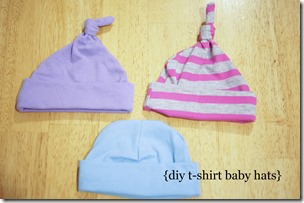
august: we celebrated our three year wedding anniversary. the blog got a Liebster Award Nomination. I diy-ed the tiniest baby hats for our friends’ new baby. we road-tripped to hood river, oregon to celebrate my cousin’s wedding.

MISAAR_1915

SONY DSC

_DSC3164

_DSC3233

september: we went to the husky vs. bronco game to kick-off labor day weekend complete with husky-style tailgating {via boat}. we took advantage of the warm weather & cleaned up the front yard with a fun game called love it or lose it. we celebrated sadie’s ninth birthday! I attended the Alt Summit for Everyone blog conference.

IMG_3907

_DSC3250

october: I attempted to start doing fashion posts again. we celebrated our two year blog anniversary at emerald city diaries! I finished up with the #embracethecamera challenge. we went to the pumpkin patch & carved pumpkins with friends.

_DSC3248

_DSC32761380499_10201673674635081_818032991_n

november: aaron joined a team for movember 2013. we snuck off to hawaii for thanksgiving.

_DSC3386

IMG_4198_DSC3536IMG_4296_DSC3624

december: I reviewed some of my favorite weekend in pictures pics. I participated in A Pinterest Christmas for the third year {see this year’s projects here, here, here, here, & here}! we celebrated Christmas in indiana with aaron’s family.

_DSC3398_DSC3412_DSC3440

reflecting back on this year, i am reminded how blessed we are & also how different this year has been than the year previous. it has been such a wonderful year & ringing in a new one is a bit bittersweet.

how was your 2013 – was it a year to remember, or are you itching to start 2014 already?

M

see past yearly highlights for 2011 & 2012.

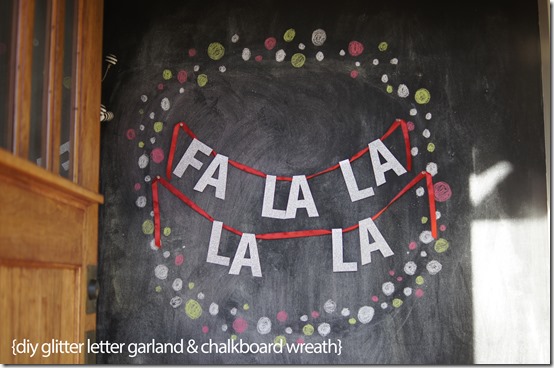
a pinterest christmas: glitter letter garland & chalkboard wreath.

welcome to week three {& the final project} of a pinterest christmas! {see the first two weeks of projects here, here, here, & here} i have been eyeing the glitter letter garlands that have been floating around Pinterest & the inter-webs for some time now, waiting for the perfect occasion to make one {if christmas isn’t the perfect occasion for glitter, i don’t know what is!}. i also wanted to make use of our chalkboard entry again & found a fun way to marry these two projects.

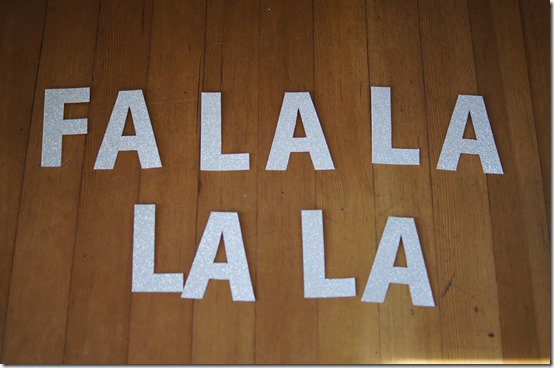
falalala

{original pinterest link – glitter letters}

supplies:

  • letter stencils – i made my own in Word

  • glitter cardstock – i got mine from Michael’s

  • scissors

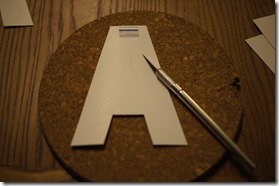
  • exacto knife – i highly recommend this for cutting out the inside of the “a”

  • plastic straw – {optional} i used to string the letters onto ribbon

  • ribbon/twine/string

  • glue – {optional to use with straw} i used tacky craft glue

first i chose the phrase i wanted to use. “fa la la la” seemed like a fun choice! then i made my stencils using Word. i just typed in the letters i needed – F, L, A – & played with the fonts & sizes until i found something i liked.

then i cut out my stencils, traced them backwards onto the back {non-glitter} side of the cardstock, & cut out the letters.

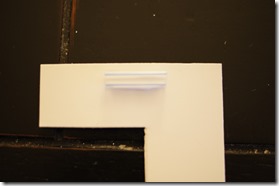
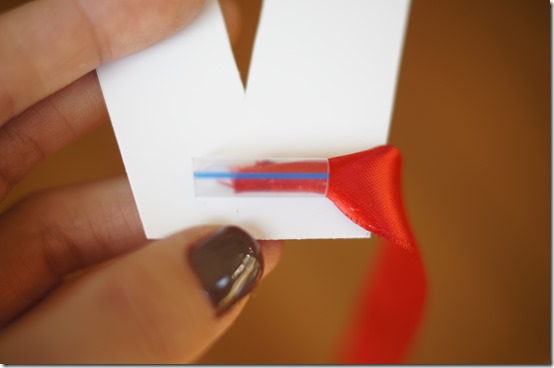
in order to string the letters onto the ribbon i chose, i decided to give a straw a try. i cut a plastic straw into small pieces, about an inch or so {less than the width of the top of the letter to disguise it} & glued the side of the straw to the back of the top of each letter.

_DSC3448

_DSC3373_DSC3381

i then strung each letter onto the ribbon.

_DSC3449

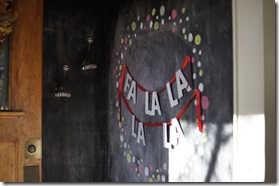
for the chalkboard wreath, i decided on the empty wall where i drew last year’s festive chalkboard art {see here} as it is the first thing you see when you walk thru our front door. my main goal for this wreath was to create a simple backdrop for the glittery garland.

Christmas Chalkboard Wreath

{original pinterest link – no original link}

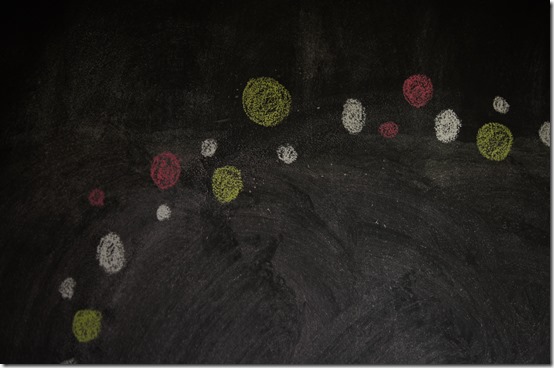
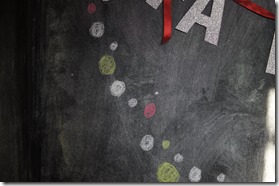
i started by softly outlining the shape of the wreath in chalk so that it was big enough for the garland to stretch across. then I erased the lines I drew with a wet washcloth in the circle shape that I wanted. i started to add white dots within the wet area, followed by red & green ones. I added dots somewhat randomly & then stepped back to see where I needed to fill in. it wasn’t a very scientific process & I liked that it didn’t need to be perfect {which is a lot if you know me!}.

i hung the garland across using push pins after I had the basic shape in place so I could use it for reference.

_DSC3451_DSC3453_DSC3454_DSC3455_DSC3456SONY DSC

ready for some more {p}inspiration? check out these ladies:

amanda @ Without A Doubt

maggi @ Greg, Maggi, & Rodney

abbi @ The Pena Family

kendra @ The Gilbertson Family

{also, catch up on the last two years on my diy tutorials page here.}


have you been {p}inspired by any christmas projects this year?

M

a pinterest christmas: kraft paper table runner.

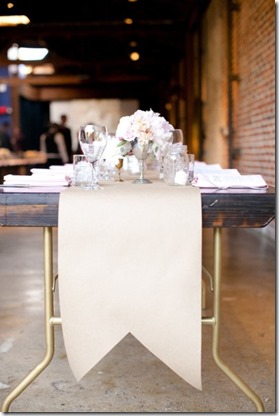
this is not really a christmas-y craft, but it was a fun addition to the snowglobe forest i shared on wednesday {see here}. you could make this paper runner for any occasion, or just for your everyday table.

paper table runner

{original pinterest link – paper table runner}

supplies:

  • paper – i used the kraft paper roll from aaron’s birthday {see here}

  • scissors

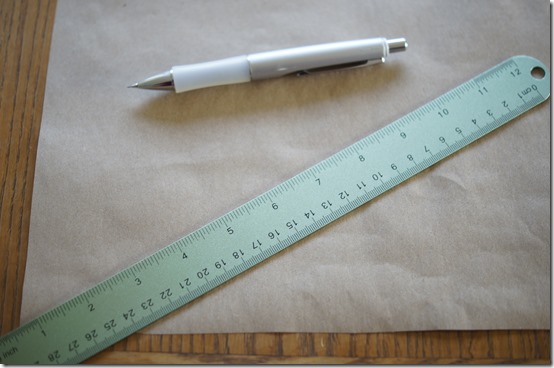
  • ruler

  • pencil

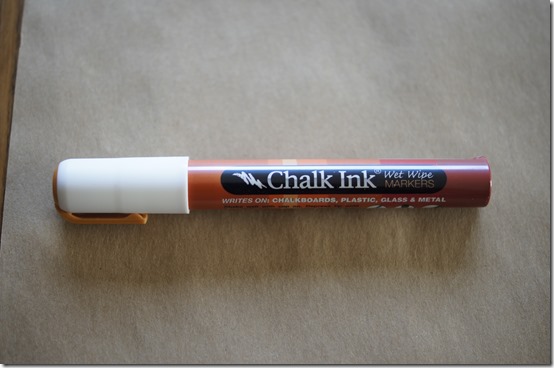
  • chalkboard paint pen

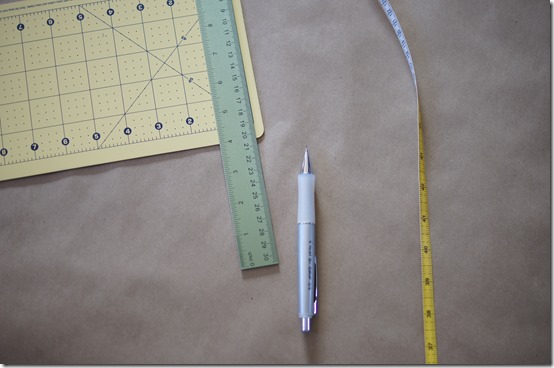
i started by measuring my table & figuring out how wide & long i wanted the runner to be. then i measured out & cut my kraft paper to make the basic runner {it was a really long rectangle}.

_DSC3428_DSC3429

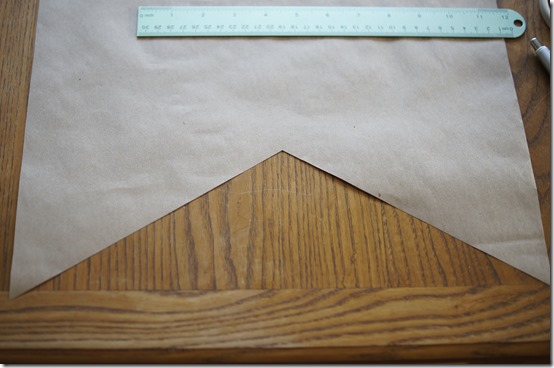
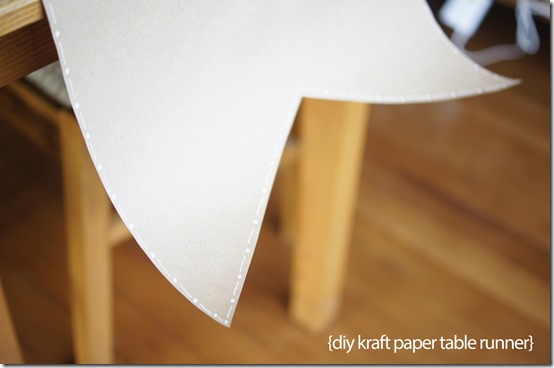
then i had to figure out what shape i wanted the end of the runner to be – straight, one pointy end, or two pointy ends. i chose two pointy ends, & measured & cut .

_DSC3430

_DSC3431

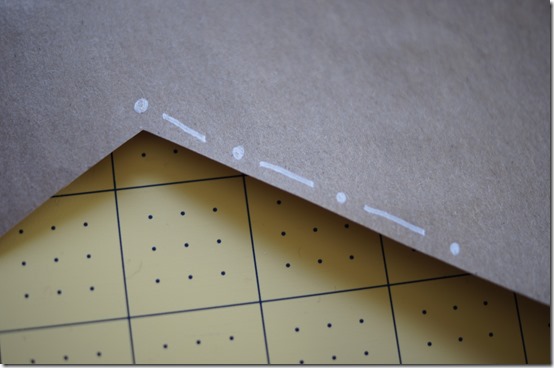
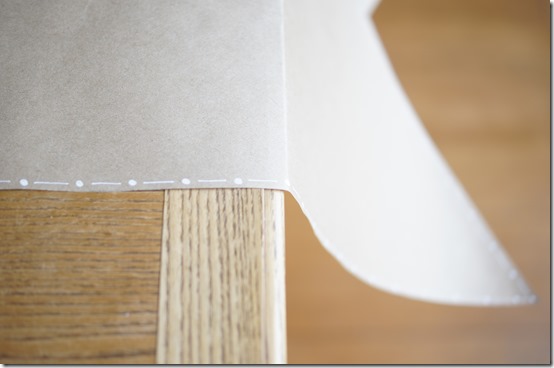
i could have just left the runner as is but i liked the idea of having some kind of design that ran along the edges of the runner. i went with a simple dot & dash pattern that i freehanded with a chalkboard paint pen.

_DSC3432_DSC3433

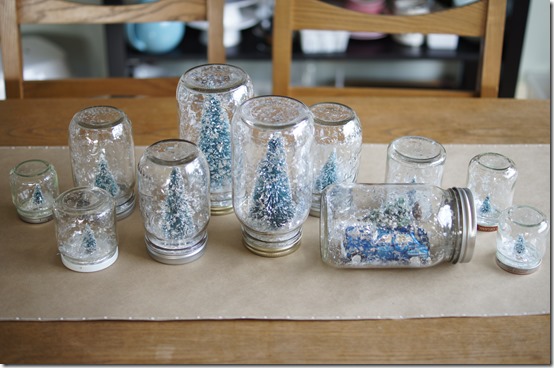
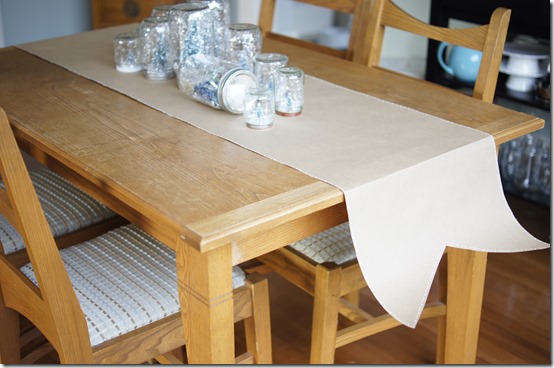
finally i placed my new runner on the table & set up my snowglobe forest.

_DSC3447_DSC3444SONY DSC_DSC3446

i like the way that kraft paper runners look, but they are also really practical since you can use them to protect your table from food {& throw away afterwards} or for a distraction for kids or dinner guests {just leave out some crayons!}. i like to cover our table, sideboard, or kitchen island with kraft paper when we are entertaining to fancy up those spaces a bit, but also to streamline clean-up {no laundry like with cloth runners or tablecloths!}.

ready for some more {p}inspiration? check out these ladies:

amanda @ Without A Doubt

maggi @ Greg, Maggi, & Rodney

abbi @ The Pena Family

kendra @ The Gilbertson Family

{also, catch up on the last two years on my diy tutorials page here.}


have you been {p}inspired by any christmas projects this year?

M

a pinterest christmas: mason jar snowglobe forest.

welcome to the second week of a pinterest christmas! {see last week’s here & here} this  snowglobe project is one that i have been wanting to do for the last few years & i am so thrilled with how it turned out {& how easy it is}!

Anthro Inspired Snowglobes

{original pinterest link – mason jar snowglobe}

supplies:

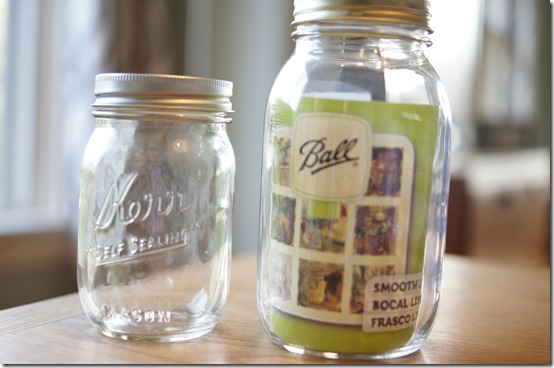
  • jars – i used various sizes including mostly mason jars & baby food jars

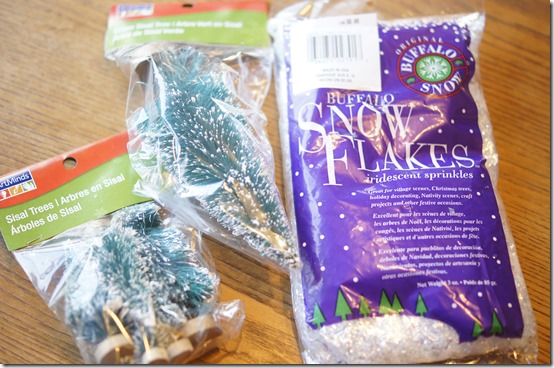
  • trees with wooden bases* – i picked up an assortment of trees from Michael’s

  • craft snow – i picked up some at Michael’s

  • glue – i used a hot glue gun

  • cardboard or paper to cover your workspace

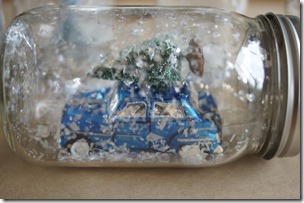
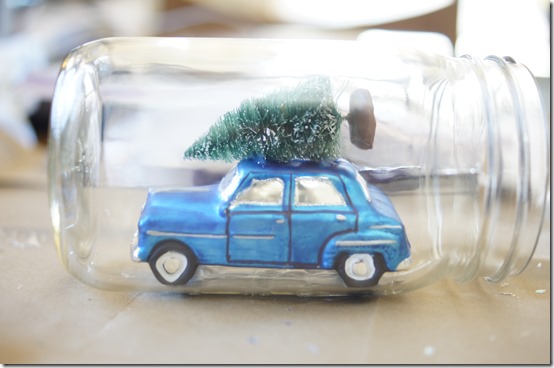
*you can add anything to your snowglobe so be creative! i loved the idea of a tree on top of a toy car {see here} & ordered this West Elm ornament.

first, be sure your jars are clean & dry. the mason jars i used were brand new, but i had to wash & dry the small baby food jars. {note: if you are like me & need baby food jars but don’t have kids, pick baby food that you can actually use – i chose applesauce – if you feel bad throwing the food away.}

_DSC3261_DSC3262

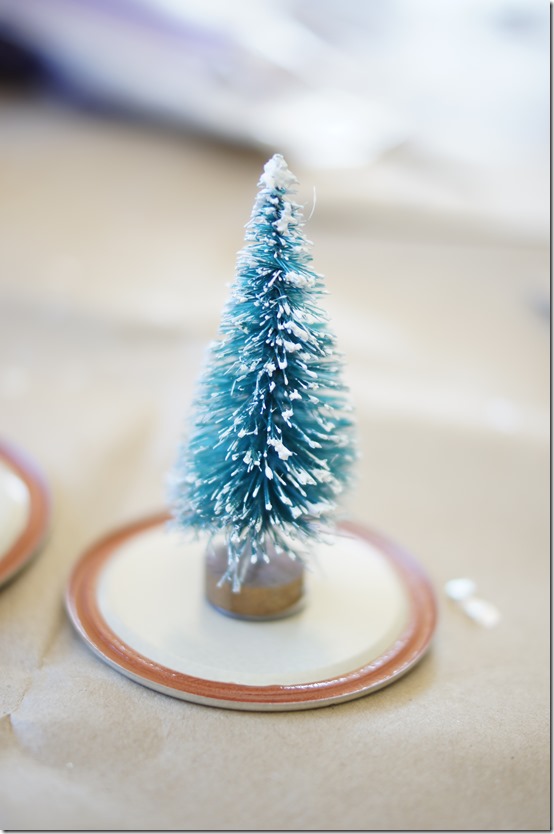
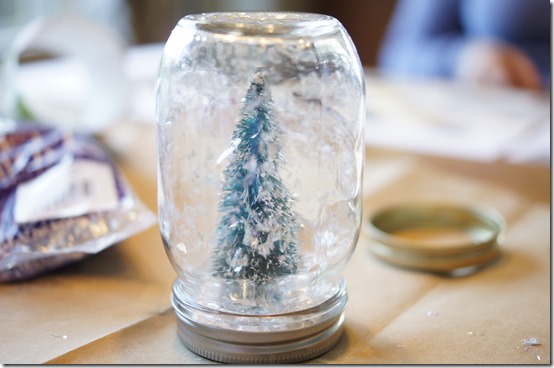
then i set out each tree to match up with each jar. i chose to put the bigger trees in the bigger jars & the smaller trees in the smaller jars. i put a glob of hot glue on the bottom of a tree base & stuck it to the thin metal lid of the jar, right in the center. i would recommend gluing all of the trees to the lids at once to make the next step easier. with the car {after making sure the car would fit into the mouth of the jar} i globbed glue all over the bottom of the 4 “tires” & stuck the car to the side of the jar.

_DSC3326_DSC3328

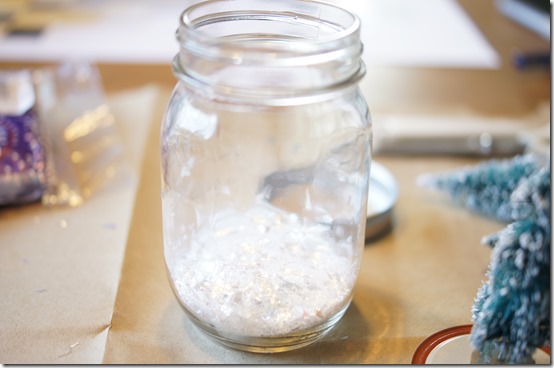
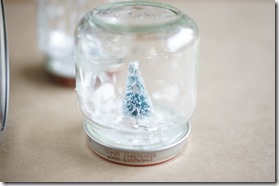
this next part is easy, but messy, so lay down your cardboard or paper over your workspace. fill each jar with the “snow.” i found that i didn’t need nearly as much as i thought, so i would start with just an inch, maybe two. once the snow is in the jar, put the lid {with the tree glued on} onto the top and then put on the ring & close the jar. once sealed, you can turn the jar over to see if there is enough snow. if not, then turn the jar back over, shake the snow off the lid, & add more as needed. i liked having the snow line be under the bottom of the tree or else it looked like the tree was swimming, but this is completely a personal preference. also, the snow that i used had big glitter chunks in it which is fun because those chunks stick to the inside of the jar & make it look like its a real snowglobe {but sans liquid}.

_DSC3264_DSC3265

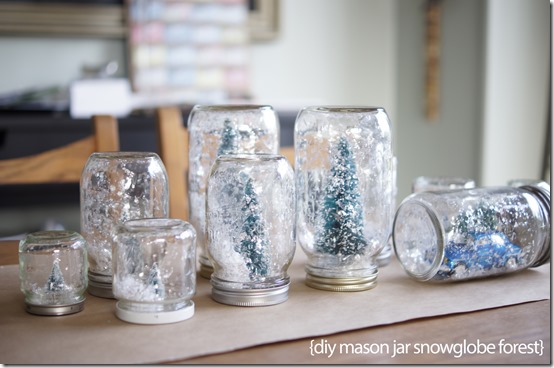
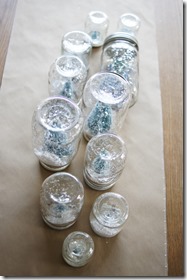
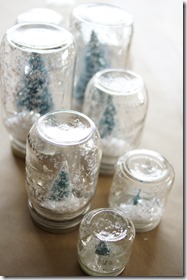
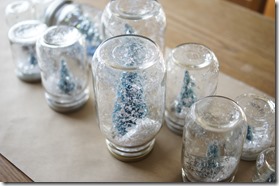
amanda convinced me that i could do an entire snowglobe forest & i love the grouping of all of the snowglobes – thanks amanda! i have them acting as a table centerpiece, but sort of love the idea of using lots of snowglobes together – a good alternative to a christmas town scene!

SONY DSC_DSC3436_DSC3437_DSC3438_DSC3440_DSC3439_DSC3442

ready for some more {p}inspiration? check out these ladies:

amanda @ Without A Doubt

maggi @ Greg, Maggi, & Rodney

abbi @ The Pena Family

kendra @ The Gilbertson Family

{also, catch up on the last two years on my diy tutorials page here.}

have you been {p}inspired by any christmas projects this year?

M