Pinterest Christmas 2015 {Join our Linky Party}.

The Pinterest Christmas blog series (in its fifth year!) started as a motivation to actually do some of the DIY projects we pinned on Pinterest & a way to share them with friends & family. Over the years other bloggers have joined & we have spent the month of December DIYing & sharing our Christmas projects. Sometimes the posts are tutorials with step-by-step instructions & other times it is simply sharing a completed project! You can check out past Pinterest Christmas projects here!

Pinterest_Christmas_Logo_Edit

This year we’d love you to join in on the fun of Pinterest Christmas! Kendra {from The Gilbertson Family} & I will be hosting a Linky Party set up for the entire month of December where you can share your own Pinterest-inspired projects & discover what bloggers are sharing too. And, we’d love to see the Pinterest Christmas graphic included in your posts!
Here is what you can do now to get started:
(1) Get on Pinterest & pin those holiday projects! (See our Pinterest Christmas board here)
(2) Get your craft on! If you want to do a tutorial, make sure to take pictures during each step.
(3) Write up your Pinterest Christmas blog post.
(4) Join in on our Linky Party! Click on the blue button below to add your blog link beginning December 1st! Feel free to add as many links as you’d like.
(5) Come back and see what other bloggers are creating.
(6) Tag your projects on FB, Twitter, Instagram with the tag #PinterestChristmas2015

Happy crafting!

M

eloise {first birthday party DIYs}

now that I have shared eloise’s first birthday party pictures, I thought I would share all of the party-planning details & the DIYs (since a lot of you have asked!).

first birthday parties have become huge events, thanks mostly in part to pinterest. (yep, I am totally blaming pinterest for this one!) I have a girlfriend who likened a child’s first birthday party to a wedding… sometimes it seems that way, right? I LOVE to decorate for parties, but had to set realistic expectations for what eloise’s party would be like because it would have been so easy to get super carried away. plus, eloise is only going to remember this party from photos. first birthday parties are for parents moms (& same with nurseries!) so I was determined not to go overboard.

of course I had a pinterest board (it was secret though!) & I honestly started pinning ideas of things around the time she was 6 months old. once we got closer to the actual event, I decided on a theme: polka dots. I knew it would be easy & simple, & it was something that eloise loved too! for me the theme was one of the trickier parts because I am not a fan of party décor that is super matchy-matchy. I think blogs & pinterest has created this idea that every single thing at a party (food, decorations, invitations, etc.) have to be perfectly on theme. but I prefer a more subtle theme, so dots were perfect.

color was the very first thing that I thought of & I pinned a few different colorways before I found the perfect one (see below). I wanted something that was fun, a little girly, & sophisticated, & this was right on! the colors I ended up with were all of my favorite colors: navy blue, mint green, grey, hot pink, teal, & gold. {& if I would have had time to make those paper party blowers, I would have! next time.}
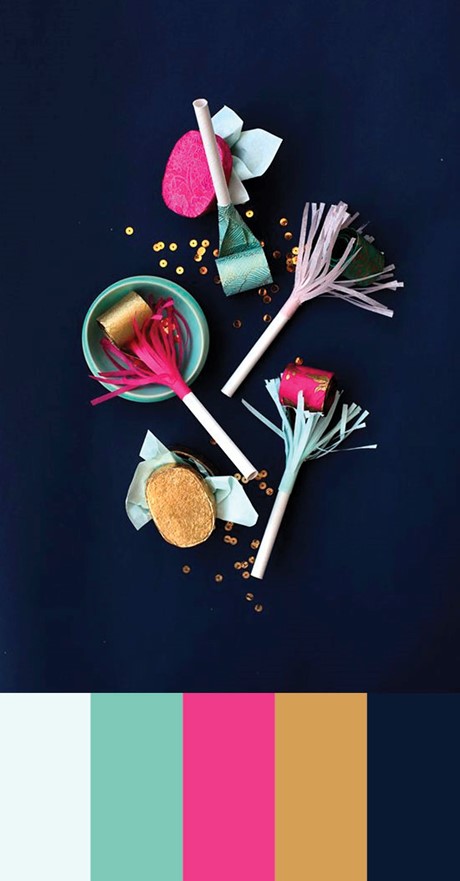
{image via}

I started with the invitation since that would be the first thing everyone would see &, let’s be honest, I adore paper goods. just like Christmas cards, I designed the invitation (using photoshop & illustrator), had them printed at my favorite local printers (Girlie Press if you live in Seattle!), & snail-mailed them to our guests. while sites like Paperless Post & Evite are really great (especially for managing RSVPs), there is something really special about a mailed card that you can hold in your hand & hang on your fridge. plus, after perusing the Paperless Post site for a few minutes, I quickly decided I would be so much happier if I just made my own invites since nothing seemed quite perfect. the other great thing about having designed the invites is that I could later make party signs that followed the same theme.
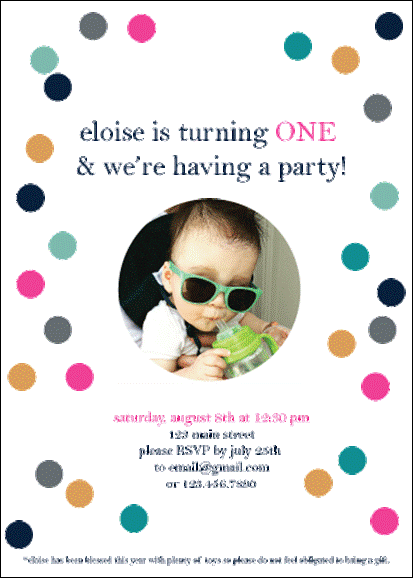
{sorry this is so pixelated!}

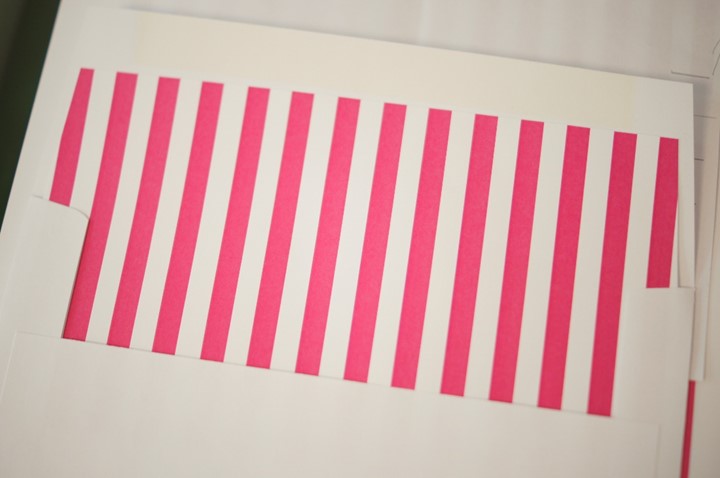
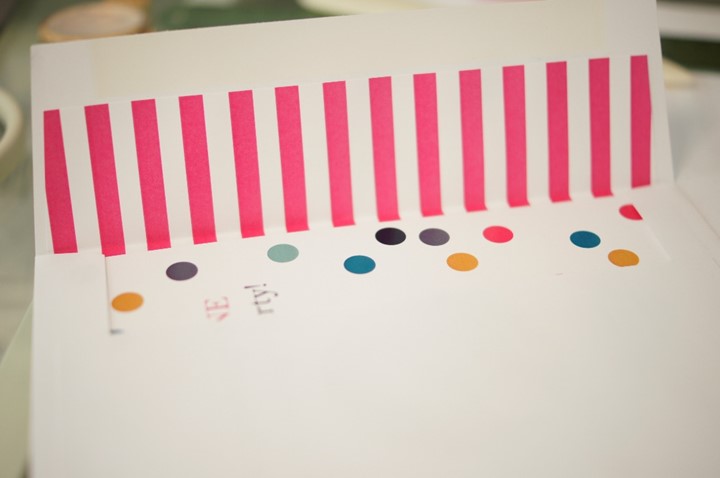
& since I was doing paper invites, I also decided I wanted to line the envelopes. this is a little something extra that I think is really fun & I never get to do with our Christmas cards since it would be so time consuming! after shopping around at a few craft stores, I opted to design a stripey pink envelope liner (& then the hot pinks matched perfectly!). in order to save time, money, & paper though I made the inserts half size so that they didn’t go down inside the entire envelope. it ended up working perfectly & I could even print two liners per page! since I did the liners later, I had them printed at my local Kinko’s (the online printing service is pretty cool!).
when it came to décor, I knew I wanted to DIY a few things, but I wanted to keep it simple. garlands, balloons, party hats. that was pretty much it!

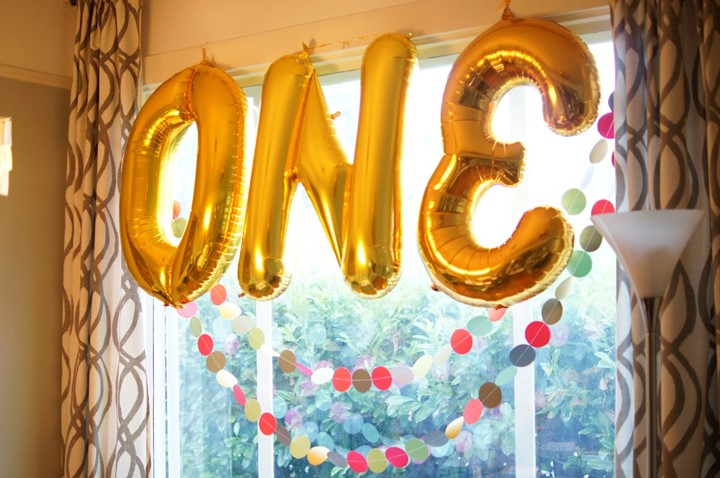
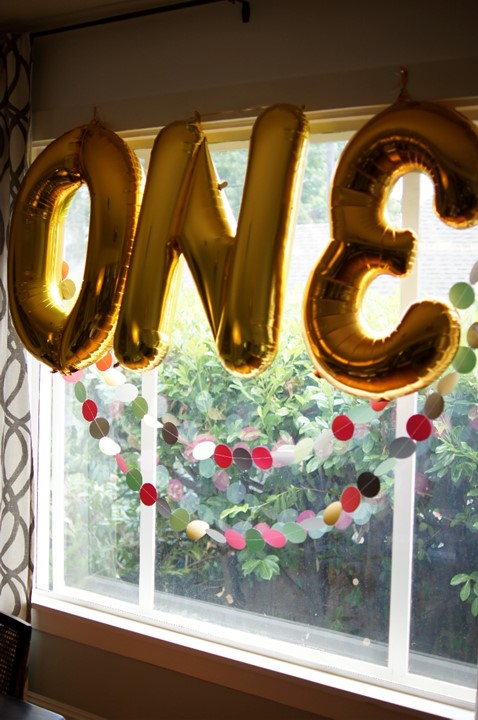
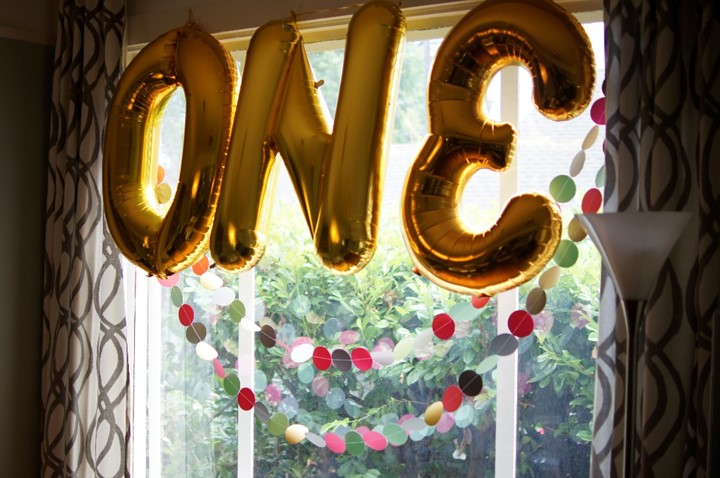
going with the polka dot theme, these paper dot garlands were perfect. I have seen a lot of different versions in my pinterest feed, but I liked the ones with the same size dots just in different colors. I chose the colors based on the paper supply at Michael’s & ended up with a glittery gold (but the glitter didn’t fall all over!), grey, hot pink, & mint green. I decided on a 3 inch circle (I traced the lens hood on our camera which was the perfect size) & traced & cut out all of the dots. it took some time (a few evenings of White Collar) & I had cramped hands afterwards, but I didn’t want to spend a ridiculous amount of money on a 3 inch paper circle cutter just for these garlands! once I had the dots all cut out, I sort of randomly arranged them in order making sure there weren’t two dots of the same color together, or too much of a pattern. then I just sewed them together using a slightly longer stitch than I normally would for fabric. I left a long thread on both ends of the garland & used a white cotton thread (my go-to) to sew the dots together right down the middle of the dot. I didn’t leave room between the dots (though I could have) & found that putting down two pieces of washi tape on my machine helped to line up the next dot. {see dot garland pictures below with the ONE balloons!}

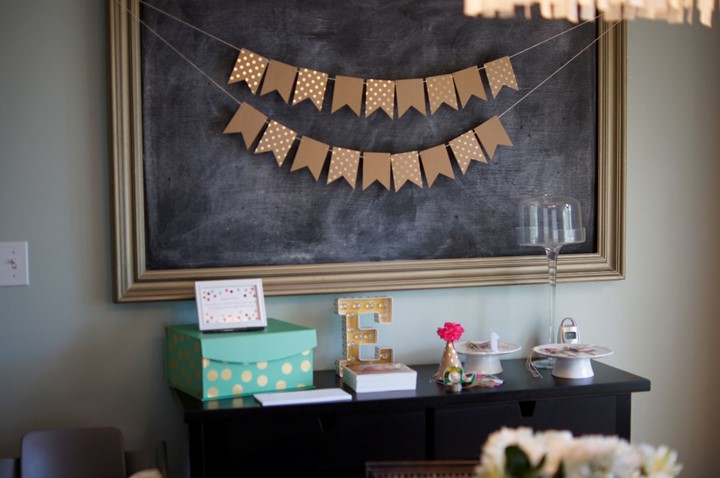
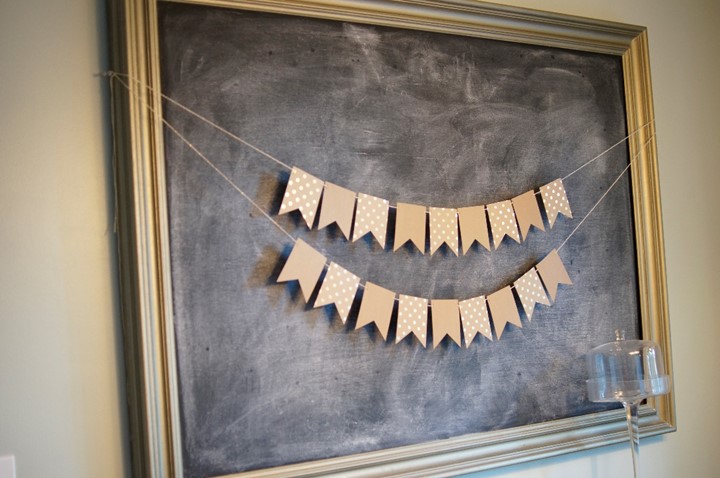
I also wanted to make a small garland to hang on the chalkboard. I found this great cardstock with gold polka dots at Michael’s & grabbed a few sheets since it was so on-theme! I ended up using some of it to make half of the chalkboard garlands (the other half I used plain cardstock). I like the look of little flags, so I used a simple rectangle & cut out the bottom triangle to make it a flag. I cut little slits with an exacto knife & then thread each flag onto white twine (with a gold glitter thread).
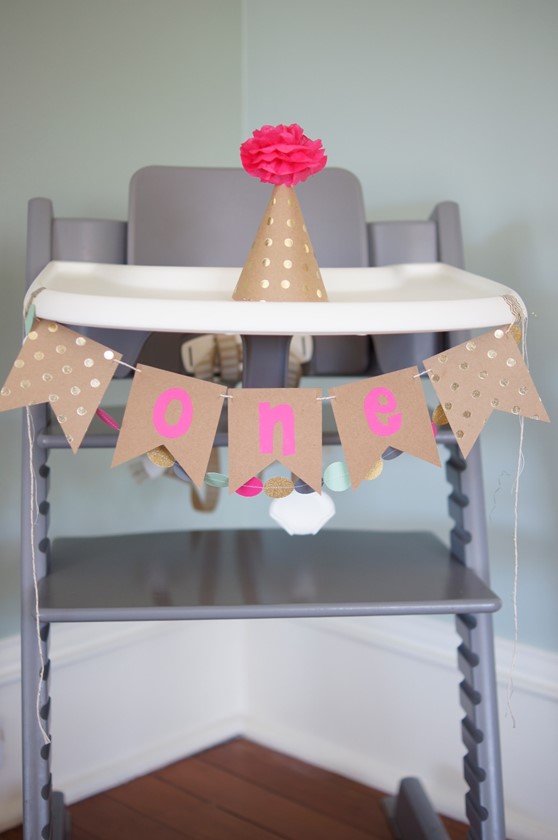
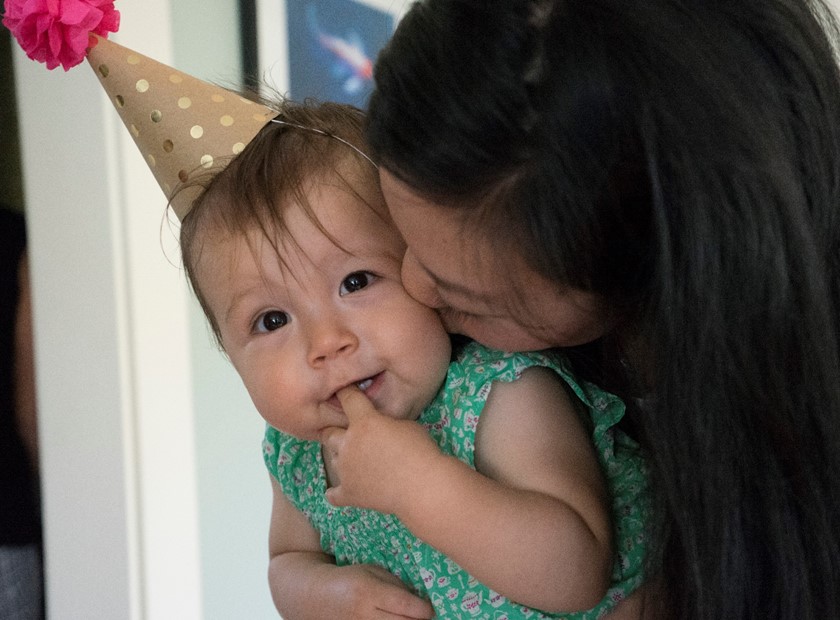
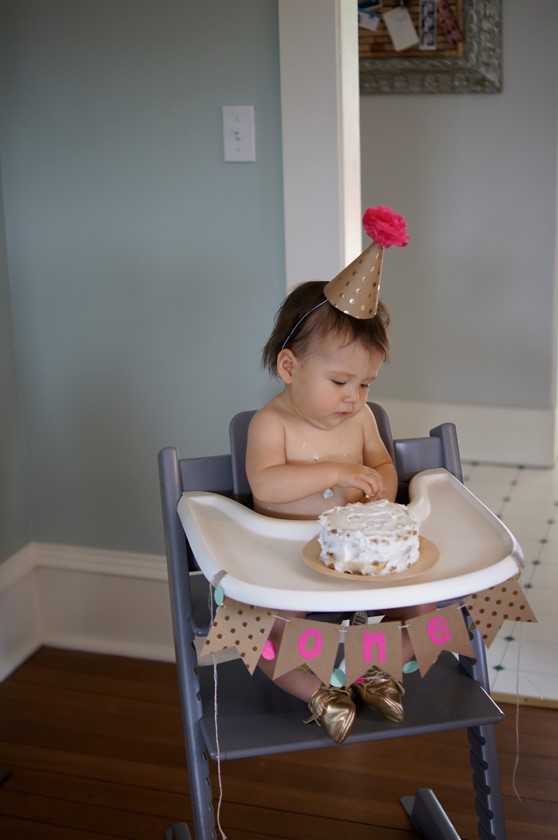
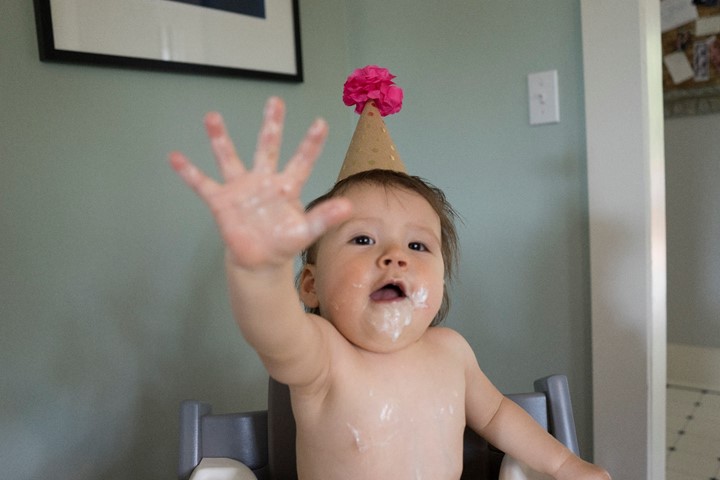
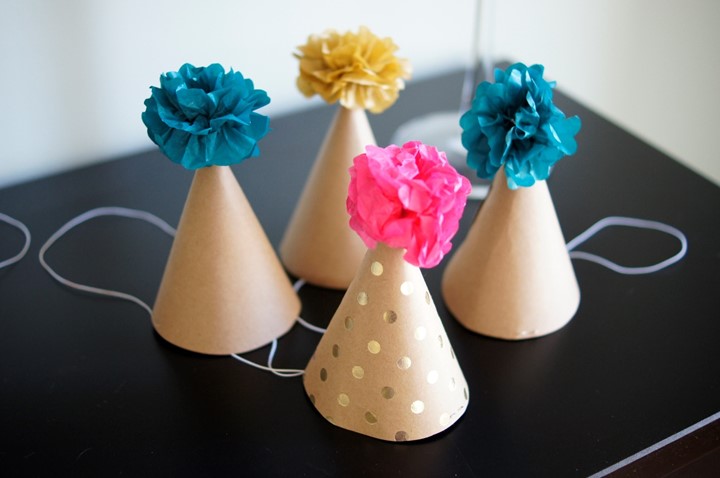
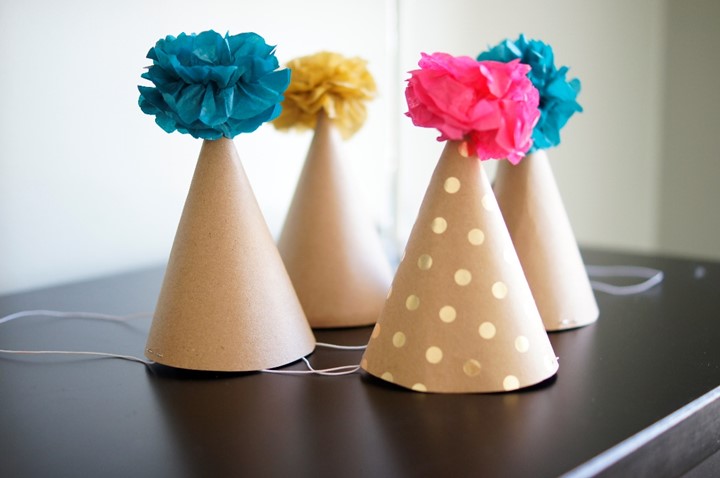
I ended up deciding pretty early that I wanted to make party hats since most of the kids at the party would be around eloise’s age. while a regular-sized party hat would have fit, I like the look of a slightly smaller party hat, especially on little kids. so I found this party hat template on Oh Happy Day! & printed it at 75% (or so). then I traced & cut out seven party hats out of plain cardstock, & one out of the gold polka dot cardstock (for eloise). I originally wanted to glue paper dots onto each hat using the same paper that I had used for the big dot garlands, but once I started one hat, it looked terrible. I could have probably painted dots onto the hats & it would have looked cute, but I opted at that point to leave the party hats plain. to make the hats look a little more festive, I added a small tissue pom pom to the top. there are lots of tutorials on how to make tissue poufs on pinterest & the interwebs. I used 5 sheets of tissue paper that were like 2 or 3 inches (small) & used very thin floral wire to wrap around & keep the pom poms together. I left the wire long on each pom pom so that I had something to tape onto the inside of the hat. I used gold & teal tissue for most of the party hats & hot pink for eloise’s polka dot hat. {sidenote: though these party hats were mostly intended for kids, they really weren’t super kid friendly. we didn’t have any issues with the hats, but the elastic & floral wire made them slightly dangerous. I made sure we had supervision while wearing the party hats.}
the other theme of the party (other than polka dots) was ONE since that was the age eloise was turning… so I thought it would be fun to have big balloons that spelled out ONE after seeing this adorable set-up with letter balloons. I ordered the O and N balloons from the Oh Happy Day! Party Shop in the large size (34 inches – they were huge!) because that was what was in stock. I was able to find the exact same balloon on Amazon for the letter E. there was a bit of a fiasco though once I had the balloons filled & while things didn’t go according to plan, I was able to make it work & was really pretty happy with it in the end. so if you are thinking about using giant letter balloons, learn from my story: on thursday evening before the party (which was saturday afternoon) I decided to run out to our local party store to have the balloons filled while aaron put eloise to bed so that I didn’t have to go out on friday & try to wrangle eloise plus three giant balloons. I was able to get the balloons filled (with helium) & home with no issues. I begged aaron offered to help me hang the balloons & the dot garland once I got home so we could check that off of my to-do list. we quickly figured out that filling the balloons with helium wasn’t ideal since I wanted them to hang near the top of the window, but didn’t want strings hanging down in order to keep them floating in the right place. so we taped them from the top of the window & weighted them down at the bottom with metal nuts (actually a really genius move by my husband!). all was well until 7 am on friday morning when I heard a POP! yep, the E balloon burst right at the seams & I was left with balloons that spelled out “ON.” perfect. Amazon Prime can get stuff to us quickly, but not that quickly, so I headed back to the party store later that afternoon (& luckily my mom was in town by that time so she watched eloise). while I was assured at the party store by multiple employees that the E balloon didn’t burst due to overfilling (I still question that, but I was picking my battles at that point!) they did make sure to tell me that the balloons sold on Amazon have about a 50% failure rate. that would have been nice to know. luckily this party store sold the same gold numbers, & the number 3 backwards looks a lot like a letter E. right before I was getting the 3 filled though, I noticed that it was a slightly different gold color than the original balloons. uh oh. but do you know what? the number 0 & the letter O are identical & I figured it may look somewhat purposeful if the O & the E were a different color than the N so I went with it. I also was talking thru the weighting process with the balloon fillers & they told me all of my problems would be solved if I just had the balloons filled with air. duh! so for the same price as helium (what?) I had the 0 & 3 balloons filled with air. once I got home, we took down the letter O & hung up the 0 & backwards 3. it was perfect (well as perfect as it was ever going to be!) & you couldn’t even tell the color difference! so all of that to say, if you are going to buy letter balloons, don’t buy them off of Amazon & buy a few extra just in case!
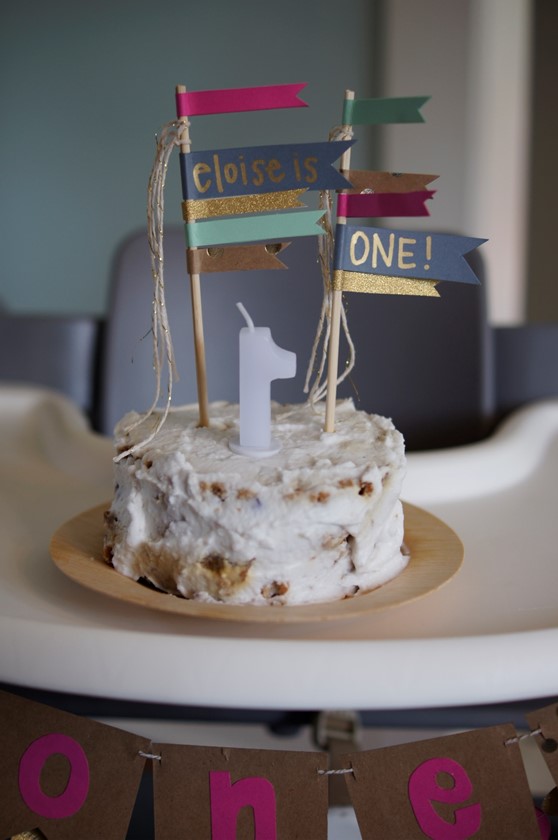
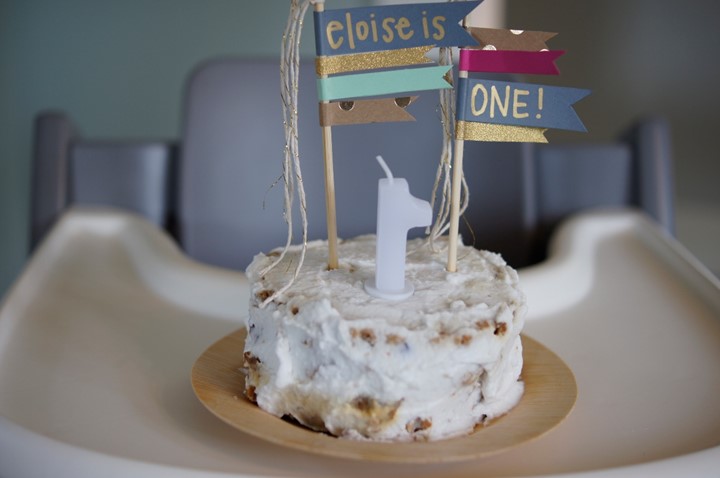
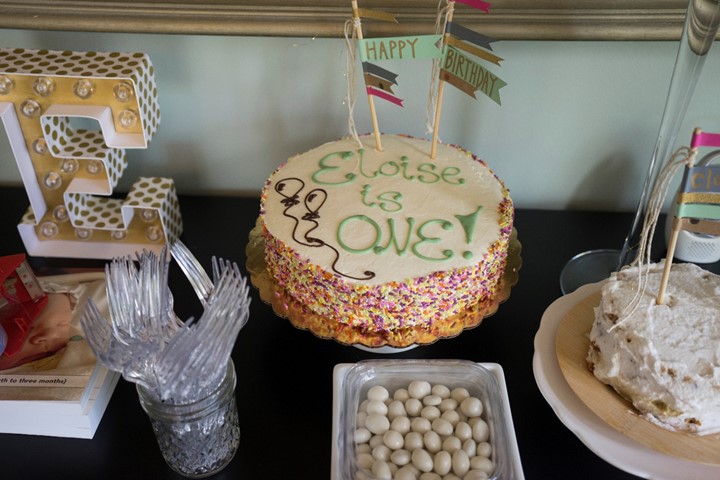
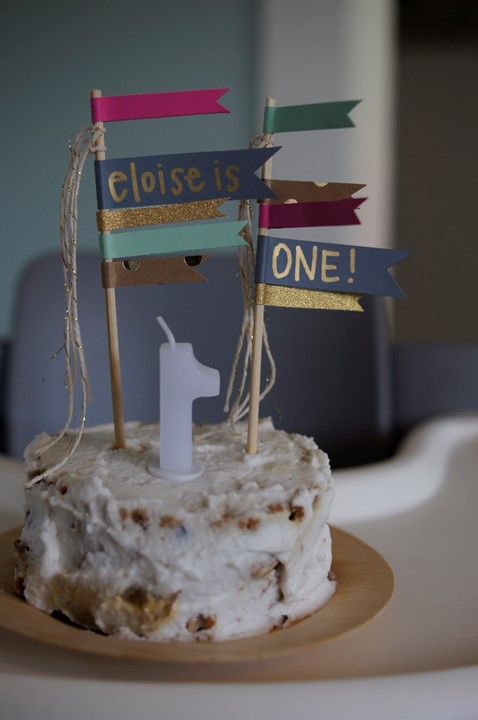
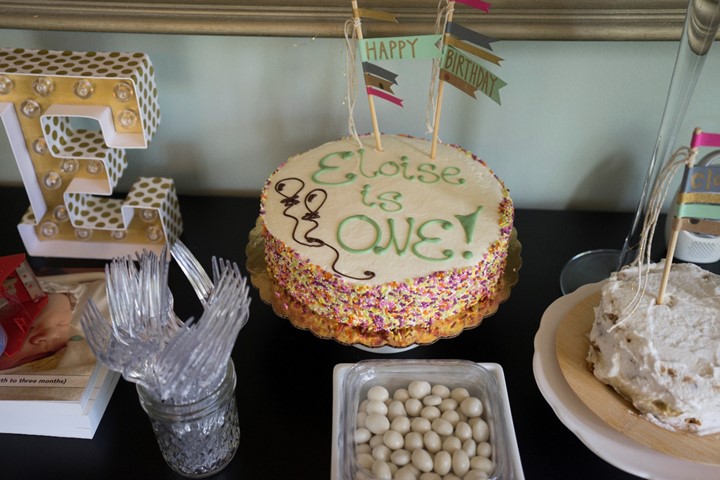
we had two cakes at the party – one for adults & party guests, & a small smash cake for eloise. the big cake was a vanilla one from Whole Foods & while I am certain it had the highest quality ingredients, aaron & I decided early on that we didn’t want to introduce eloise to sugar (just yet!). so I made her a little smash cake that was banana & blueberry with whipped coconut milk frosting. I really wanted some kind of cake topper too & made two sets (one for each cake) using this cake topper as inspiration. it was really simple to make. I cut different widths of paper strips (using the same paper as the big dot garlands) & glued them onto a wooden BBQ skewer (which I cut down in length after the flags were on it). once all of the paper strips were glued on, I cut out the little triangles from the ends, making each flag a different length. I added the writing with a gold paint pen, & added the gold-thread twine (which is the same I used to hang the chalkboard garland).
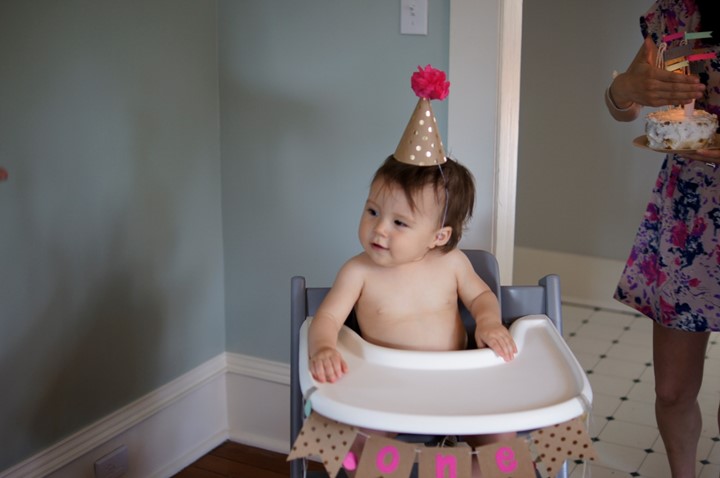
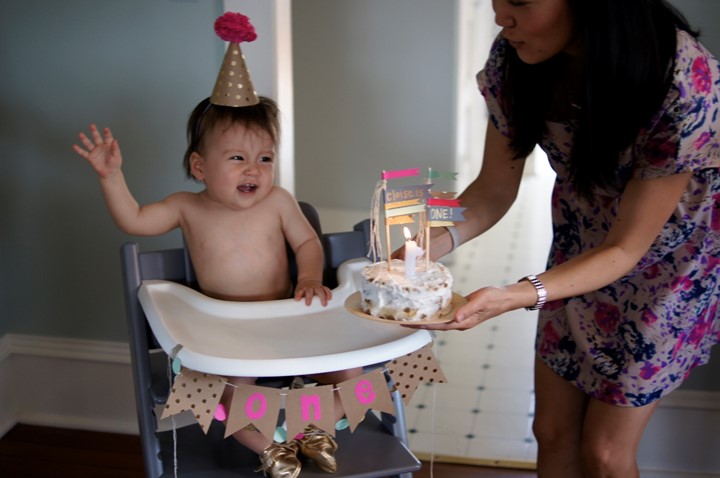
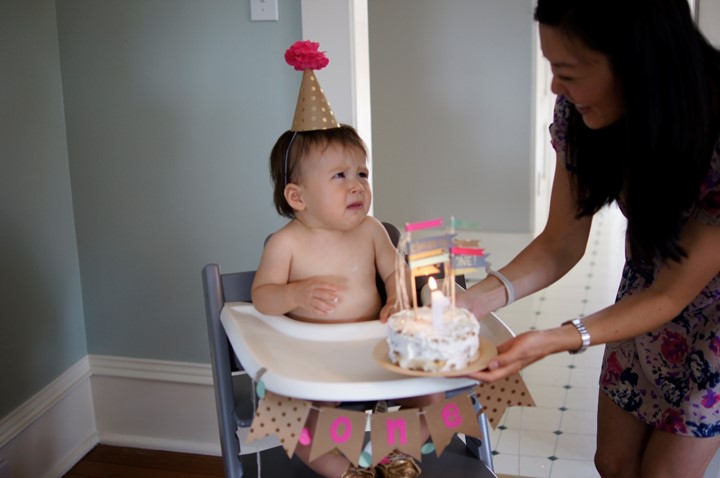
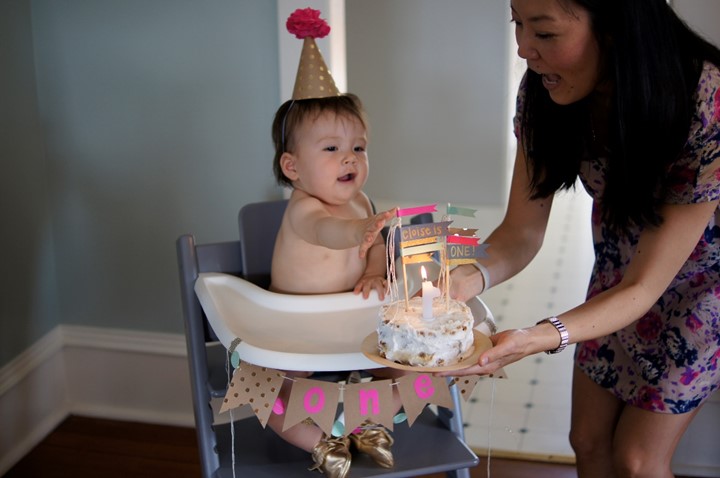
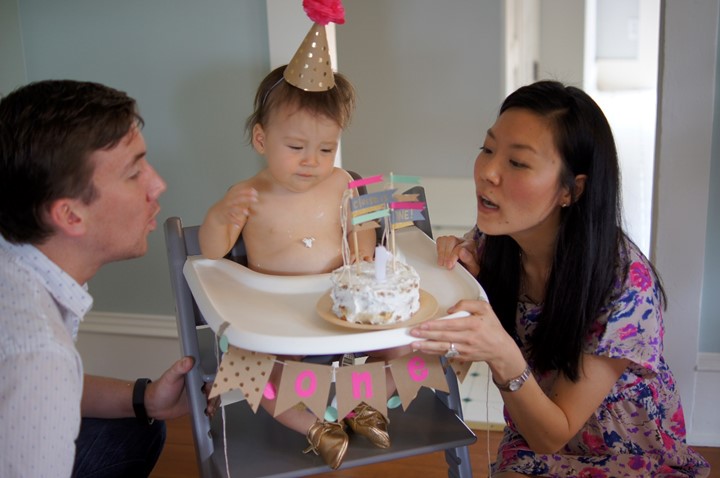
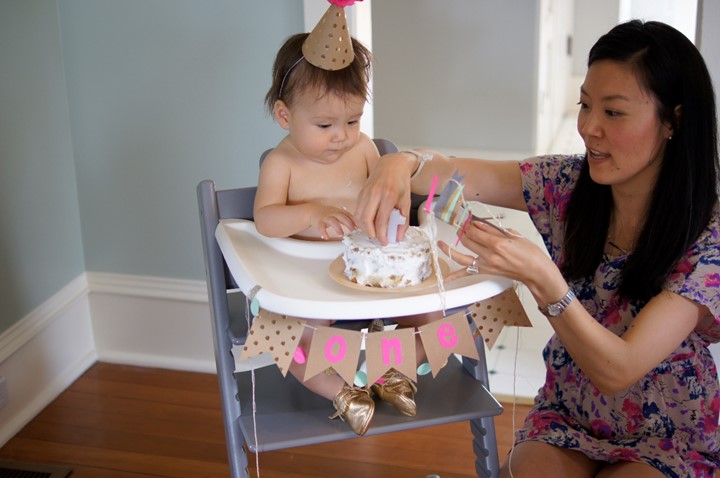
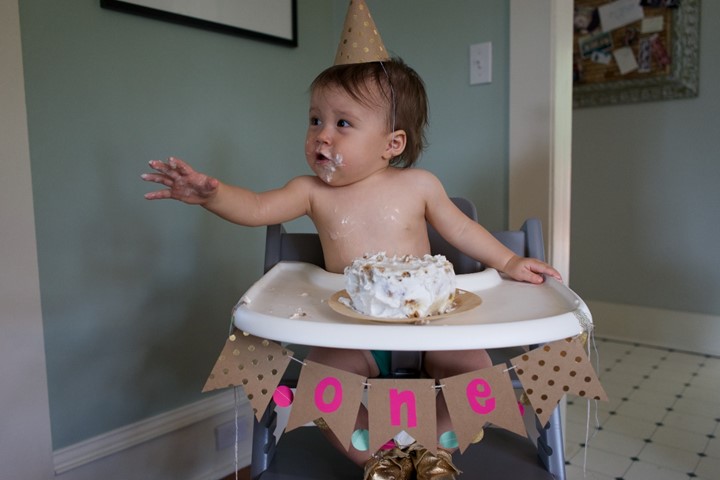
because of the smash cake photo op, I wanted to decorate eloise’s highchair a bit. nothing too elaborate, but I did make two little garlands that hung on the front of her tray. the first one was a tiny version of the dot garland. I used a small circle cutter that I have (it is about an inch and a half) & then sewed the small dots together just like I did with the bigger garland. the other garland used the same little cardstock flags as the chalkboard garland, & I added ONE to the middle three flags.
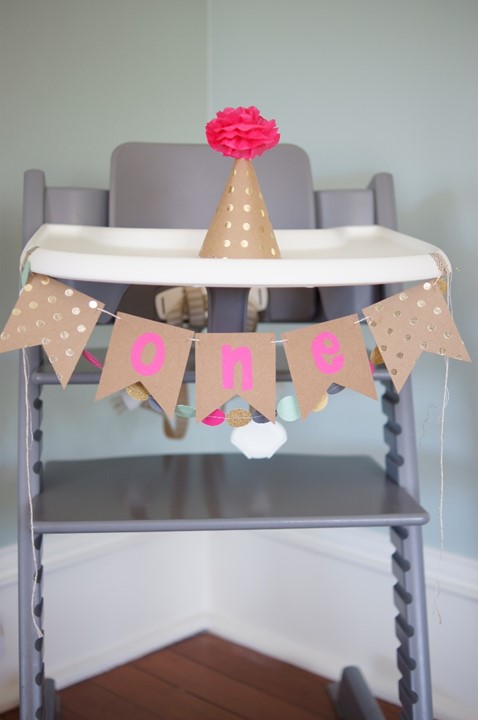
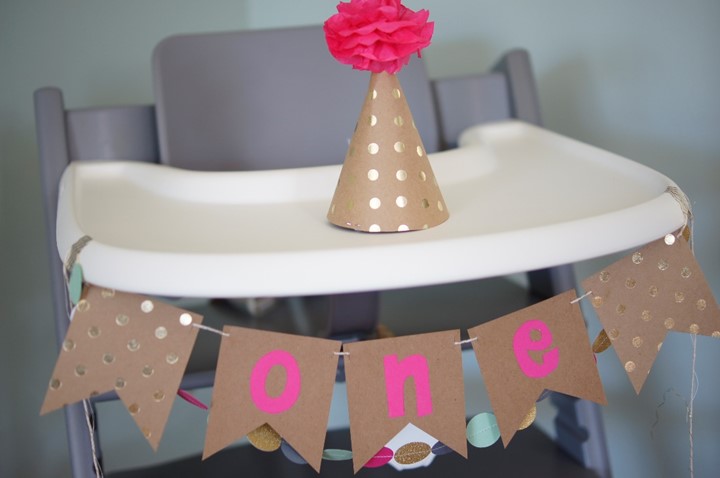
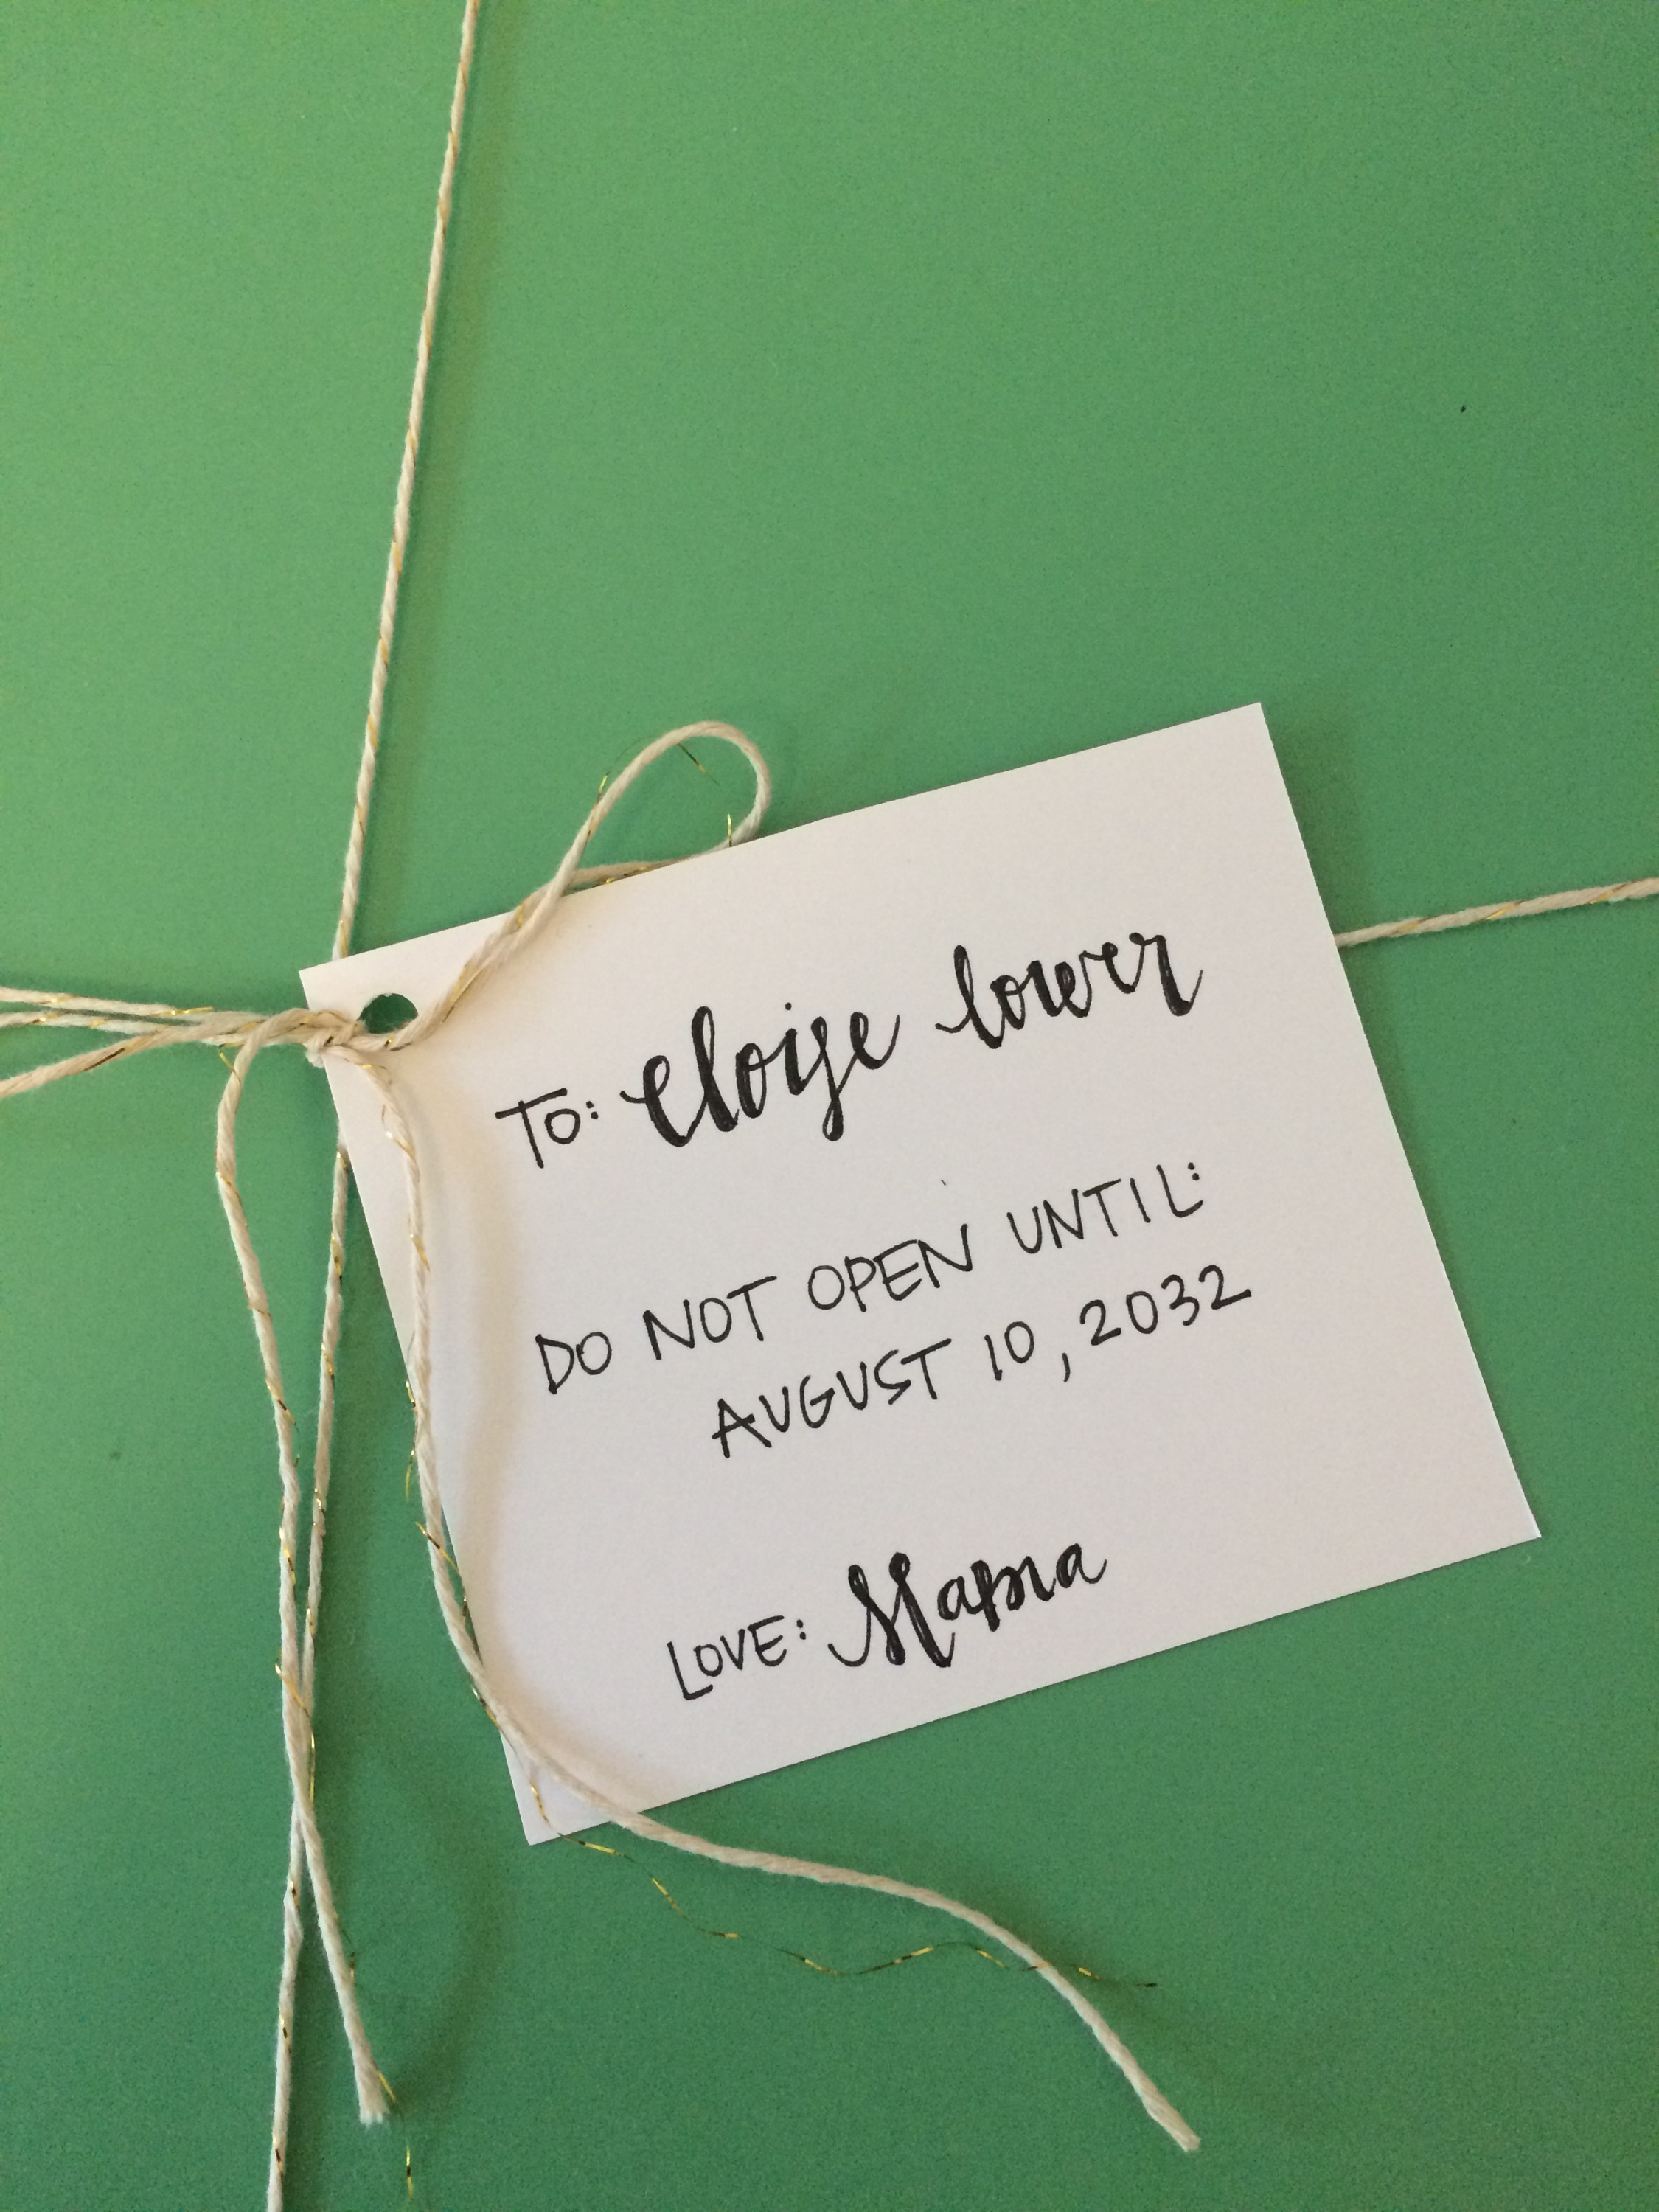
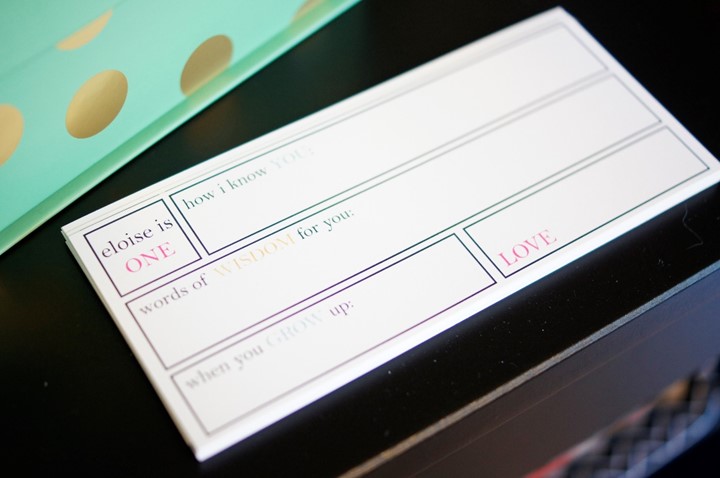
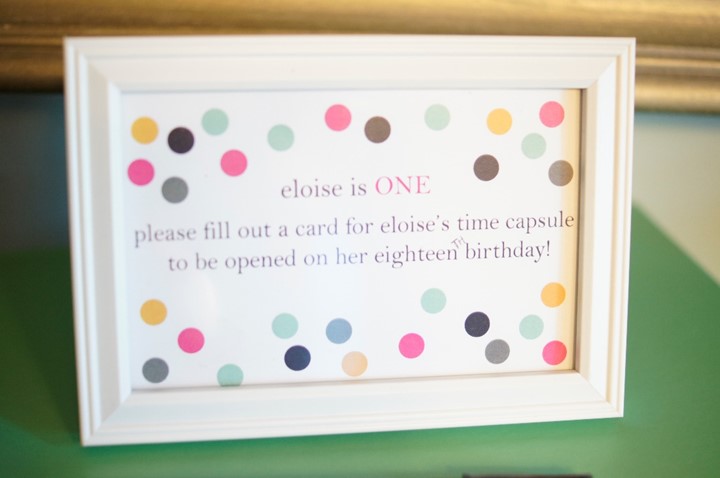
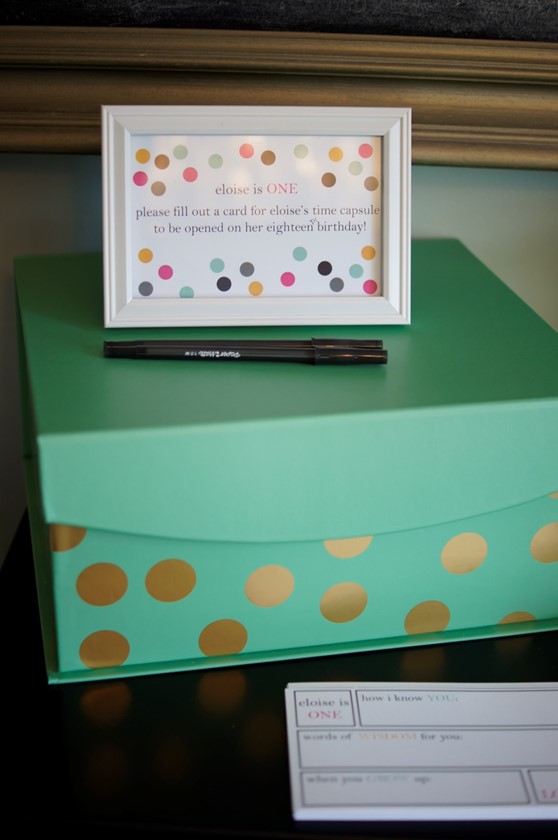
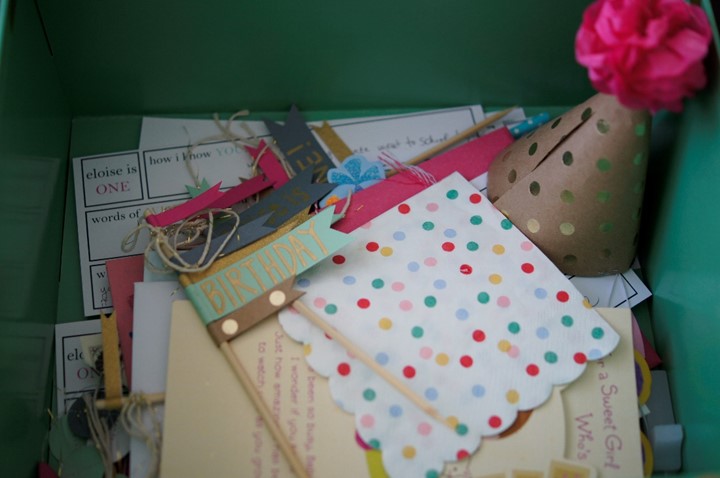
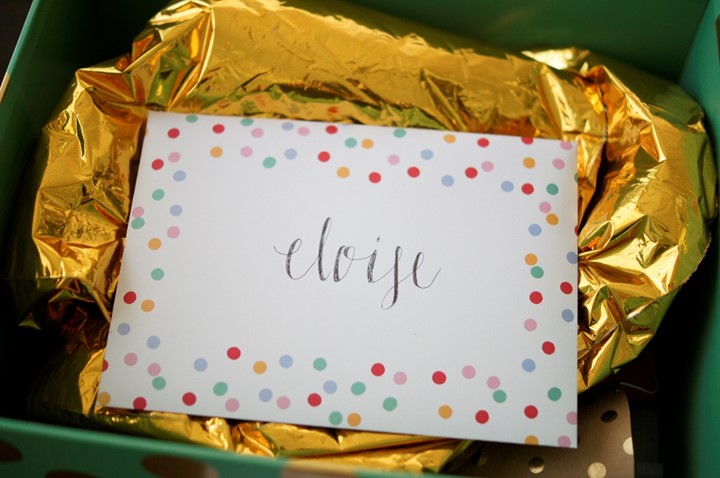
while perusing pinterest for party ideas, I came across a few pins for a party time capsule. I instantly fell in love with the idea & knew I wanted to do some type of time capsule for eloise to open on her 18th birthday. I found this great gold polka-dotted box at Home Goods & knew it would be perfect. the idea is that I am saving things from eloise’s first birthday party, storing the box, & giving it to eloise to open on her 18th birthday. pretty fun, huh? so far we’ve got all of her first birthday cards, the cake toppers, eloise’s party hat, the garlands from the highchair, the 3 balloon (since it doubles as an E for eloise!). plus, I thought it would be fun for each guest (well adult) to fill out a card for eloise so she could have all of them to read in 17 years (see picture below). I am hoping to add her ONE onesie that she wore on her birthday & for her first year photoshoot (still waiting on pictures from the photographer), a string that is the same length as her at one year, & perhaps some printed photos from her party & photoshoot.
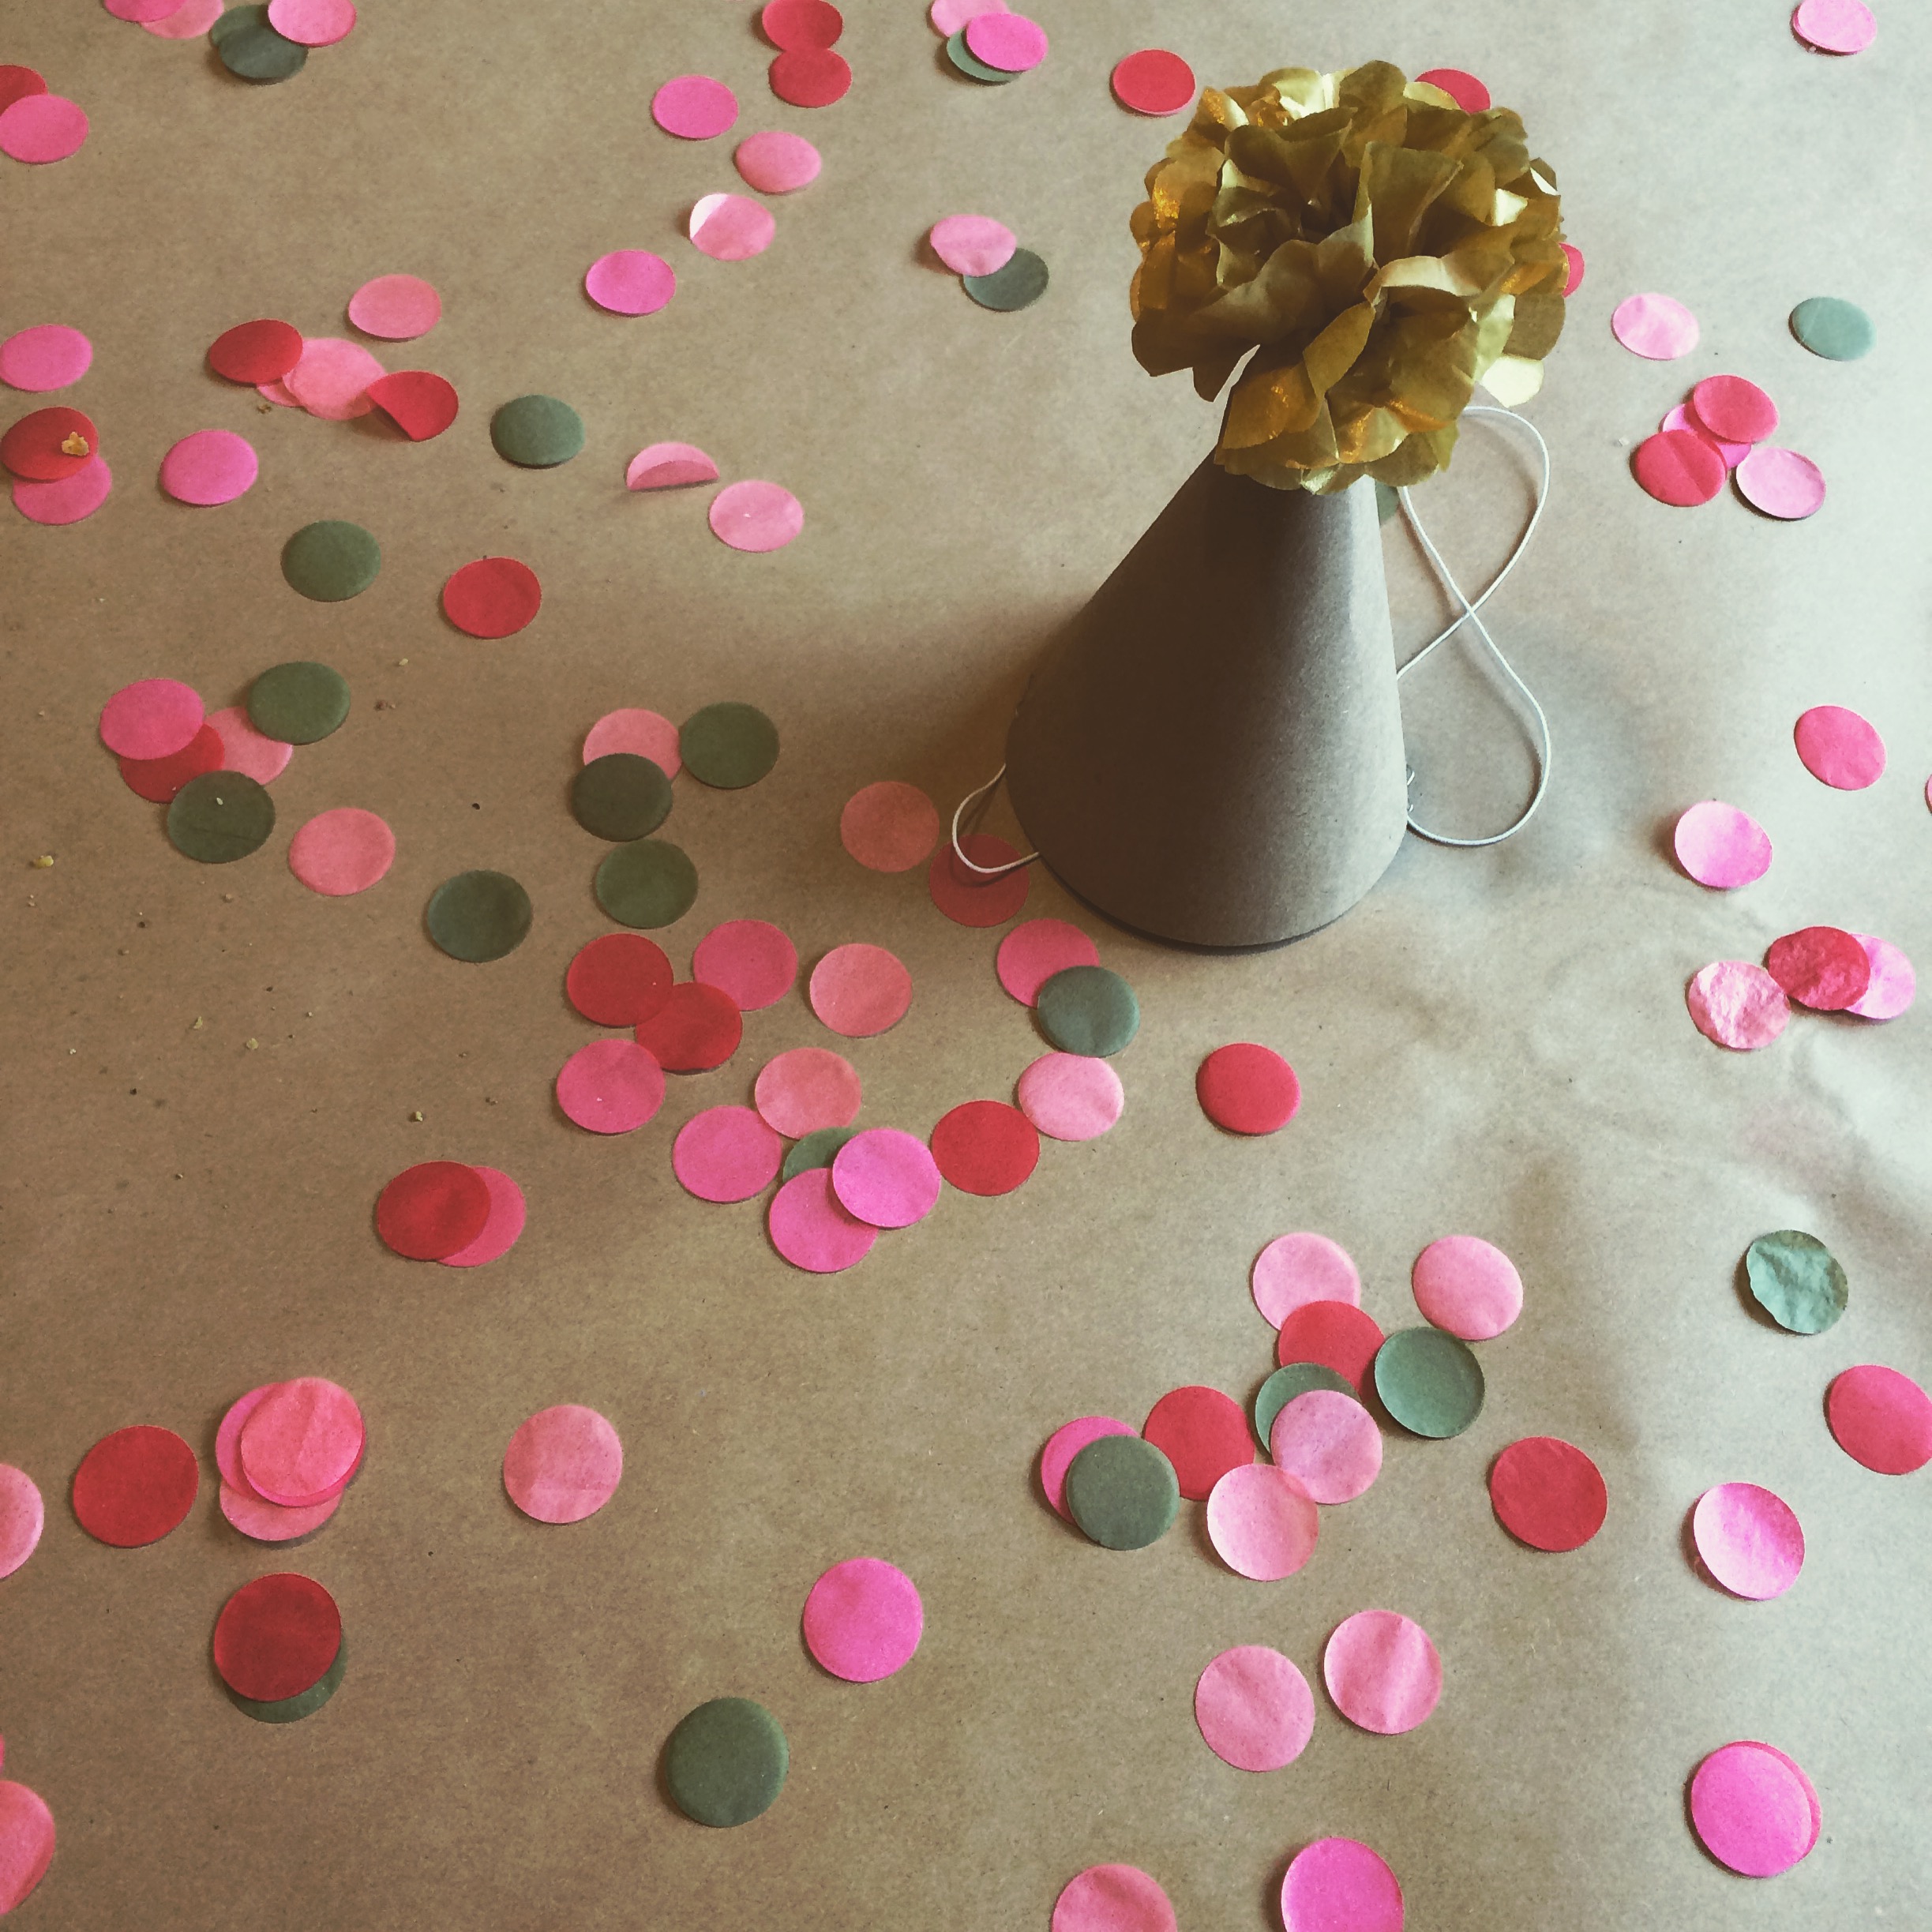
& finally, I always put a Kraft paper tablecloth out on our dining room table (where we serve food) whenever we have a big group of people over. it gives me peace of mind that the table won’t be destroyed by water or food, & it makes clean-up so easy! plus, it usually goes with the party décor since I almost always incorporate Kraft paper somehow. I keep this huge roll of Kraft paper around for occasions such as these (& use it to make table runners, signs, wrap gifts, the possibilities are endless!). for this party, I also added some confetti to the table that I picked up here (apparently it is the BEST confetti ever!).
20150809_020033119_iOS

{this is the only photo we have of the table – birthday party aftermath!}

I had SO much fun planning eloise’s party! &, if I do say so myself, think I did a pretty good job managing the décor & not going too crazy.

did you plan a first birthday party for your kiddo(s)?

M

this post contains affiliate links.

eloise {first birthday party!}

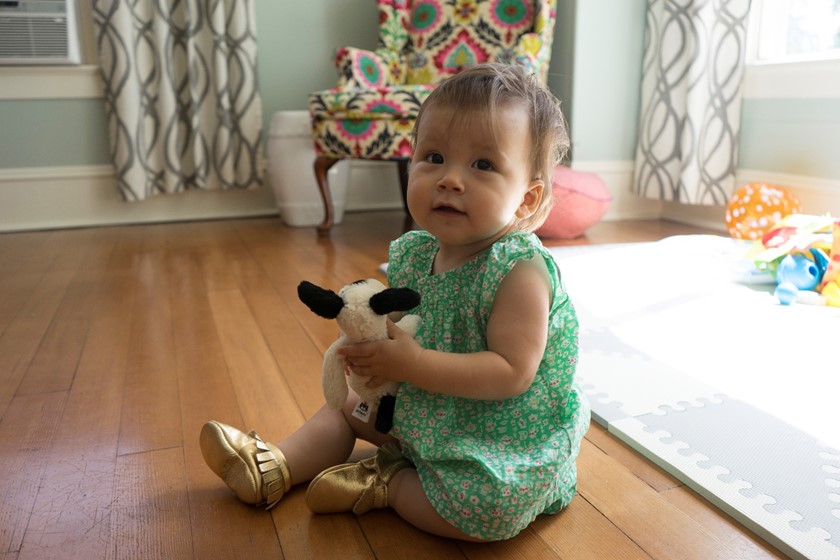
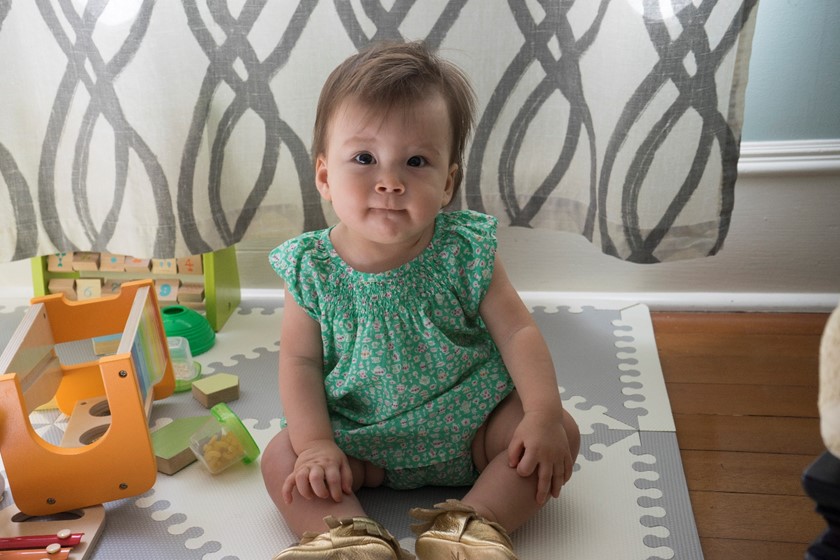
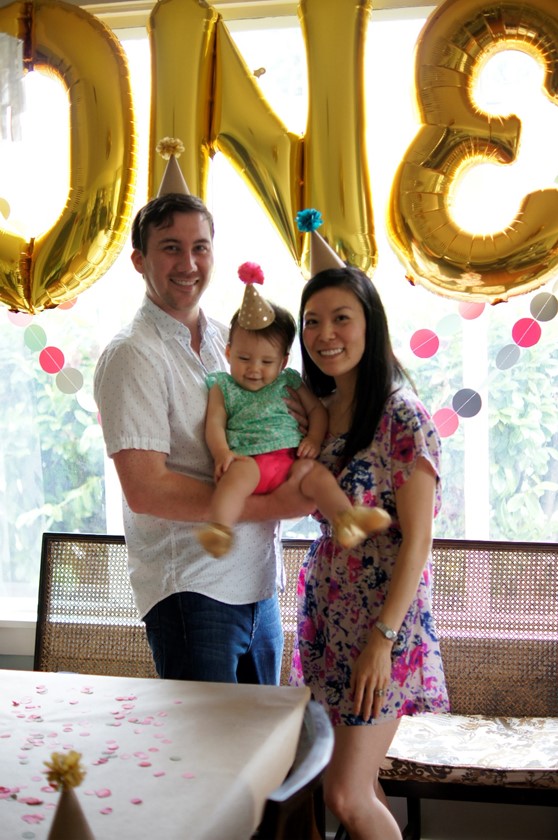
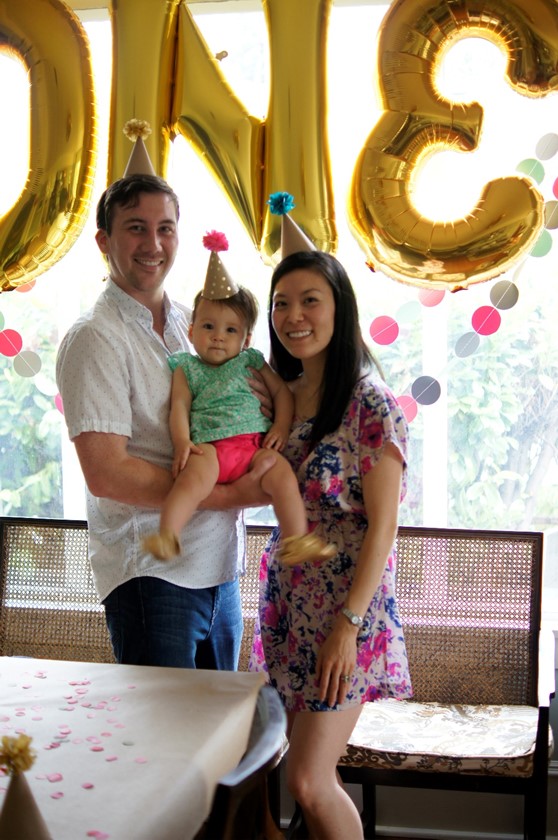
eloise turned ONE & we had such a fun time at her party! we were surrounded by family & friends to celebrate the first year of our daughter, & it meant so much to us that everyone came over. surprisingly, I wasn’t as emotional at all about eloise turning one (even on her actual birthday!) & I really thought I would be a mess. lots & lots of people have been asking for party pictures, so here you go. {warning: there are a lot of photos!}

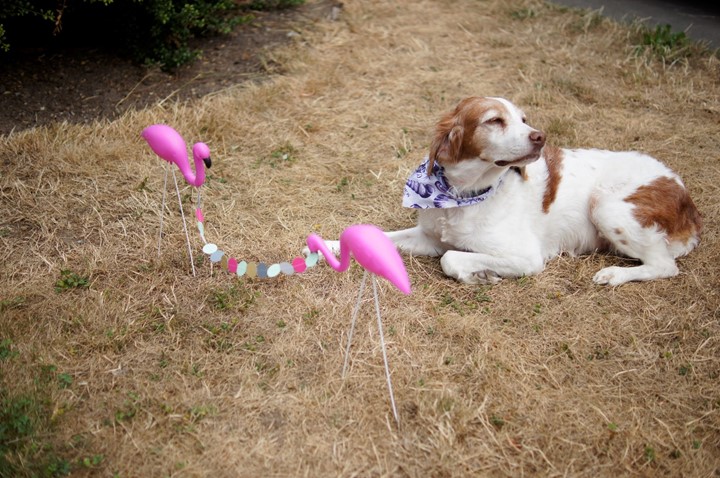
{we had lawn flamingoes & a dot garland to welcome guests (to our very dry lawn!). I meant to get the big flamingoes, but ended up ordering miniature ones instead (no longer available)!}


{this was a time capsule that I am doing for eloise’s first birthday. I asked each guest to fill out a card to include in the box. more details to come!}


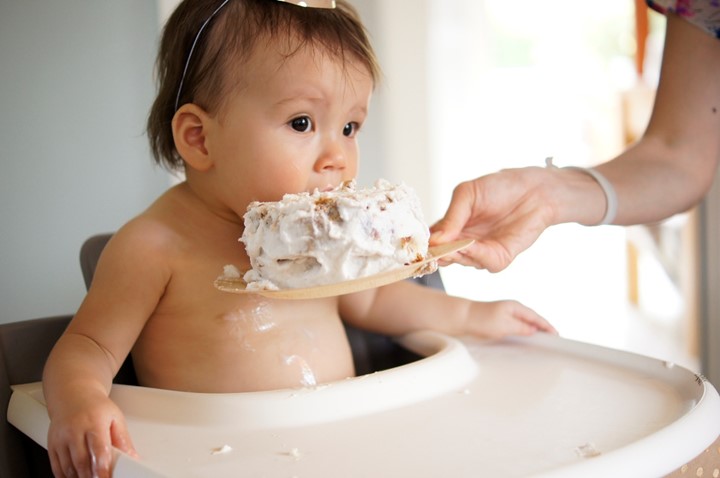
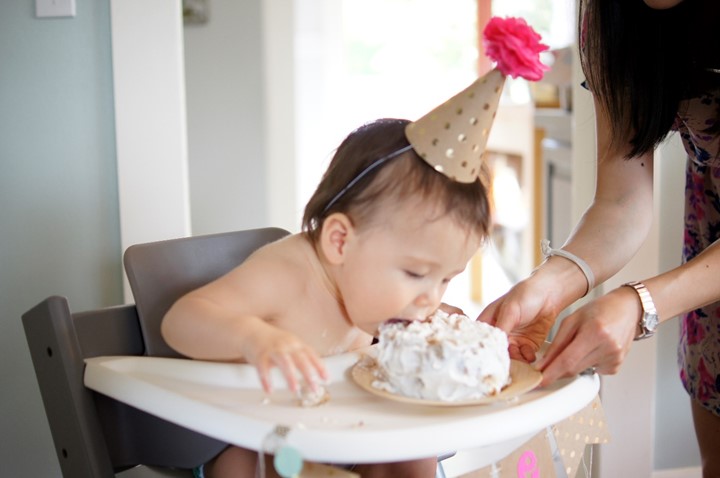
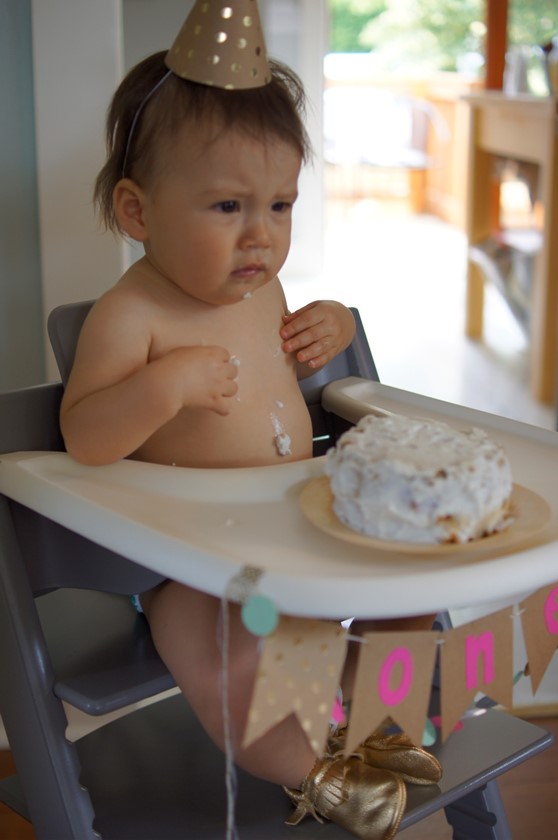
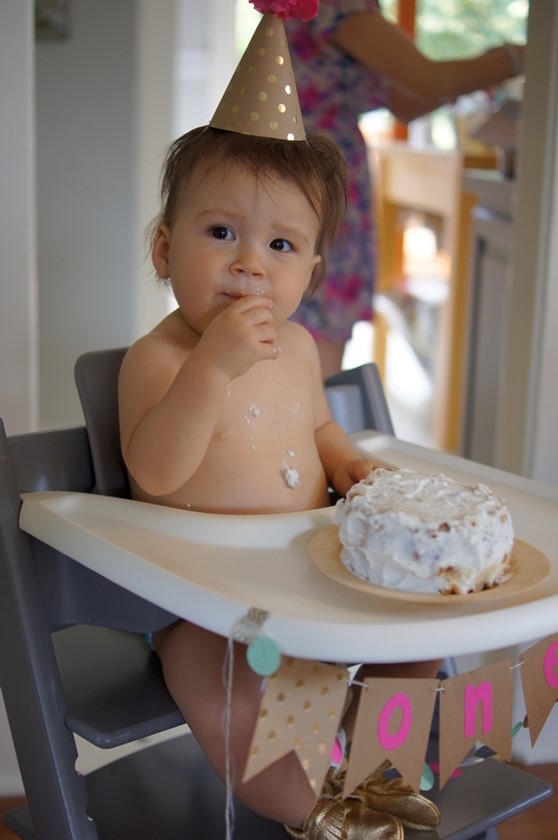
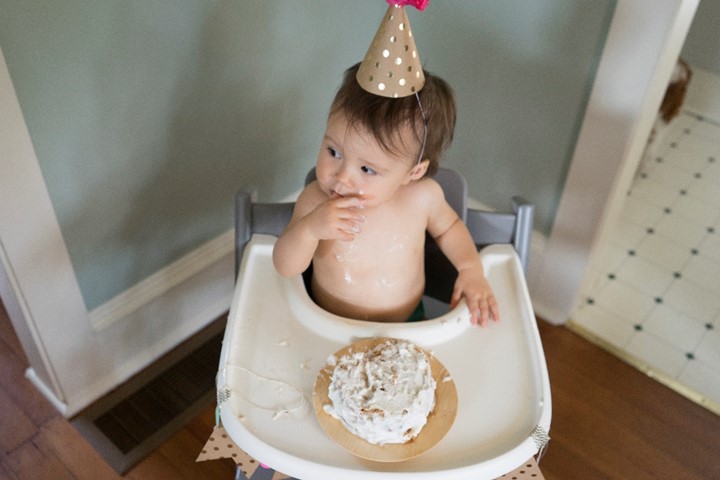
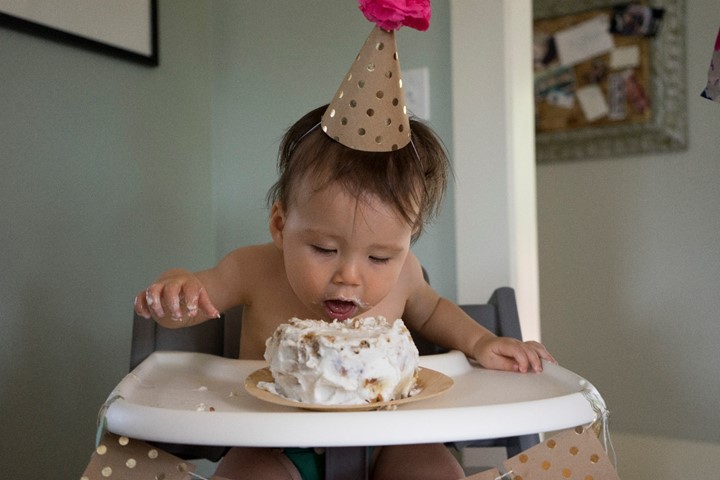
{eloise’s smash cake & other birthday cake.}


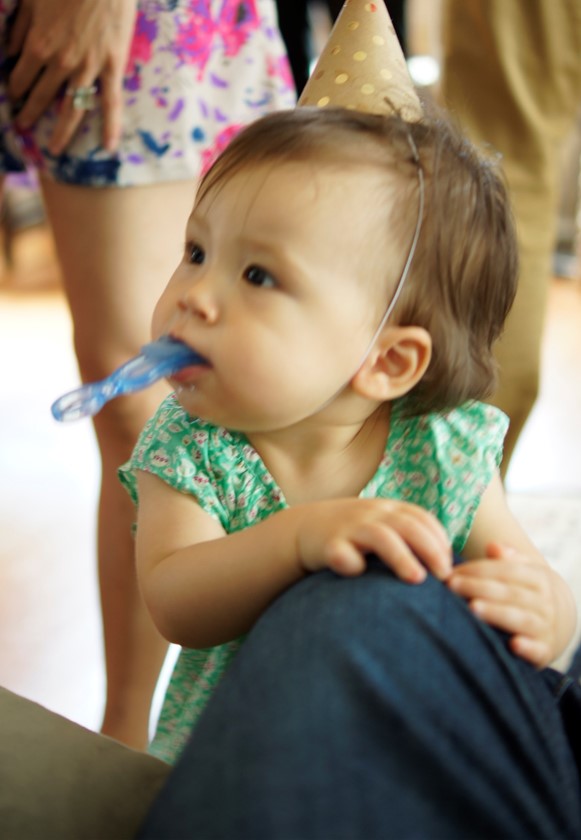
{just brushing her teeth & playing with mama’s phone at her party.}


I didn’t take the words of advice to really limit the guest list because we wanted this to be a celebration that included all of the family & friends that are important in eloise’s life. however, I did want to keep things casual & not have a strict schedule of events, so we just did two things: a fortune telling & the cake smash.

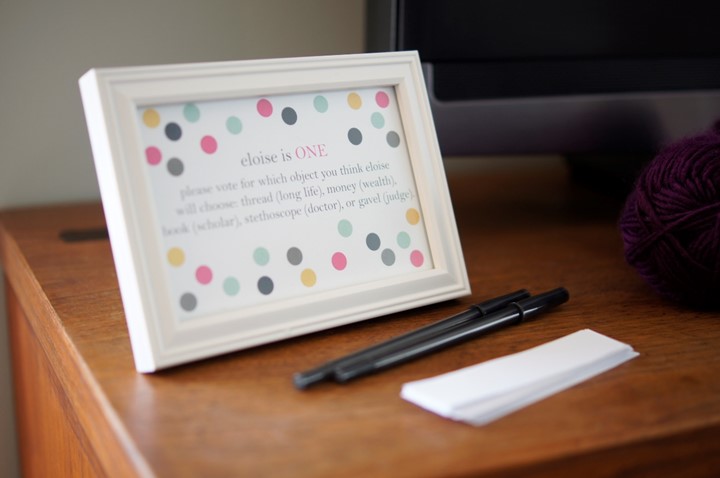
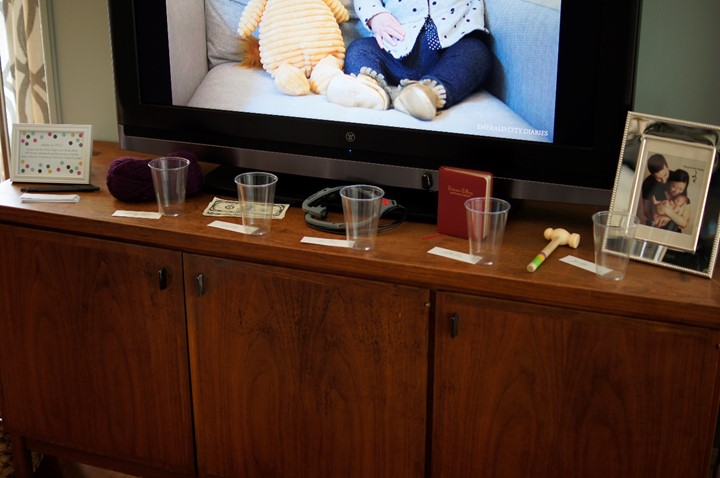
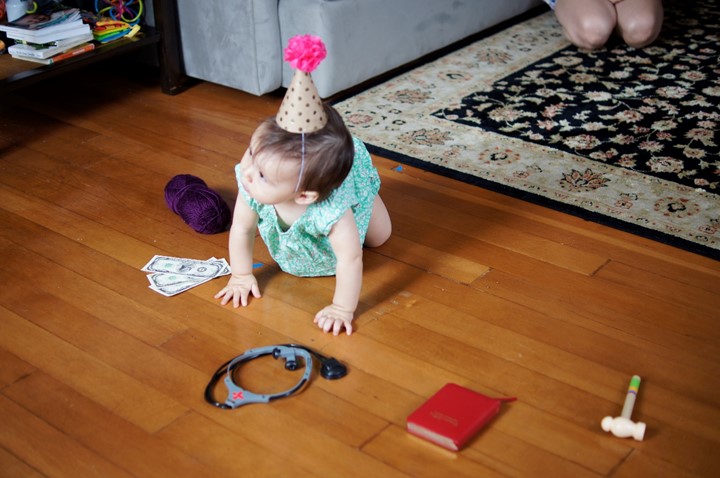
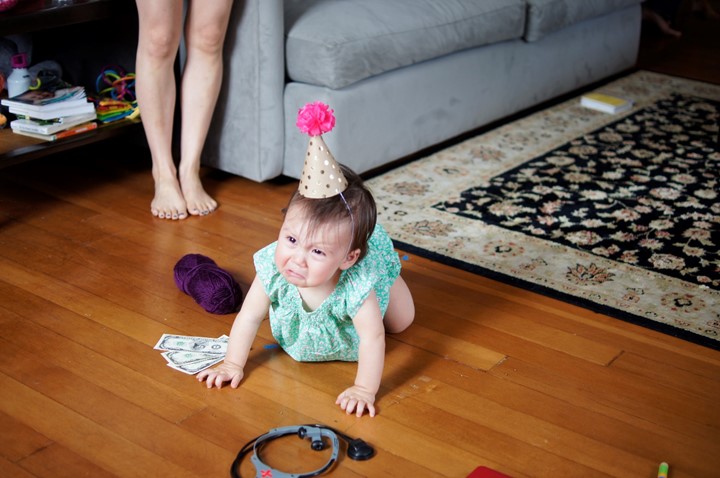
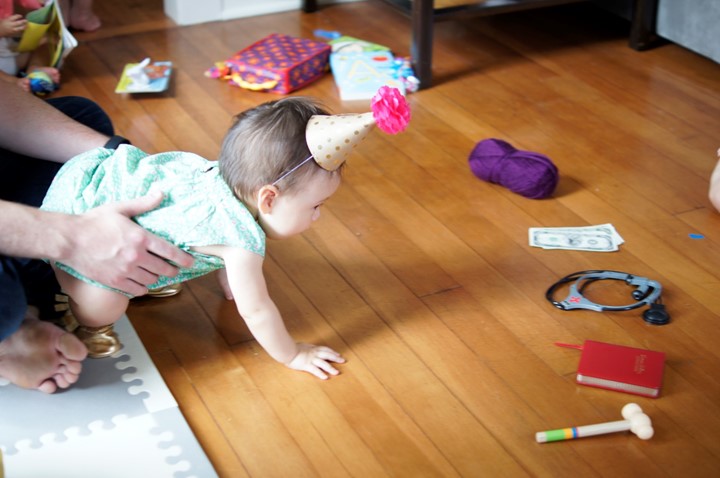
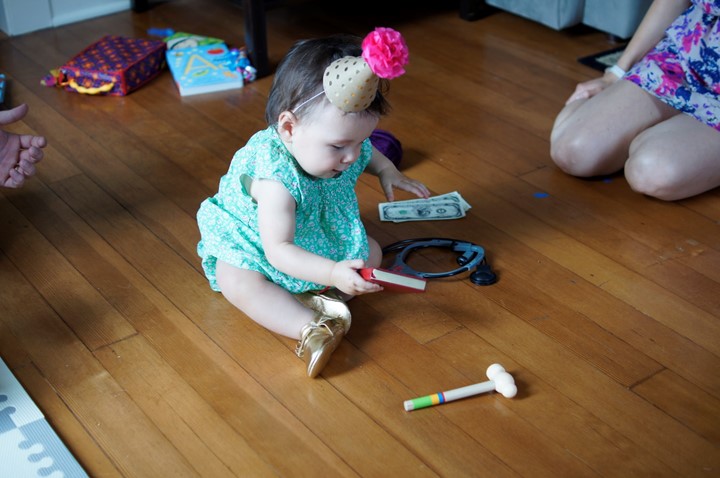
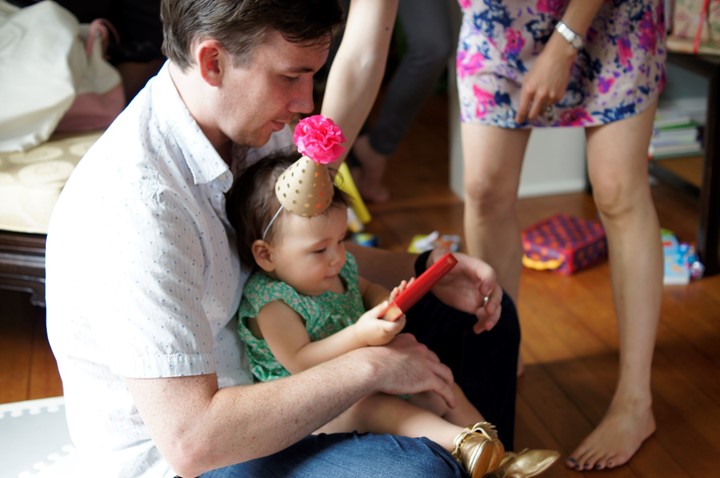
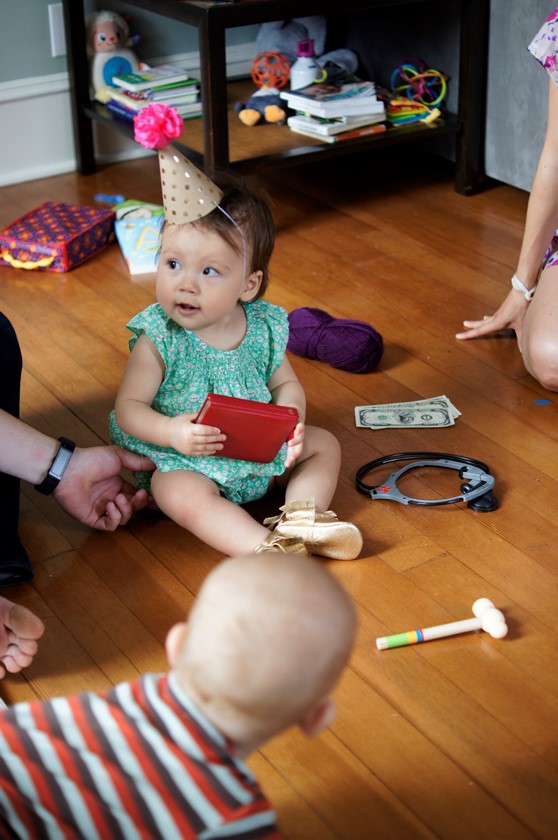
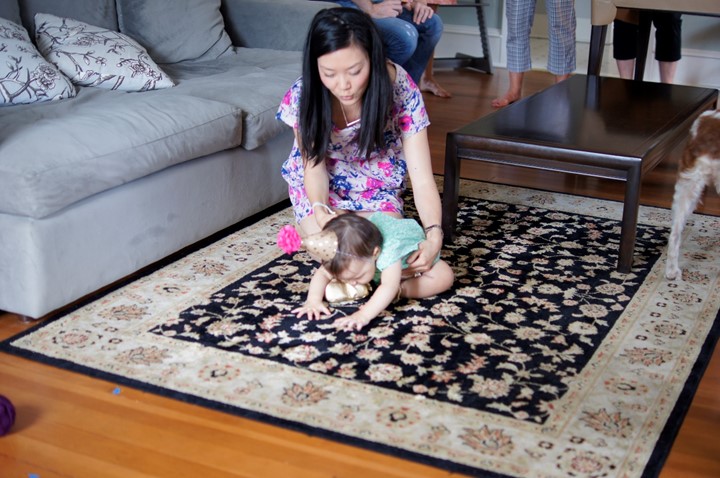
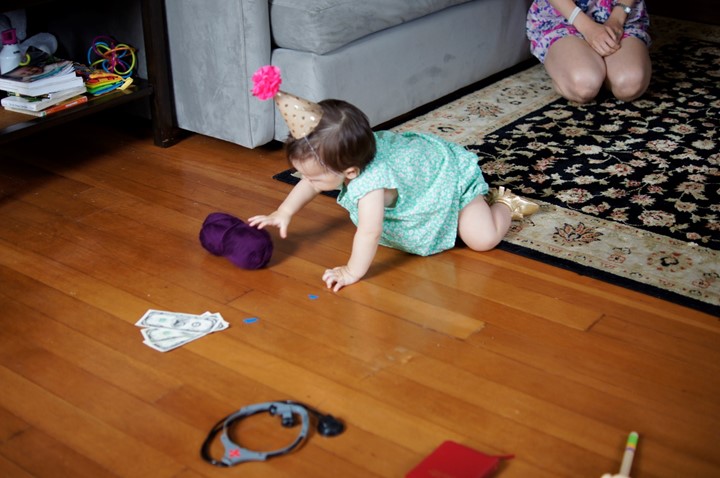
in the Korean culture, first birthday parties are a very big deal – traditionally & in the modern day. one of the birthday traditions – the Dol – is that a child is set in front of objects & picks one. the object that is chosen is supposed to be representative of that child’s future. since eloise is half-korean, we thought it would be fun to do at her party. we also incorporated a voting portion & each guest put his or her name in a cup to vote on which object eloise would pick. once she had picked an object, I drew a name from that cup & had a little prize. I tried to stick to the traditional objects & keep the number minimal so she didn’t get overwhelmed. needless to say, she was overwhelmed & got upset at the beginning! (funny thing is that another kiddo who had a Dol at her party also cried when she had to pick!) at first eloise went for the thread/yarn, but after getting some reassurance from her papa, she ended up choosing the book. big surprise! so, eloise is going to be a scholar in her future!


{we had the objects set out so guests could see them & vote for which one eloise would pick! you can also see a shot of the slideshow we had going on the TV – all of eloise’s weekly & monthly pictures.}


{she set out for the thread first, but before she grabbed it she stopped, looked up at everyone, & started to cry. aaron gave her some snuggles & then sent her back on her way. she picked the book & was pretty happy with her choice in the end!}

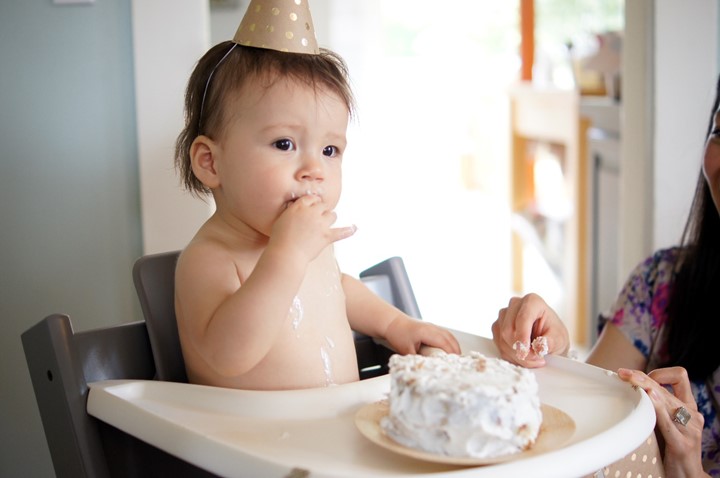
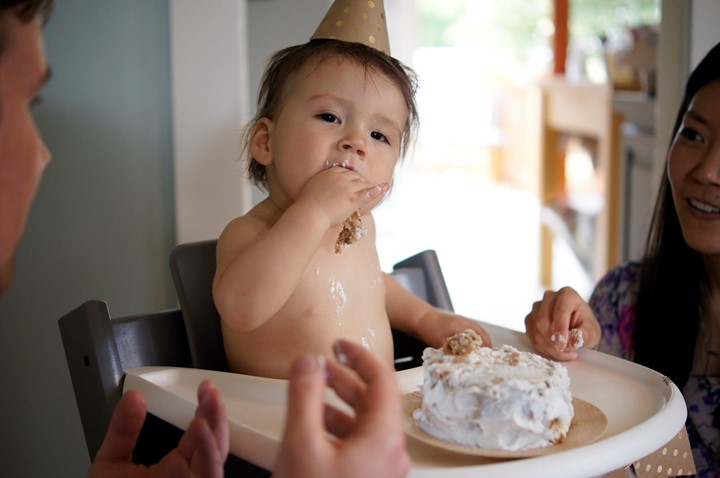
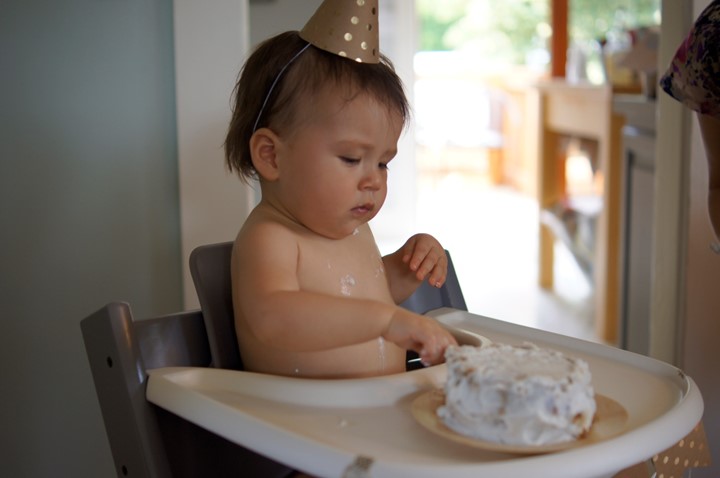
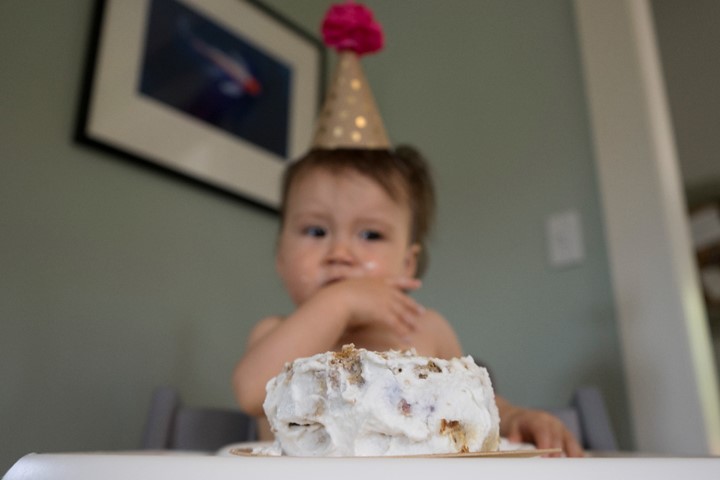
after the Dol we decided it was time for some cake. I got a simple vanilla cake from Whole Foods for the guests to enjoy, but aaron & I didn’t want to introduce eloise to sugar, especially in that quantity, on this occasion. {sidenote: I realize that I won’t be able to keep eloise away from sugar forever, but I might as well while she has no idea what it is!} so I made a sugar-free banana & blueberry cake (it was similar to a banana bread) with a whipped coconut milk frosting. the recipe made two 9 inch cakes which was way too much & I ended up cutting two small circle cakes out of one of them & stacking them on top of each other (& I froze the other cake). in hindsight, I should have made a whipped cream cheese frosting instead since this was the first time eloise had coconut & she didn’t seem to be a fan. she wasn’t super interested in the cake (which was a huge surprise to us all) & I think it was because of the coconut. I gave her just the plain cake later & she gobbled it up!


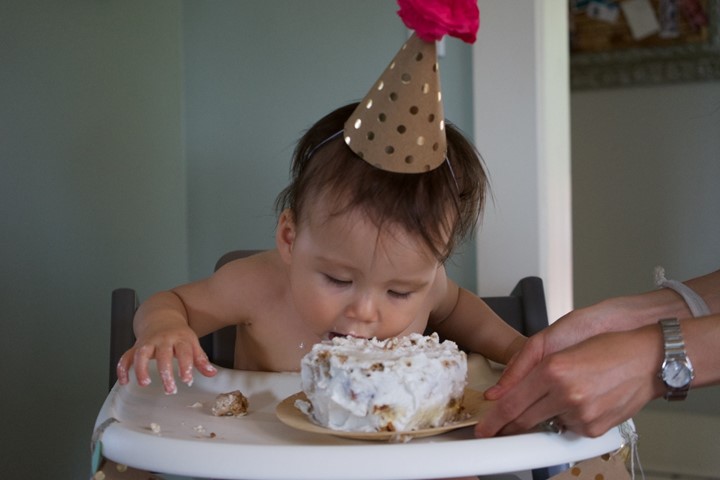
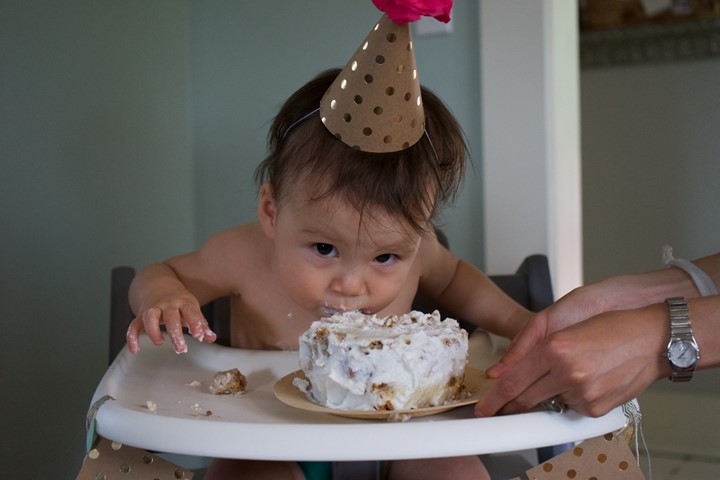
{these smash cake pictures are like the many faces of eloise!}


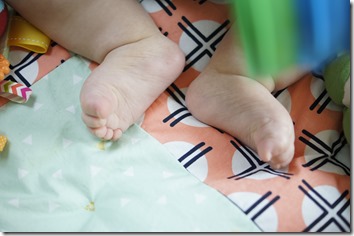
{I am not sure which one of these family photos I like the best. & I love that eloise’s feet are blurry because she was wiggling!}

& a huge THANK YOU to our friend jess & my brother-in-law ben for taking pictures at the party! I made sure to leave our camera out (thanks for getting some snaps jess!) & asking ben to bring his camera to take photos so that I didn’t have to worry about taking the photos during the party. plus, it means that aaron & I are in them which is really special!

happy happy first birthday eloise!

M

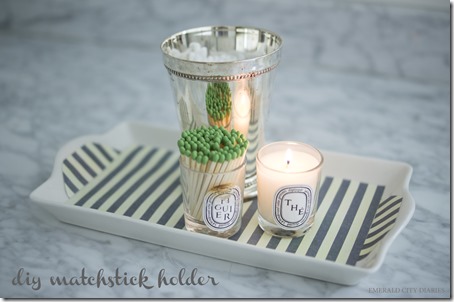
diy matchstick holder.

this project has been on my {insanely long} to do list forever, but I finally did it! & this is such an easy DIY that I feel silly even having a step-by-step tutorial. seriously.

I am not a huge candle burner (it scares me to death that I will accidently leave a candle burning!) but I do like having candles as décor. on the off-chance that I do want to light a candle though, I wanted a matchstick holder that looked nicer than a matchbox.

{pinspiration via The Organised Housewife}

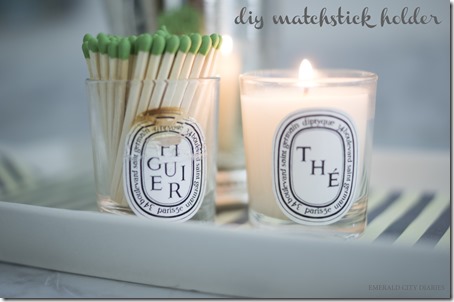
yep, this is a tutorial for gluing a strike pad on the bottom of a glass jar!

supplies:

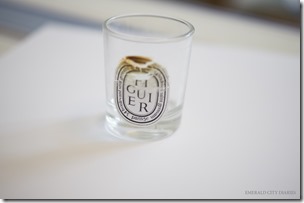
  • glass jar or container (I used a small Diptyque candle)
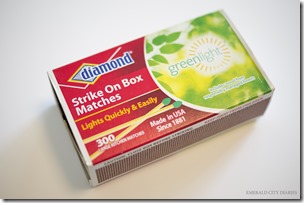
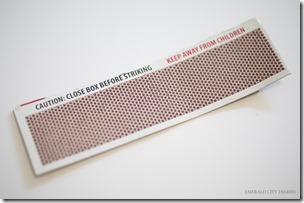
  • box of matches – you will need the strike pad & matches (you could also probably use sandpaper)
  • pencil
  • scissors
  • glue

SONY DSCSONY DSC

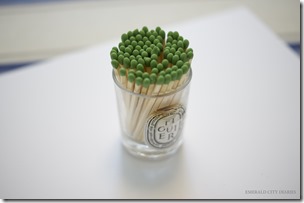
{after finishing the candle I cleaned out the wax using boiling water // I liked the green-tipped matches}

SONY DSCSONY DSC

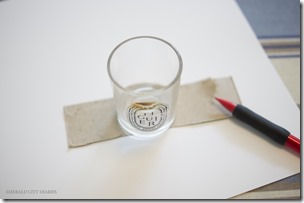
{cut out the strike pad // trace & cut to fit to slightly smaller than the bottom of the container}

SONY DSCSONY DSC

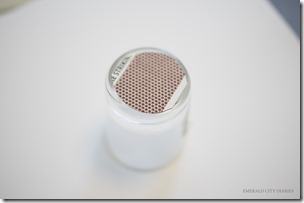
{glue the strike pad down & let dry // add matches}

SONY DSC

SONY DSC


voila! easiest DIY ever & it looks so much better on our bathroom vanity.

are you a candle lover?

M

this post contains affiliate links.

diy quilted playmat.

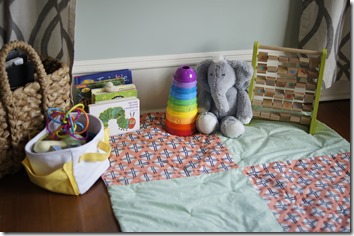
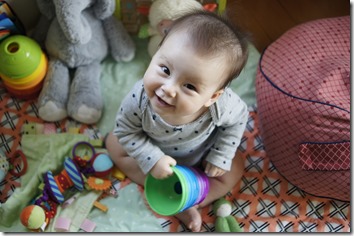
eloise has a corner of the living room where she can sit & play with her toys. it is nice because it is out of the way of any foot traffic & allows her to have independent playtime. when I first set it up, it was a hodge-podge of thick blankets & her play gym since she was still learning to roll & sit up. I didn’t like the way it looked, so I made something I liked instead!

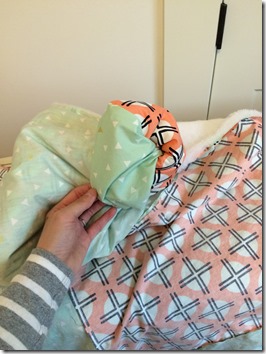
I knew I wanted something quilted to give eloise some padding on our hardwood floors. I really love hardwood, but when your baby is learning to roll & sit up, it can be brutal! I found this fun playmat on Purl Bee (via Pinterest) & made it slightly larger. I am really happy with the way this playmat turned out, I just wish I would have made it sooner!

{via Purl Bee}

supplies:

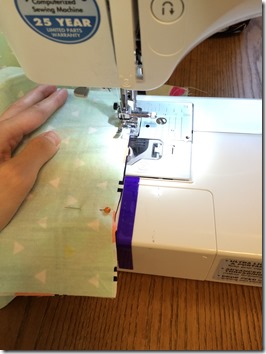
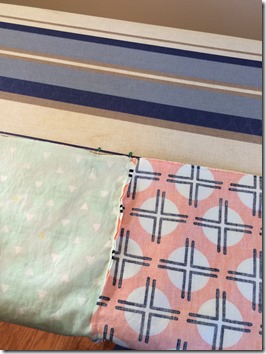
{sidenote: I apologize for the iphone quality pictures. I did this project in tandem with my chair & needed the SD card in my computer (rather than in the camera) so that I could see how the pieces went back on. I guess that’s the problem with multi-tasking!}

I (mostly) followed the directions on the Purl Bee post, but added an extra set of four squares (so my finished quilt was six squares on each side rather than four).

first I cut out all 12 squares. I typically have issues with the cutting part of sewing projects, but squares are nice because you can cut two sides & then fold it in half & then cut the remaining sides.

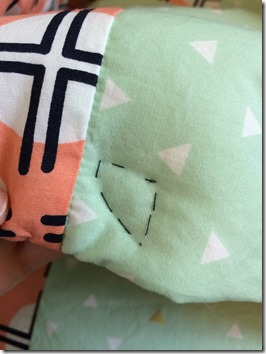
then I pinned & sewed two sets of squares together (one of each fabric) & then sewed three sets together (to make two sets of six). the seam allowances for this project were really small (in my opinion) & I wish I would have followed my gut & made them bigger from the beginning. I was worried about it the entire time, & lo & behold, I had two places on the quilt where I didn’t quite catch enough fabric & have to handstitch the area closed… oh well!

20150326_230717769_iOS20150326_231411711_iOS

I didn’t get a picture of this part, but then I made the quilt batting “sandwich” where you layer the fabric right-sides together on top of the quilt batting. then you sew around the entire perimeter, leaving a few inches to reverse the fabric right-side out. then you sew the hole shut by hand. I normally would top-stitch something like this to give it a nicer finish, but I didn’t think I could do a good enough job going thru the batting.

20150331_234444553_iOS

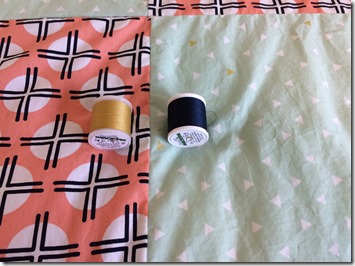
next it is time to quilt! I chose contrasting thread colors like in the original post. since I didn’t use exactly the same fabric though, I had to make up my own way to quilt the shapes. I had though thought about this when I bought the fabric, making sure I ended up with two patterns that would lend themselves to this type of quilting.

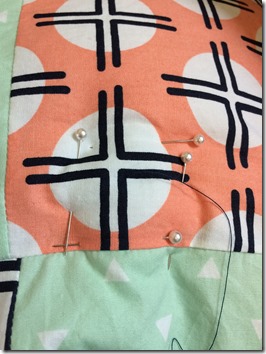
once I got started, I found that it was easiest to pin all around the area I was quilting to keep the fabric & batting from moving around.

20150401_202801573_iOS20150401_210907889_iOS

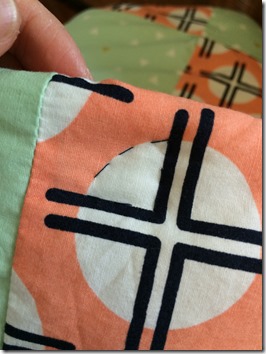
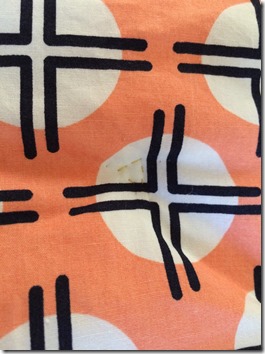
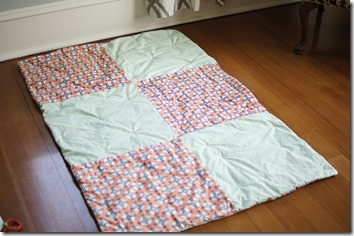
on the Clay Sundot fabric (peach) I quilted a quarter circle with navy thread. you can see what it looks like on the backside of the quilt too.

20150401_205544023_iOS20150401_205549677_iOS

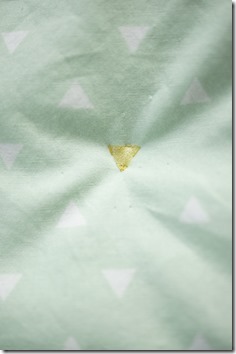
on the Triangle Token Medallion fabric (mint green) I quilted some of the gold triangles with yellow thread. you can (sort of) see what it looks like on the backside. I followed the advice to have some quilting at least every eight inches in order to keep the batting in place. for each square, I quilted the first shape & then measured out eight inches or so to pick the remainder of the quilted shapes.

_DSC602320150401_234837489_iOS

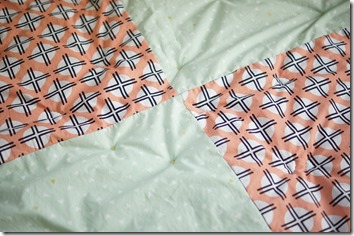
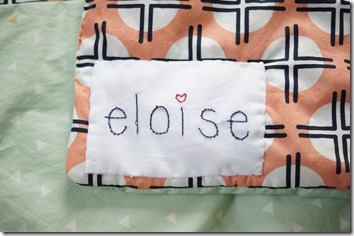
and the finished product! I really LOVE how this turned out & that I was able to choose fabric that was fun, but not too juvenile. it coordinates (sort of) with our living space & hopefully it will be a quilt eloise can use for years. I especially adore the embroidered name tag – a fun last-minute addition! (I just cut out two smallish rectangles of white cotton muslin that I had leftover from the chair project & ironed them flat. then I lightly traced out the letters spelling “eloise” before hand embroidering along the penciled lines. I stacked the second cotton muslin piece behind the embroidered one before hand sewing it onto the corner of the back of the quilt.)

_DSC6025_DSC6020_DSC6026

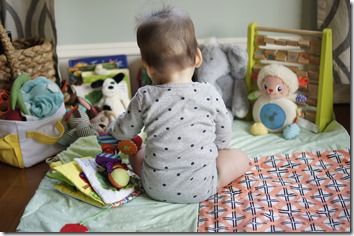
this is such a great place for eloise to play now when she isn’t rolling or crawling all around!

_DSC6027_DSC6032_DSC6034_DSC6036

how have you set up the playspace for your kiddos?

M

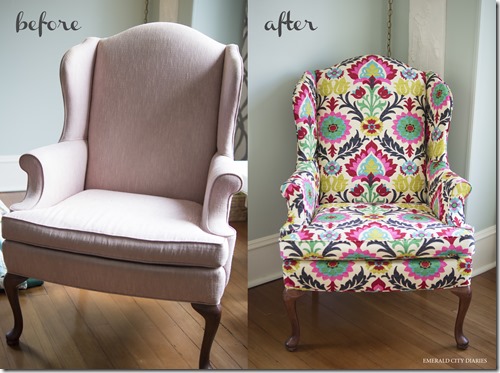
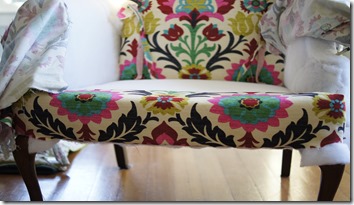
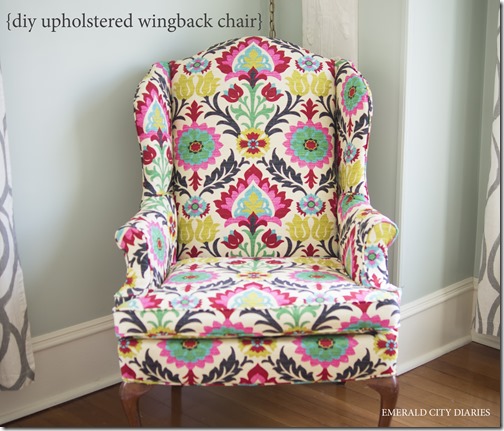
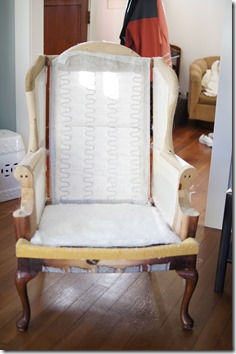
diy upholstered wingback chair.

SONY DSC

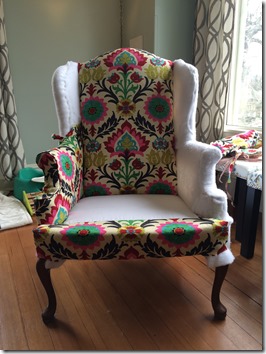
seriously, SWOON! I have a new favorite piece of furniture!

this project has been a long-time in the making so the fact that it is finally done is sort of a miracle. I have been interested in reupholstery for a while & completed smaller projects (upholstered lack tables HERE & our old headboard) but have been waiting to do a much bigger project.

I found this wingback chair on Craigslist almost three years ago (right after we bought our house). it was listed for $5 so we went to take a look & it was in such good shape. we gave the sellers $10 for the chair & delivery – such a good deal! then the chair sat in our basement. & it sat & sat. I finally decided on a fabric & bought it, & then had buyer’s remorse & bought another fabric. it moved with the other things into storage last spring to make way for the house renovation & then came back & sat in our living room. finally in january while aaron was on paternity leave I decided it was do or die. I had to at least start to reupholster it or I knew I never would. & three months worth of naptimes later it is finally complete!

I found lots of tutorials on Pinterest but the main ones I used are listed below:

  • Basic Chair Reupholster Instruction: here & here
  • Cording Tutorial: here
  • Ply-Grip (Curve Ease) Tutorial: here

reupholstering is a pretty meticulous process, though you can almost always go back & do something over again if it doesn’t work out right the first time (you just have to be willing to pull out all of the staples again!). I was surprised how quickly the chair came back together since taking it apart took forever.

supplies:

  • chair
  • upholstery fabric – I used 6ish yards of this fabric
  • staple gun & staples – we have one that attaches to our air compressor & I highly recommend that for ease of use (though it is loud to run)
  • sewing machine & a zipper foot (to sew cording)
  • good (fabric) scissors
  • upholstery thread to match fabric – I used Coats & Clarke
  • seam ripper
  • piping/cording (if you don’t reuse the original)
  • zipper for cushion cover (optional – you could either reuse the zipper like I did or cover the cushion without a zipper)
  • tack remover
  • rubber mallet – I didn’t have one of these & I wish I would have (you can also use a hammer & towel)
  • needle-nose pliers
  • cardboard upholstery tack strip
  • upholstery tack nail strip
  • Ply-Grip (Curve Ease)
  • quilt batting
  • upholstery dust cover (optional – I reused the original)
  • camera – for taking lots of pictures as you take the chair apart!

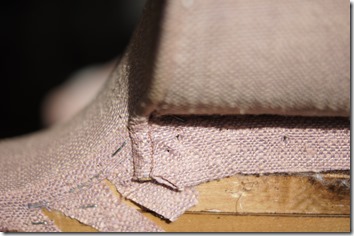
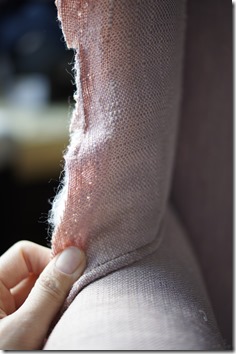
after finding your chair & choosing your fabric, the first part of reupholstering is to un-upholster your chair. this is really time intensive as there are likely 7 million staples, plus you want to document as much as you can since you will want to put the new fabric & pieces on the exact way they came off. I took pictures as I removed pieces (hundreds of pictures which I will spare you!) but in hindsight & for a few particular places I wish I would have set up a tri-pod & videotaped those sections. just something to think about. also, as I removed pieces of fabric, I annotated on the front with a Sharpie about how it went on – like whether there was a tack strip on one side, or piping, or whatever.

_DSC5683_DSC5688

{the arm rest & the wing.}

_DSC5869

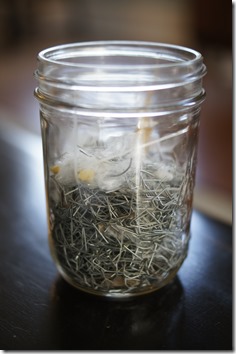
{I used a jar to contain all of the old staples. that’s a lot of staples!}

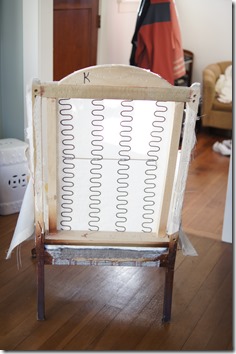
once your chair is completely stripped, you will want to check the structure for any damage. unfortunately, you may get to this point & figure out your chair isn’t worth reupholstering… that would be a bummer. hopefully you find that the structure is in good shape as well as the bottom springs, etc.

_DSC5858_DSC5860

{the front & back of the chair.}

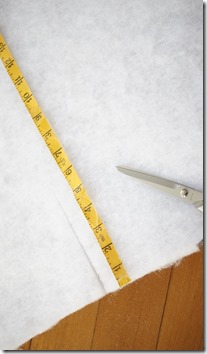
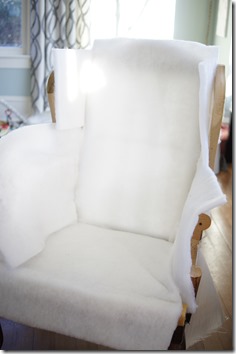
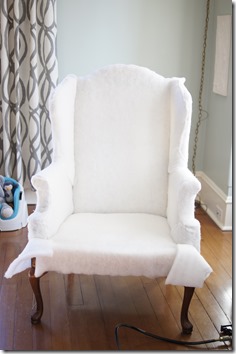
next you’ll want to cover your chair in at least one layer of batting (I did two on the wings & sides). you can also do a layer of foam underneath the batting. I didn’t because there wasn’t any originally, except for on the back upper cushion which I reused since it was in great shape. the nice thing about reupholstering, starting with batting, is that you don’t have to cut pieces exactly right. as long as there is enough material to cover the section, you can cut away any extra as you are stapling. & if you didn’t cut enough material to begin with, you can always add without there being weird seams since it will all be covered with fabric anyways.

_DSC5862_DSC5863

{cutting the batting & attaching it to the chair.}

_DSC5870

{stapling all of the batting in place.}

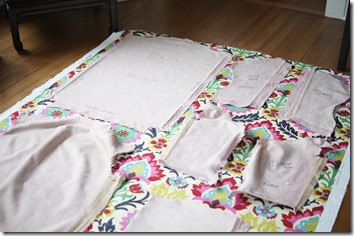
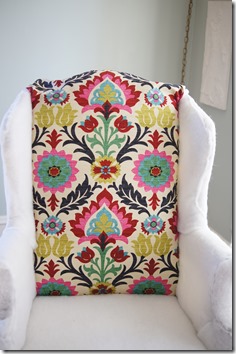
then you will want to lay out all of your pieces onto your new fabric & use them as patterns. if anything, you will want to cut things big because you can always trim them down. also make a note of extra cuts or jagged edges on the original pieces – these places are where the fabric had to be cut in order to fit into or around part of the chair structure & you’ll want to duplicate them as best you can. also, if you have a pattern like the one I used where you want specific parts of the fabric to be on specific parts of the chair, you’ll want to cut all of your big pieces first (lay them all out to make sure you have enough fabric) & then use the extra fabric for smaller pieces where the pattern doesn’t matter as much. for me, the front & back pieces, the front & back of the cushion cover, & the very front bottom edge of the chair where important for me to have the same floral piece centered; so I cut all of those pieces first.

_DSC5701

{strategizing with the fabric.}

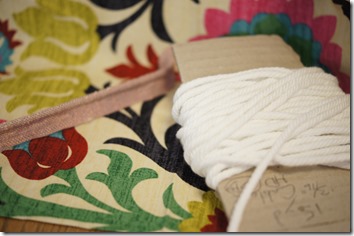
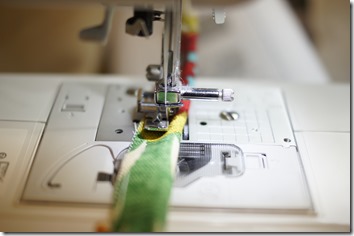
I sewed all of my piping before I really started putting the chair back together. I needed different pieces of piping along the way & I figured it would be nice to have it all done from the beginning & not have to stop & sew some together if I needed it for a certain section. I used the tutorial linked above. as long as you have a zipper foot for your machine, you are pretty much good to go. I decided against making bias strips since there weren’t a lot of curves in my chair pieces where piping would have gone. for the chair cushion I was going to do bias strips, but the original cushion didn’t have separate pieces of piping (it was part of the front & back seat fabric) so I just followed the original design. 

_DSC5864

{supplies for piping.}

_DSC5865

{sewing piping with the zipper foot.}

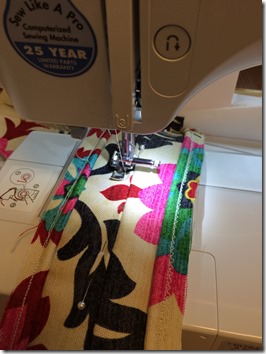
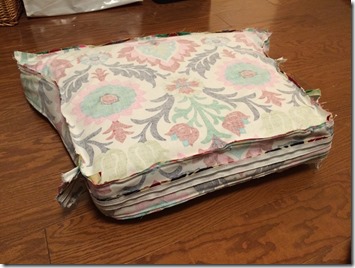
I also sewed the cushion cover at the same time I did the piping since I was into the sewing groove & needed to do piping for the cover anyways. I was able to re-use the zipper & the cushion which was helpful. down the line I may replace the cushion, but for now it works.

20150311_234241203_iOS20150317_032237872_iOS

{sewing in the zipper & pinning the cushion pieces.}

when it came to attaching the fabric to the frame of the chair, I started with the front part of the chair. it was one of the largest pieces, but also one of the easiest to put on. from there I moved down to the bottom front edge of the chair where there was a piece that had to be sewn together (one piece was printed & wraps around the front edge, & the other piece was plain cotton muslin & ran under the cushion). I then moved to the arms of the chair. the two pieces that covered the arms had sewn pieces (the front oval shapes on the arm rests) in order to more easily attach the piping around that section I assume. because it was sewn together originally, I did the same thing when it came to reattaching. up next were the inside wings, & then the outside wings. after I did the bottom sides of the chair. the last big fabric piece was the back. lastly I did the piping that ran along the entire bottom edge, & finally the bottom dust cover (which I was able to reuse the original).

_DSC587220150319_224940515_iOS

{adding the back & side pieces.}

_DSC5907

{attaching the bottom piece.}

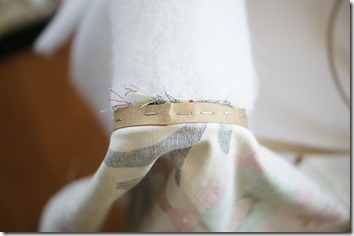
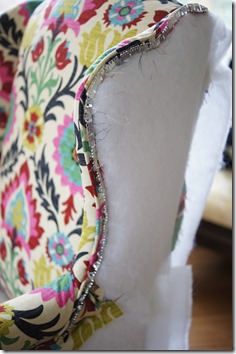
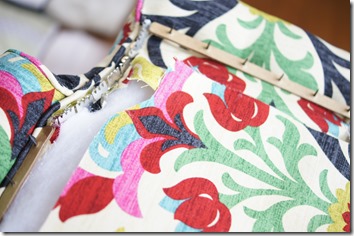
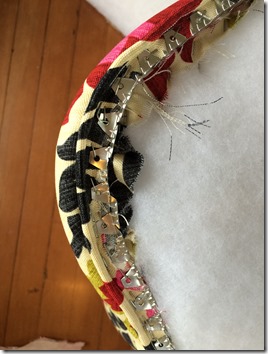
there are a few places that I used extra upholstery pieces to help get clean lines or edges using materials listed above. I used the cardboard tack strip (essentially a skinny piece of flexible cardstock) along the top curve of the arm rest, along the top of the piping on the inside of the chair wings, & in the top few inches of the chair back. I used the Ply-Grip (after watching the video) along the outsides of the wings, directly underneath the bottoms of the arm rests, & along the back curve of the top of the chair. & I used the tack nail strip along the top & sides of the bottom outside pieces, & along the outsides of the big back piece.

_DSC5910

{cardboard tack strip on top of arm.}

_DSC5985

{Ply-Grip on outside wing.}

_DSC5986

{Ply-Grip & nail tack strip on outside bottom.}

20150319_232623391_iOS

{Ply-Grip along the back curve.}

a lot of reupholstering is just mimicking how the pieces were originally attached, so photos or video of the original chair & it’s disassembly are the most valuable in a project like this. you just have to go for it! I had to break my work over three months worth of naptimes & a few chunks of time on the weekend because of the nail gun. I could run the air compressor during eloise’s naptime & luckily the compressor doesn’t have to run the entire time you use the staple gun.

this is one of my favorite DIYs yet & now I want to reupholster everything we have in this gorgeous fabric!

SONY DSC

have you reupholstered anything recently? I’d love to see!

M

this post contains affiliate links.

diy easter baskets.
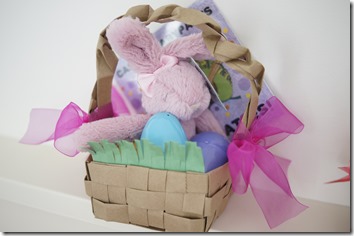
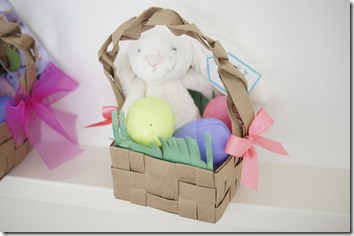
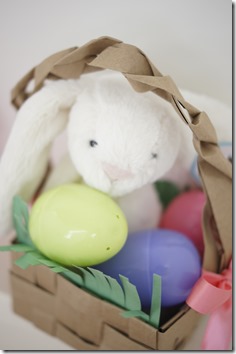
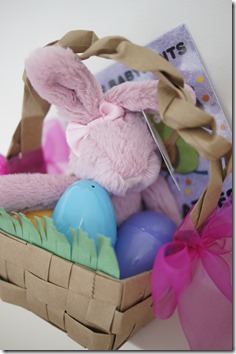
just wanted to share a pretty quick & easy DIY easter basket made from a paper grocery bag before Easter weekend. I made two last week – one for eloise & one for our niece charlotte. the finished basket is pretty small (like the size of a CD case) but perfect for just a little stuffed rabbit & some eggs.
DIY easter basket

{original pin: The Elli Blog}

_DSC5991_DSC5990


supplies:

  • paper bag
  • hot glue gun & glue sticks
  • scissors
  • ruler
  • pencil
  • ribbon (optional)
  • green construction paper (optional)

I followed the tutorial linked above (it’s a pretty good one). I always forget how hard hot glue can be to use & gave myself a blister, so be careful! I also found the handles to be tricky to attach.
I added a bit of grass to two of the sides of the basket without handles. I cut a piece of paper the same width as the basket & then randomly cut the edge of it (a few inches) to make blades of grass. then I trimmed the bottom of the paper & glued it inside the basket so the blades stuck out. repeat for the other side.

_DSC5994

{a little white bunny for eloise}

_DSC5993

{a little ballerina bunny for charlotte}

note: both bunnies are JellyCat.

how are you celebrating easter with your little ones?

M

a pinterest christmas: clothespin advent calendar.

Pinterest_Christmas_Logo

welcome to the final week of A Pinterest Christmas! see the first week’s post here, second week’s post here & the other years’ crafts here.

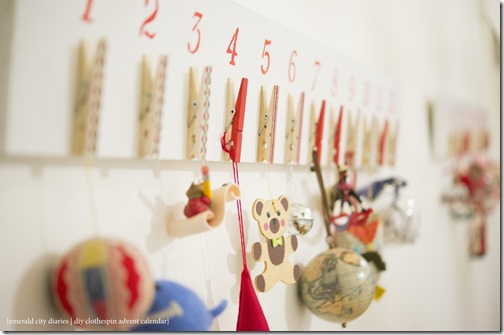
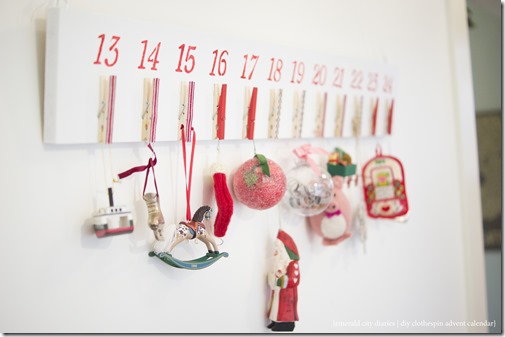
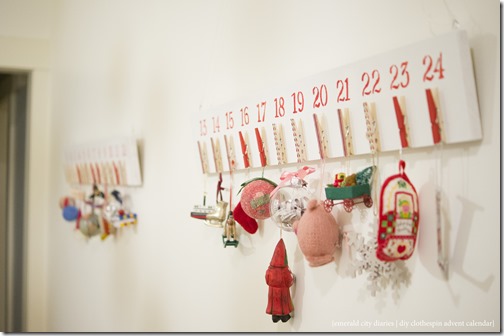
much like last year, i wanted to share my love of advent calendars by creating another one {you can never have too many, right?}. last year’s was focused on fun activities to celebrate the Christmas season, & this year’s focus is small gifts, or in my case, ornaments to hang on the tree each day.

in theory it would have been best to share this project during the first week {& it was my intention!} but painting the numbers took so much longer than i had anticipated. oh well, right? also, the original pin for this link wasn’t a tutorial, so i had to make things up as i went along.

DIY clothespin advent calendar

{original Pinterest link – candy cane advent calendar}

supplies:

  • wood board {i used a 1×6 Poplar board & had Home Depot cut it in half)
  • fine sandpaper
  • white paint {i used Behr primer & paint from this project}
  • paintbrushes & roller
  • 24 clothespins
  • number stencil {i used a Martha Stewart set i picked up from Michael’s with a coupon}
  • red craft paint {you could use any color, but i used red for some of the clothespins & the numbers}
  • sponge brush
  • wood glue (i used Contact Cement)
  • ribbon {i used two different kinds}
  • glue (i used Fabri-Tac)
  • picture hangers or d-rings

SONY DSC SONY DSCSONY DSCSONY DSCSONY DSCSONY DSC

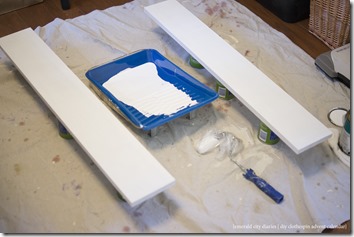
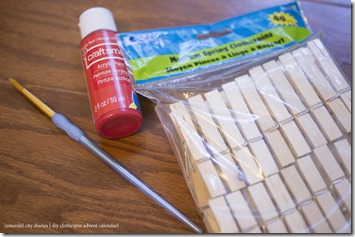
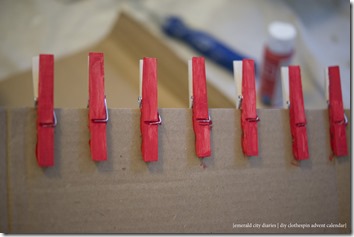
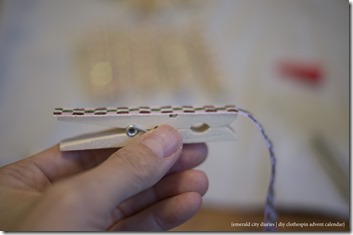
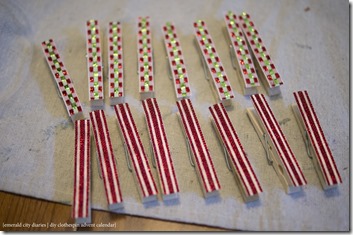
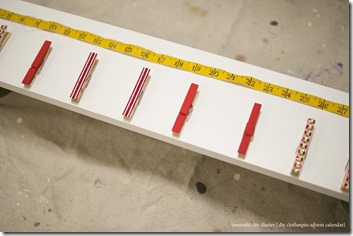
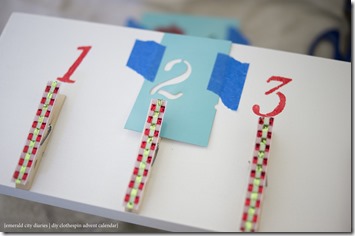
i started by prepping the boards – lightly sanding & rolling on three thin coats of white primer/paint. {note: i decided to do two boards instead of one long board for storage reasons.} then i prepped the clothespins: i painted about a third of them red & glued ribbon to the remaining pins. i found that clipping the pins onto a thick piece of cardboard made it much easier to paint; i also decided that i would just paint the top part of the pin & not the bottom. for the ribbon, i applied a thin coat of Fabri-Tac to the pin, laid a piece of ribbon down, & then cut the ribbon {as opposed to measuring & cutting all of the lengths of ribbon first & then trying to glue them on exactly right}. i laid the pins down on each board {12 per} & tried to get them as equally spaced as possible. then i glued each pin in place on the board.

SONY DSCSONY DSC

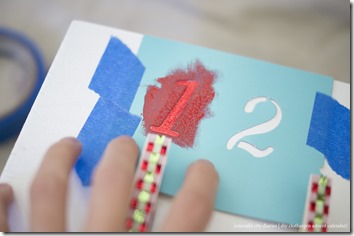
once the pins were adhered, it was time to stencil the numbers. it probably would have been easier to stencil before adding the pins so that the stencil could lay completely flat {or i should have just cut the bottom of the stencil!} but i thought it would be easiest for spacing to put the pins exactly where i wanted them & then add the numbers above. the first few numbers went really well with the stencil since the cardboard on the stencil was still fresh & not full of paint. i did every other number to begin with in order to make sure i had enough room to tape the stencil down without disturbing a previously painted number. it got trickier once i got into the teens & twenties since i needed the 1 & 2 stencil for each of those numbers – this is where the project really slowed down since i had to wait for the paint to dry on both the board & the stencil. in hindsight, i may have bought a plastic stencil instead that you could wipe the excess paint off of between numbers. i only did one coat of paint for each number {so there is a sponge-paint quality to the numbers}, but did also go in with a small paintbrush to touch up the edges where the stencil bled.

SONY DSC  SONY DSC SONY DSC     

what i love about this calendar is that it can be different each year. one year it could hold little gifts for every day & another year it could hold handwritten cards about the reasons why we love the Christmas season! this year i thought it would be fun to leave 24 ornaments off of the tree & then add a new one each day until Christmas. one day in a few years i know eloise will love the tradition of this advent calendar!

For more projects and inspiration, check out the other blogs in the A Pinterest Christmas series [Emerald City Diaries | Greg & MaggiThe Gilbertson Family | The Pena Family | This Grey House | Without A Doubt]. Share your Pinterest Christmas projects with us! Comment on one of our blogs, link back to a post, or use #PinterestChristmas2014 on Instagram!

M

a pinterest christmas: eloise’s first ornaments.

Pinterest_Christmas_Logo_thumb[8][8]

welcome to the second week of A Pinterest Christmas! see the first week’s post here & the other years’ crafts here.

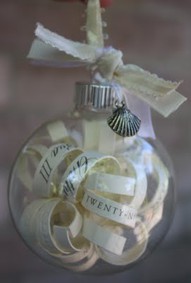
in celebration of a baby’s first Christmas there are always lots of ornaments to choose from. aaron & i have our own bets on how many Eloise may get this year, but i thought i would also add to the mix by making two of my own. one is with her birth announcement & the other with her footprint.

keepsake ornament

{original Pinterest link – wedding invitation ornament}

supplies:

  • clear plastic ornament (or you could use glass)
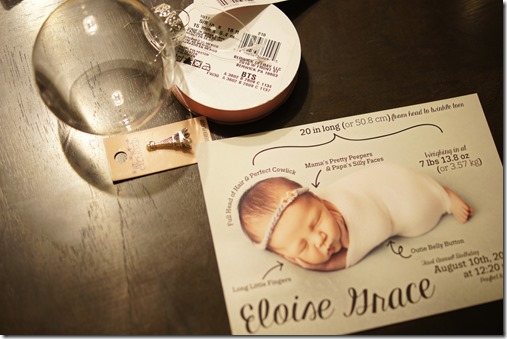
  • invitation or announcement
  • paper cutter or scissors
  • ruler
  • ribbon
  • charm
  • pencil

i made a version of this ornament for my first Pinterest Christmas project with our wedding invitation so i pretty much knew what i was doing.

_DSC5298 _DSC5299

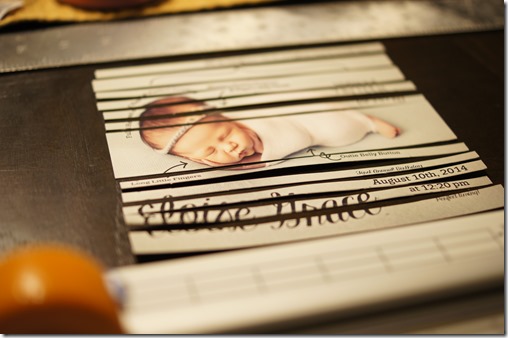
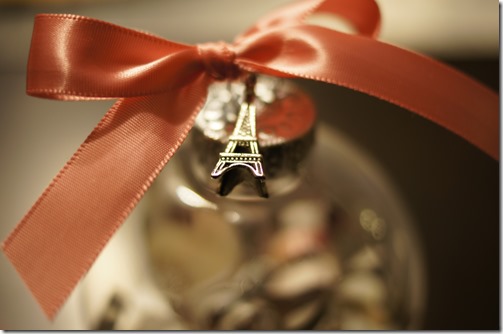
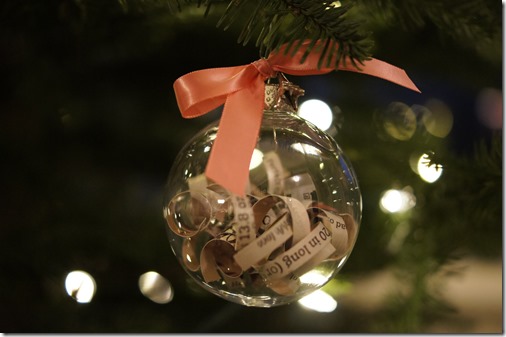
first, i decided which parts of Eloise’s announcement i wanted to use – i focused on her stats. then i measured & marked a 1/4 inch section around each part i wanted to include in the paper strips. i used a paper cutter & scissors to make the paper strips & wrapped the strips around a pencil to curl. once i had all of the strips cut & curled, i took off the top of the ornament & placed them inside. then i cut a length of ribbon, strung on the Eiffel Tower charm, & tied it in a bow on the top of the ornament.

_DSC5300    _DSC5384

footprint ornament

DIY baby's first Christmas ornament

{original Pinterest link – handprint ornament}

supplies:

  • clear plastic ornament (or you could use glass)
  • craft paint
  • ribbon
  • sponge paintbrush
  • ribbon – wired ribbon makes the best bows!

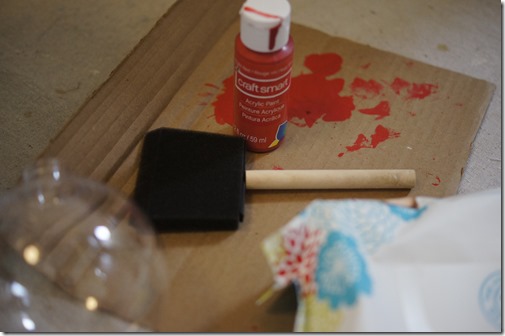
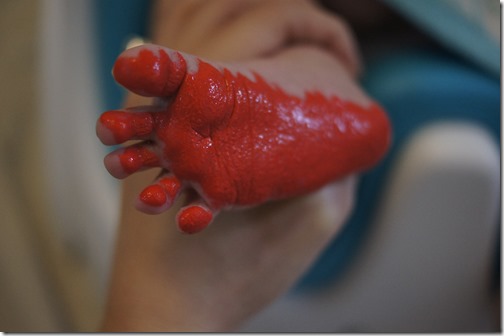
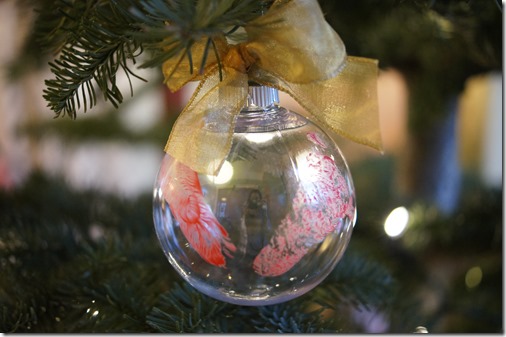
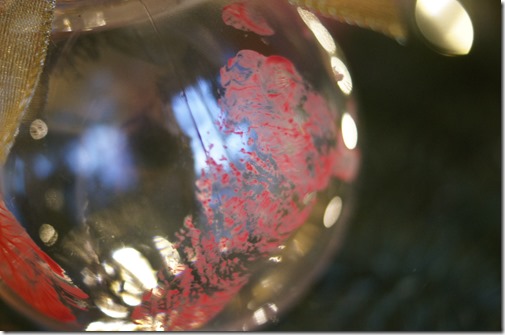
i modified this project in a few ways: i chose to do Eloise’s footprint instead of her hand (mostly because a footprint is so much easier!), & i used craft paint instead of embossing. the result wasn’t exactly what i was hoping since the footprints didn’t turn out that well. none-the-less, it is still a good representation of her feet on her first Christmas {which was the point, right?} & i have been doing ink prints of her footprints every month, so it isn’t like i won’t have her footprints in another form.

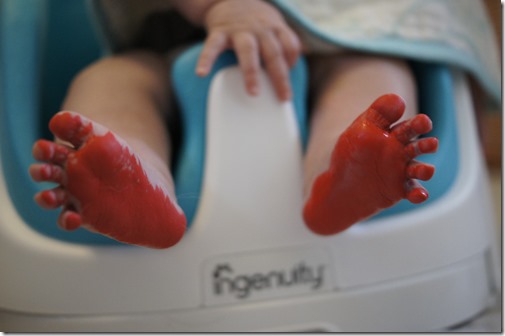
this was a really simple project. i sponged paint onto the bottoms of Eloise’s feet & then pressed them onto the plastic ornament. then i tied on a bow.

_DSC5386

_DSC5387

_DSC5389 _DSC5398

_DSC5400 

For more projects and inspiration, check out the other blogs in the Pinterest Christmas series [Emerald City Diaries | Greg & MaggiThe Gilbertson Family | The Pena Family | This Grey House | Without A Doubt]. Share your Pinterest Christmas projects with us! Comment on one of our blogs, link back to a post, or use #PinterestChristmas2014 on Instagram!

M

a pinterest christmas: family christmas stocking.

Pinterest_Christmas_Logo_thumb[8]

welcome to the first week of A Pinterest Christmas! i started this series as a fun way to share the Pinterest-inspired projects & crafts that i created for Christmas – my very favorite season of the year! check out the other years’ crafts here.

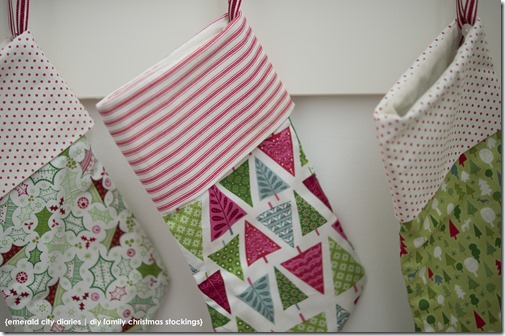
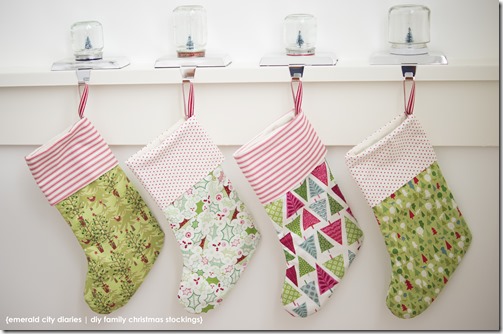
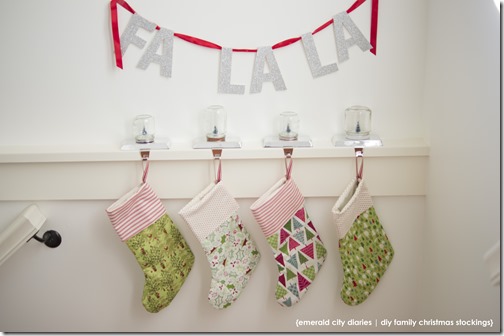
the year i started A Pinterest Christmas, i attempted to make stockings for our family at the time: me, Aaron, & Sadie. Sadie’s stocking turned out really well, but ours, not so much. ever since then i have been wanting to make us a new set of Christmas stockings. when Eloise joined our family this year i knew it would be the perfect opportunity! [& i went ahead & made four knowing that we would likely have another child at some point – no i am not pregnant! – & then i wouldn’t have to make a third set at that point!]

i followed two Pinterest pins – one for the stockings & linings & the other for the hangers.

Lined Stocking Tutorial.

{original Pinterest link – lined Christmas stockings}

Sew Scrumptious:One fat quarter of main fabric (patterned) One fat quarter of lining fabric (plain white fabric is fine) A small amount of contrasting fabric for Stocking Cuff A small amount of ribbon A button

{original Pinterest link – Christmas stocking hanger}

supplies:

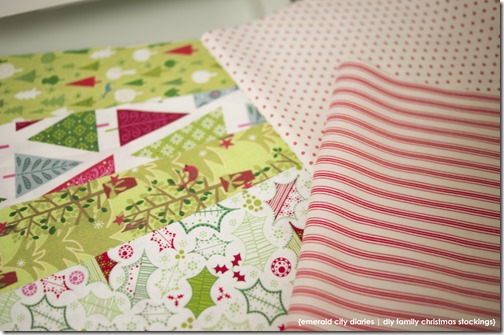
  • Christmas-themed fat quarters
  • thread – i used white for the entire project
  • lining fabric – i used this fabric from our Christmas tree skirt project
  • ribbon
  • buttons
  • scissors
  • stocking pattern – i used a free one here
  • needle

SONY DSC

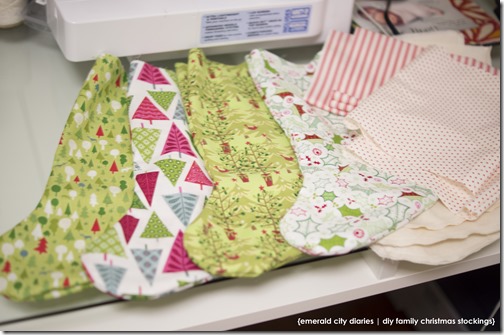
i started by ironing all of my fabric {nope, i didn’t pre-wash it – worst seamstress ever!} & cut out the stocking pattern – two stocking sides, 2 lining sides, & one cuff. i learned the hard way that you have to flip the pattern to make the cut out stocking side, or else you will have the back of the fabric on the backside of the stocking…

SONY DSC

SONY DSC

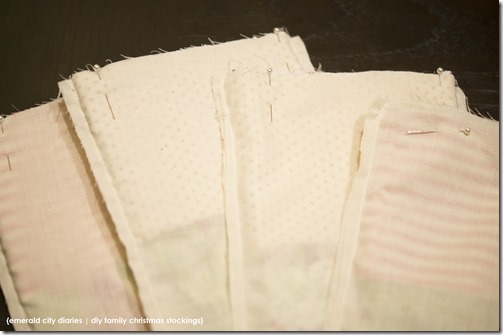
next i sewed all of the pieces. i made the cuff from a single piece of fabric – sewing one seam, flipping the fabric right-side-out, & then folding the fabric in half (as shown in the linked instructions). for the linings, i sewed around with a 1/2 inch seam, leaving a few inches on the long side of the stocking to flip everything right-side-out later on. for the stockings, i sewed the two pieces right sides together with a 1/2 inch seam & then flipped them right-side-out.

SONY DSC

SONY DSC

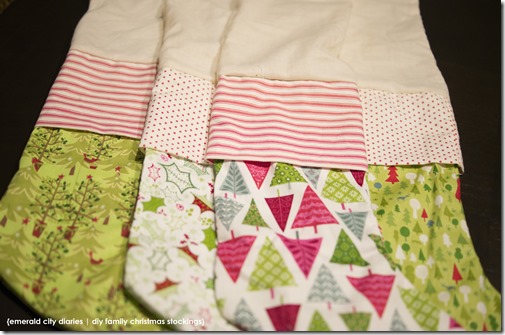
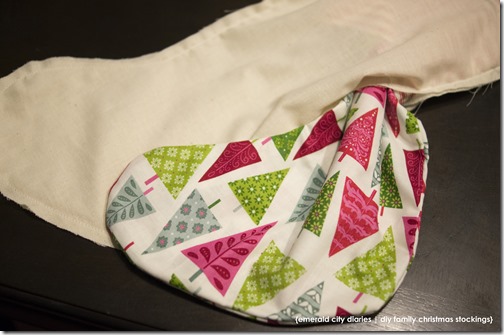
then i attached all the pieces. first, i sewed the cuffs to the stocking bodies, and then stuffed each stocking into the lining & attached. if you leave a small hole in the seam of the lining – just a few inches – then you can flip the entire stocking inside out & have a nicely finished stocking with a lining & no raw edges.

SONY DSC

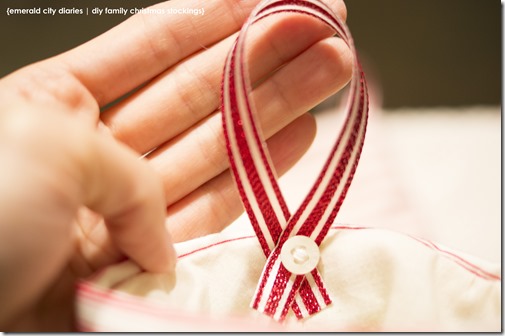
i then switched tutorials for the stocking hangers. i liked the look of a real cuff, & a ribbon hanger with a button so i combined the tutorials for the perfect stockings! i was able to round up four white buttons from my button box & use some Christmas-y ribbon that i picked up for another project (which you will see next week!). the nice part about adding a real cuff is that i could attach the ribbon & button, & hide the stitches underneath the cuff. SONY DSC

SONY DSC

SONY DSC

SONY DSC


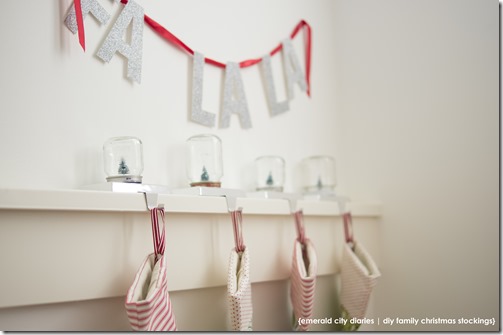
{also Fa La La sign & mason jar snowglobes}

For more projects and inspiration, check out the other blogs in the A Pinterest Christmas series [Emerald City Diaries | Greg & MaggiThe Gilbertson Family | The Pena Family | This Grey House | Without A Doubt]. Share your Pinterest Christmas projects with us! Comment on one of our blogs, link back to a post, or use #PinterestChristmas2014 on Instagram!

M