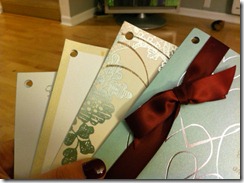
i saved all of the wedding cards we received & stashed them away in the back of our office closet. at the time, i didn’t know what i was going to do with all of them, but it just felt so wrong recycling them all.
then i saw this tutorial on pinterest & knew exactly why i had saved all of those cards! this is a diy that you could easily use for cards from any occasion: birthday, christmas, baby shower, wedding.
{the original pinterest link: diy card mini-album}
supplies:
-
cards
-
paper (probably different types for front & back cover, inside cover)
-
ribbon
-
initials, photo, etc. to decorate front cover
-
metal book ring
-
hole punch
-
2 small brads
-
glue or glue dots
-
scissors
-
paper trimmer (optional)
-
2 pieces of cardboard
first i stacked all the cards i wanted in the book (i did have to take out all of the shower cards as there were just too many) & measured out two pieces of cardboard that were slightly larger than the largest card. {sidenote: the only cardboard i had around the house was what our west elm sheets were packaged in & it was really thick. i would recommend using thinner cardboard, if you can, for this project because it will be so much easier to punch holes thru.}
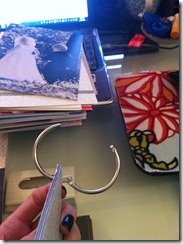
then i punched holes in the top corners of all of the cards. it took awhile, but i basically punched each card individually to avoid the punch getting jammed. i punched the first card & then traced the circle onto the other cards so that it would be in relatively the same spot on each.
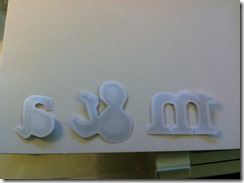
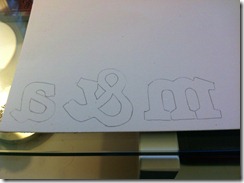
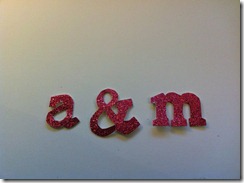
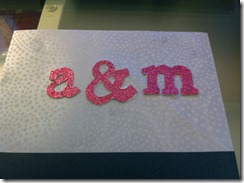
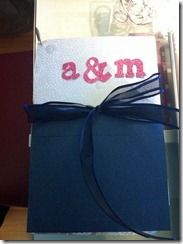
i really liked the glitter initials that were in the original tutorial: lower case letters & an ampersand – yes please! i searched high & low to find the perfect letters, but, alas, they could not be found. so i did the next best thing & bought glittery paper to make them myself. i just opened up a word document & typed in “m & a” and then played around with fonts & sizes until i got something perfect; this is definitely not an exact science. i ended up printing & making stencils from letters in Calisto in 120 size font. {sidenote: when i cut out the letters, though, i cut slightly bigger than the font size. in hindsight i probably would have gone slightly bigger than 120 size font as the letters were really hard to cut out.} my letters are by no means perfect but they will definitely do for a handmade book.
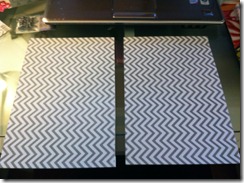
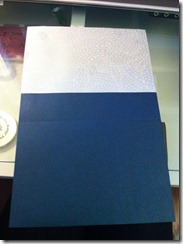
i trimmed paper for the front, back & inside covers. the paper that i used was grey & white zig-zag on one side (i used this for the inside covers) & grey & white paisley on the other side (i used this for the front & back cover). i was able to buy just two square sheets (they are scrapbook paper) to cover the cardboard – it was a happy accident that i liked both sides of the printed paper & only needed to buy two sheets for the project. on the front & back covers i also did a layer of printed velum paper over the paisley print (i liked the velum but didn’t want the brown of the cardboard to show thru); on the front cover i also cut up a left-over envelope from our wedding invitations to put on the bottom half; then i glued on the letters i made.
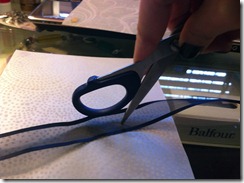
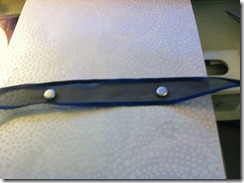
this next part was definitely the trickiest & most difficult (it is also where thin cardboard would come in handy). on the back cover you will want to attach the ribbon that will wrap around the book. you will want to glue on the back cover paper, but not the inside cover paper (i made this mistake & had to take off the inside cover paper & then re-attach it later). i made two little pencil marks on the back cover in about the middle where my brads would go in. then i lined up the ribbon (so the middle of the ribbon was between the two marks) and used scissors to make a hole. {sidenote: in hindsight, you really don’t need to punch thru the ribbon & the cardboard at the same time, especially if you are using really sheer ribbon like i did.} once i punched thru the two holes, i threaded the brads thru the ribbon & the cardboard, securing them on the inside cover. then you glue the inside cover one (covering up the back of the brads).
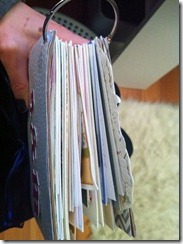
the last big step is to string the cards & the covers onto the ring. i couldn’t find rings at any craft stores & ended up with a multi-pack of book rings from office depot (or was it office max?) because i didn’t know what size i would need. for reference, i ended up using the biggest size ring.
the very last step is to tie the ribbon around the cards & trim the ends. voila!
this book was pretty easy to make, minus the punching thru cardboard, & though mine is definitely not as nice as the one from the tutorial, i am happy to have found a way to preserve & display our wedding cards.
are you in the habit of keeping old cards around?
M





such a neat idea! I keep some of my friends’ wedding invites, and since a lot of them got married last year, that stack is getting thicker and thicker. Maybe i’ll do this too. At least they won’t be all over the place 😀
ah, i’m so glad you did this. i organized all of our cards right after we got back from christmas–baby cards and wedding cards. now i just have to make it. 2 questions though…not all of the cards are the same size and direction (vertical vs horizontal), so how did you decide how big the front and back cover would be? and did you use both vertical and horizontal cards and different sized cards?
and yes, i am a card hoarder…i even keep thank you cards people send.
i am so glad to hear that i am not the only hoarder of cards. i have been better, but there is just something about them 🙂
i chose the cover size based on the biggest card in the stack, and it happened to be the tallest and the widest. if you have square cards, or something, that are wider than the tallest card, you could either add width to the cover, or just have the edges stick out a bit.
i did use horizontal and vertical cards. i turned the horizontal cards so that the folded edge was on the left hand side and then you would just turn the book sideways to read it.
also, just a thought for you when you do this project: i originally had my cards stacked in size order (smallest on the top and largest on the bottom) but once i started putting it together, i mixed the cards up because it sort of looked like this wonky pyramid. 🙂
best of luck and be sure to post your books – i can’t wait to see them!
thanks so much for sharing about our blog. would you mind sending me the link to this, when i try to click on it it says “page not found.” boo.