let there be (better looking) light.

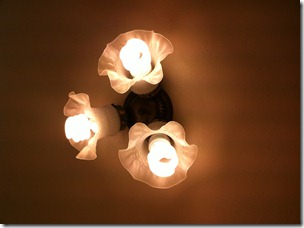
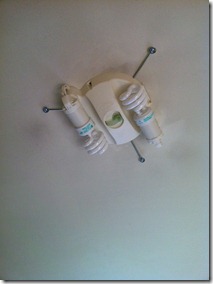
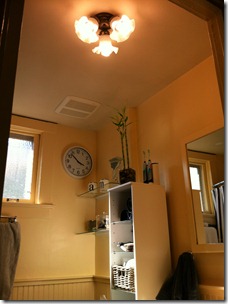
our bathroom light fixture was pretty outdated, but it didn’t look too bad until we added CFL bulbs. then it looked crazy.

IMG_2601IMG_2602

{before}

we have been looking for a replacement fixture since the day we moved in, but there hasn’t been a single light fixture that has inspired us. we have been to the usual suspects – lowe’s, home depot – and even specialty online light stores, but still nothin’. i have even been scouring pinterest searching for “bathroom light” & apparently people either have wall mounted lights (near the mirror) or chandeliers.

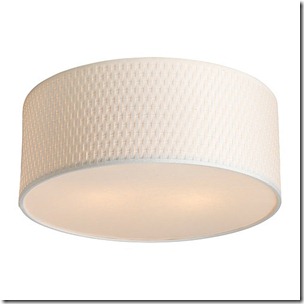
i found myself at ikea sunday morning shopping for a few things & since you basically have to walk thru the entire store anyways,  i was perusing this & that while i searched for what was on my list. as i walked thru the lighting section, a fixture caught my eye. it was the alang to be exact.

alang-ceiling-lamp__0120130_PE276557_S4

{ikea alang}

simple, inexpensive & light diffusion (one of the bad things about the current fixture is the harsh light since the bulbs are exposed). i tried calling aaron a few times to get his thoughts on the fixture, but he wasn’t answering. so, after i had collected all of the other ikea goods i needed, i back-tracked to the lighting section & picked up an alang. i figured i could always return it or use it in a different room if aaron didn’t approve.

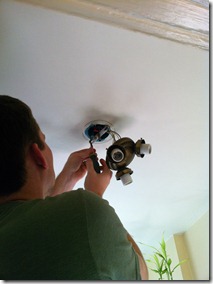
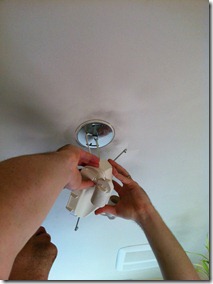
well, aaron liked it enough to at least try it, so down came the old one & up went the new.

IMG_2604IMG_2605IMG_2606

{installation}

installation went fairly quickly & i am glad aaron was here to do it since it involved unattaching & reattaching the electrical wires.

IMG_2607IMG_2608

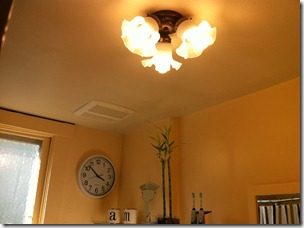
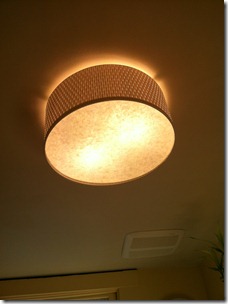
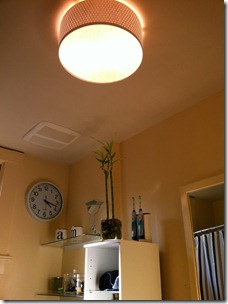
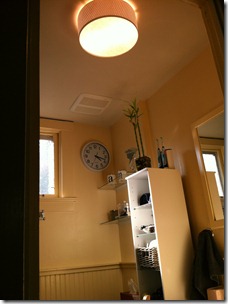
i think the alang is a vast improvement over the original fixture – don’t you? we haven’t done much work to the bathroom, but have big (painting) plans for it to be completed over the thanksgiving holiday! once we get the ceiling (it looks white in pictures but it is a smidge yellow), walls & beadboard painted, this bathroom is going to look so. much. better. further down the road we want to replace the beige sink with a vanity, the toilet & have the tub painted (we have beautiful blue tile on the floors & in the shower that we would hate to see go, so it seems like painting the tub white makes the most sense).

IMG_2603IMG_2610

{the before & after}

this is a pretty small upgrade, but it is still one more thing off the big ole’ checklist (i.e., the never-ending, constantly-being-added-to, how-are-we-going-to-pay-for-this checklist)!

thoughts? have you been updating fixtures in your house lately? where are your go-tos for light fixtures?

M

the big kitchen reveal.

this is the post that you have all been waiting for: the big reveal!

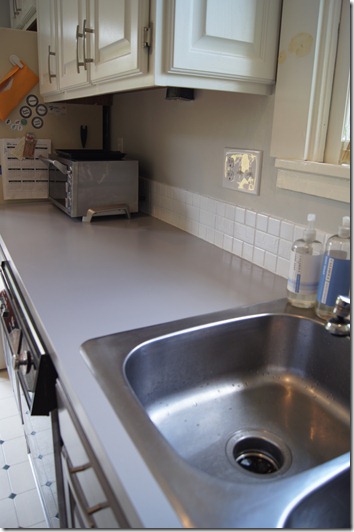
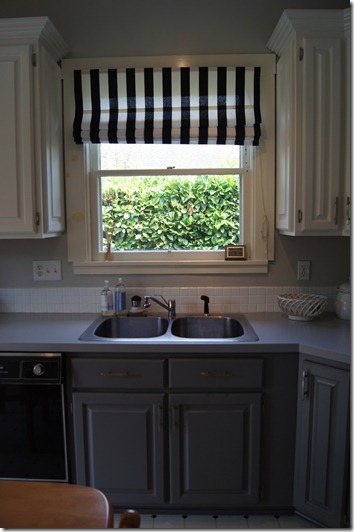
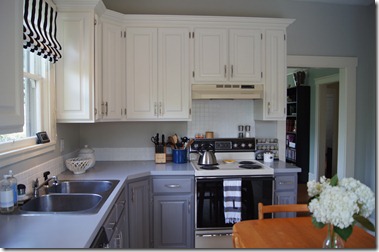
i have shown you the kitchen updates in pieces, but it looks so great when its all put together.

in case you missed the updates, here are links: painting cabinets, painting backsplash tile, painting counter, & roman shade.

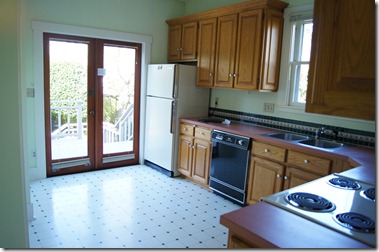
DSC00786

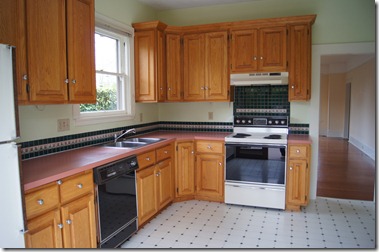
DSC00808

{a reminder of where we came from.}

{sorry in advance for the dark pictures. when we had lots of sun in seattle, the kitchen was still a mess. naturally, as soon as i was ready to take pictures, the rain came.}

DSC01418

DSC01417

DSC01419

DSC01420

DSC01421

DSC01422

DSC01423

DSC01424

DSC01425

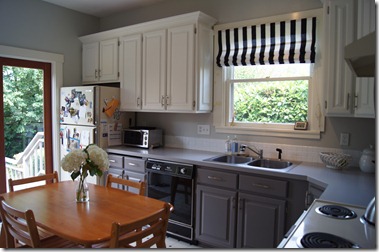
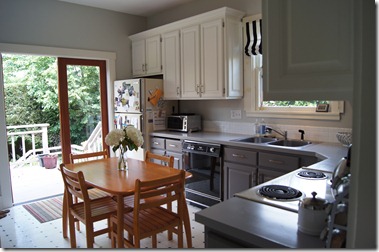
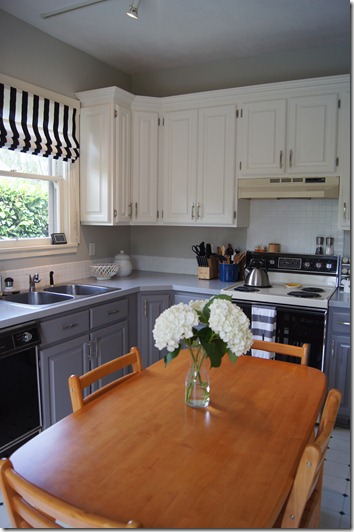
crazy, huh? it is amazing what a couple of coats (okay, a lot of coats) of paint can do to a space. when we first bought the house, we thought we would have to eventually gut & remodel the entire kitchen (including taking out the pantry). but, after seeing it, i think we may be able to replace the countertops & the appliances. {sidenote: i didn’t like the appliances when we first moved in, but come to find out, older appliances work amazingly! despite not getting consistent temperatures in our oven, i can get boiling water in two minutes!} also, we are thinking of eventually replacing our kitchen table with a kitchen island (since we have a table out in our dining room).

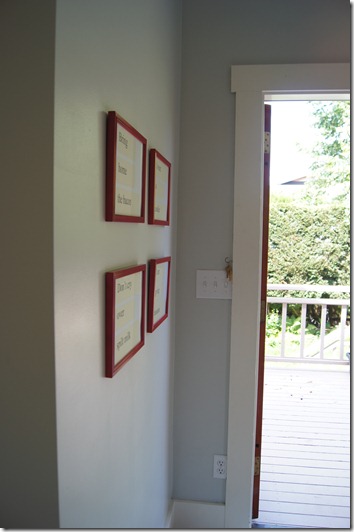
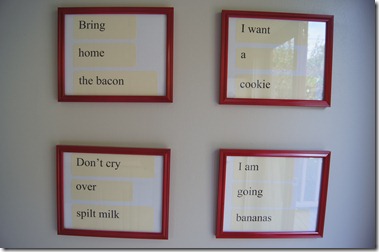
i also added a bit of art to our kitchen walls. i really loved the idea of framing vintage flashcards into sayings {see here} but i was too lazy (& cheap!) to find all the flashcards i would have needed. so, i decided to diy it. i also couldn’t find red frames either, so i diy-ed those too by spray painting white target frames red.

to make the flashcards, i just typed out the phrases i wanted, printed them out on resume paper, cut into long rectangles, & rounded the corners. then i glued the “flashcards” onto white cardstock.

DSC01426

DSC01428

i would love to hear your thoughts about our new kitchen. is your mind blown? (mine is.) it doesn’t even look like the same room. i can’t believe it every time i walk into the kitchen. it is so much more light & airy.

i still need to add some more color back in, as well as find new kitchen lights (aaron & i both hate the track lights that are currently in there). future plans: globe pendant lights, brightly colored rug(s), fresh flowers, colorful trivet.

what have you updated lately? have you ever thought of painting your kitchen?

M

kitchen mini-blind update (or pinspiration: no sew roman shade)

the most recent update to the kitchen was to change the face of the mini-blinds. we have mini-blinds all over our house, including on our kitchen window {obviously}, but the truth is i really hate mini-blinds. we had them on our living room windows until we put up the curtains & i had aaron take them down about six seconds after the curtains were up! we also have mini-blinds in both our bedroom & the office, but until i find curtains or another window covering, those will be staying put. unfortunately.

but, more about the mini-blinds in the kitchen. we really don’t need a window covering at all since privacy isn’t an issue & we get lots of morning sun into the kitchen via the window. i would hate to put something on the window that would prevent the sunshine from filling the room, but since the mini-blinds were already there, i decided i would try to spruce them up a bit {& if that didn’t work, i would just take them down & leave the window bare}.

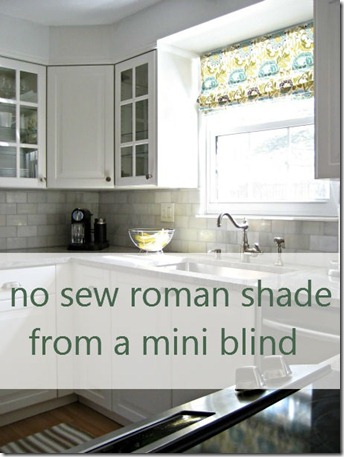
i had heard about being able to make a roman shade from mini-blinds months ago, & i found this tutorial floating around pinterest.

165507355026075299_gP6YZH81_f

{the original tutorial: no sew roman shade from a mini blind.}

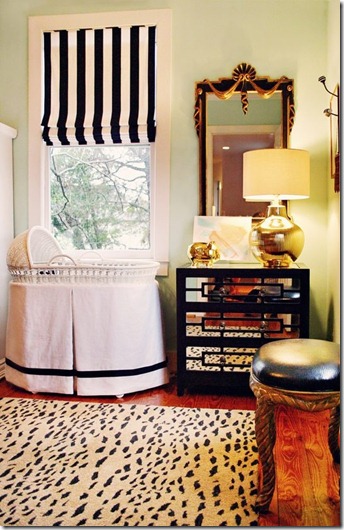
i also found this image on pinterest around the same time i found the tutorial & knew that black & white stripes would look great in our now-grey & white kitchen. i also liked that the stripes are vertical.

51158145737250681_cR9Syzwm_f

{image via}

supplies:

  • mini-blinds
  • scissors
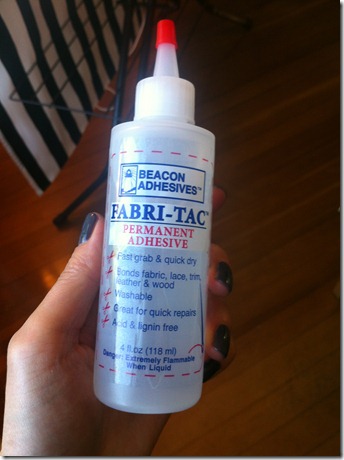
  • glue (i used fabri-tac)
  • fabric (amount depends – you will need about 2 inches longer on all sides than your blinds)
  • iron (optional, but it would be difficult to iron your fabric after it is attached to the blind)
  • ruler or measuring tape
  • washers (optional. i used one on each string to help me not have to tie such huge knots)
  • needle-nose pliers (optional, but i found them helpful to undo the original knots)
  • masking tape (optional, but i used it to hold down the string while measuring)

this project was pretty simple & only took a few hours. just be sure you have a big table or do this on the floor (i opted for the table plus the ironing board since i didn’t want dog hair all over the fabric!). i followed the tutorial & only had to improvise when re-tying the knots at the bottom of the blinds.

IMG_2299

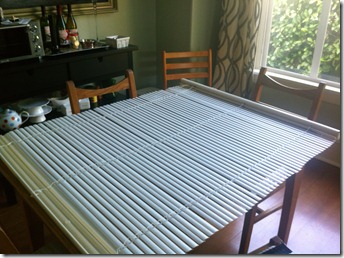
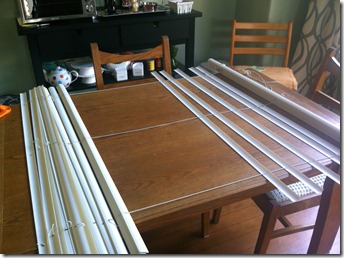
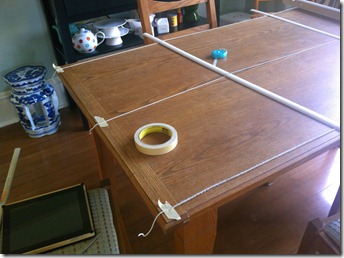
first i had aaron help me take down the mini-blind from the window & i laid it on the table. i took off the long, skinny wand that makes the blinds turn up & down (you won’t need that anymore). i also should have dusted or cleaned the blinds, but i didn’t.

IMG_2300

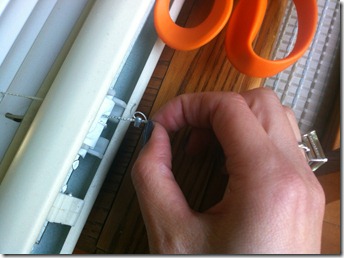
then i untied the knots below on the ladder string & clipped the string from above too. {the ladder string – this is what i am calling it since it looks like a ladder – is the one that holds the blinds & turns them, not the one that pulls them up & down.}

IMG_2301

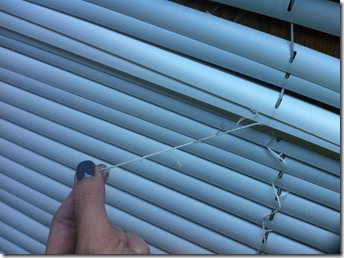
once the top & bottom were free, i just pulled on the ladder string & cut each little “ladder” section.

IMG_2302

i decided to keep five blind slats for the roman shade.

IMG_2303

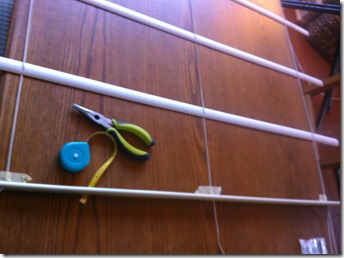
i spaced each blind slat seven inches apart, starting from the top.

IMG_2304

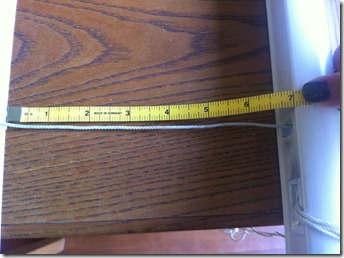
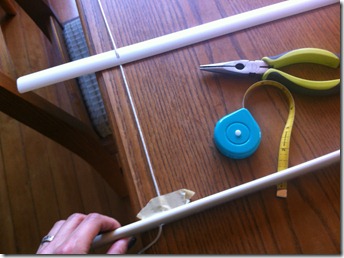
i taped down the ends of the string so they would stay still as i measured where each slat would go. be sure that you have enough string at the end to tie knots to re-secure the slats. i put the tape right at seven inches so i would be ready for the next step.

IMG_2306

when i got to the bottom, it was time to re-secure the end of the blind (that i had taken off in the beginning). i put it up on its side right against the tape (so it would be at seven inches) & began my knot tying.

IMG_2307

IMG_2305

IMG_2315

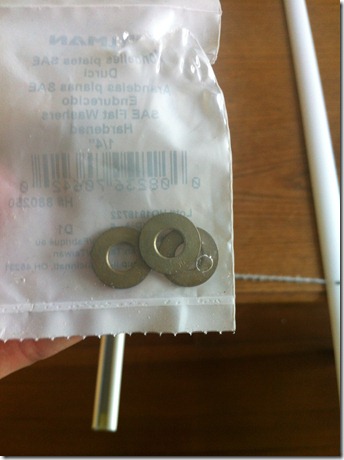
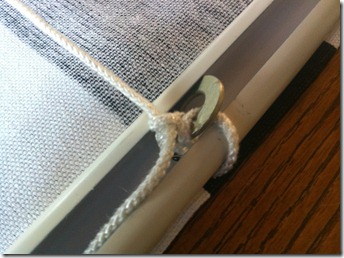
i ended up finishing the knot later in the project (you can see the fabric is already on) but i essentially used the washer in order to not have to tie an enormous knot. then i kind of stuck the washer into the bottom of the blind.

IMG_2310

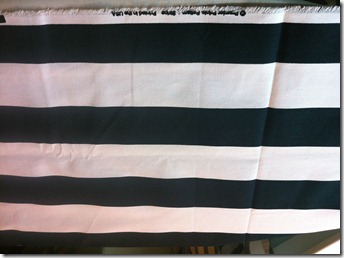
{black & white stripey fabric from this etsy store.}

IMG_2311

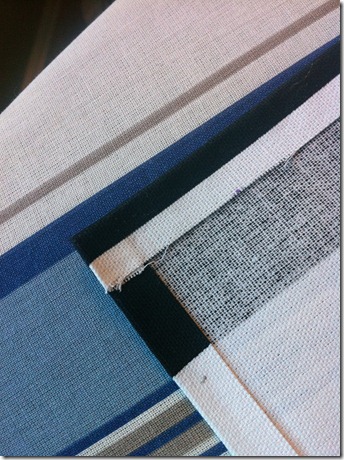
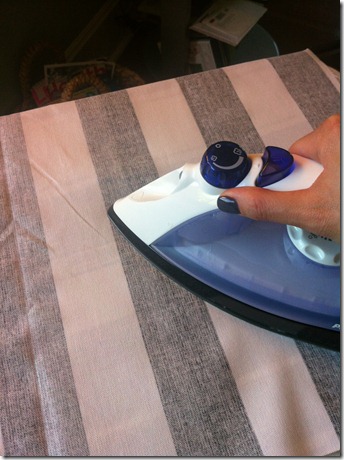
i measured the fabric so that each side was two inches longer than the blinds, cut the fabric, & ironed it. then i ironed half-inch seams on all four sides. {sidenote: i originally planned to sew the seams because i thought it would look nicer, but because of the two-color fabric, you would have been able to see the seam.}

IMG_2312

{fabri-tac. this glue is great because it is very quick drying & clear.}

IMG_2313

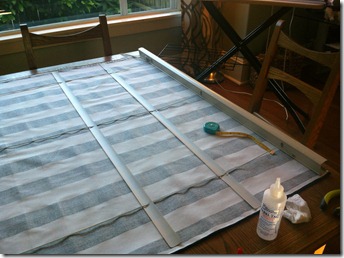
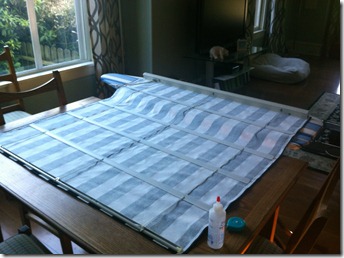
finally, i laid the blinds over the fabric, re-measured the seven inches between each blind slat, & glued each slat down to the fabric (put glue on the rounded side of the blind). let the glue dry before hanging; i waited a couple of hours just to be sure.

IMG_2314

IMG_2316

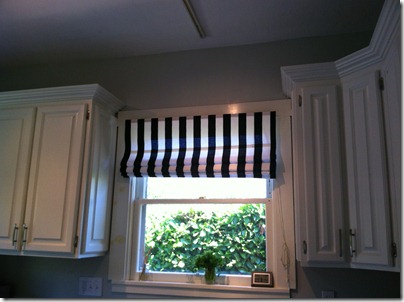
then re-hang your blind & admire. i sort of like the look of some folds in the fabric, so i didn’t pull the blinds all the way to the top.

IMG_2321

even though these roman shades didn’t add much color to the kitchen, i love the simpleness & whimsy they bring to the space.

this is the last post before i reveal the entire kitchen, so definitely stay tuned.

do you have mini-blinds you don’t like? would you consider converting them to roman shades?

M

kitchen counter update.

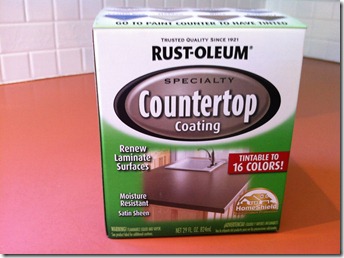
the last major update to the kitchen was to the laminate countertops. as much as we loved the salmon pink color of those counters, we knew the color had to go. since we didn’t want to make a huge investment into replacing counters yet, i decided to try a new paint by rust-oleum that is meant to resurface laminate counters. there is no sanding, priming, or sealing & for about $25 it seemed like an easy decision.

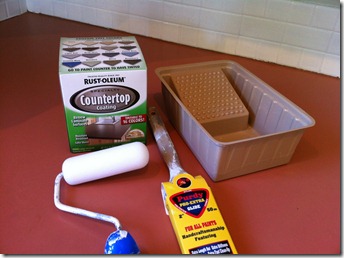
supplies:

  • cleaner (i used fantastik degreaser)
  • rust-oleum countertop coating (home depot or lowe’s)
  • paint tray
  • smooth paint roller (i used a leftover roller from painting the cabinets)
  • paint brush
  • paint thinner (i didn’t have this but highly recommend it to clean your brush)
  • painter’s tape
  • painter’s paper (optional)

IMG_2259

{the basic supplies}

IMG_2260

IMG_2261

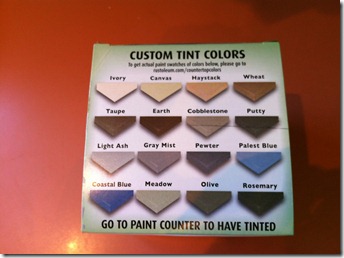
{we decided on grey mist for our counters. it seems a little bit lighter in person than that little swatch.}

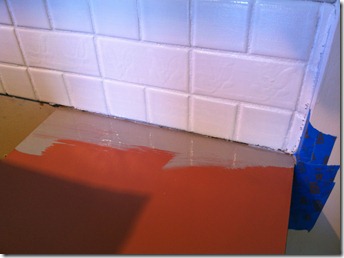
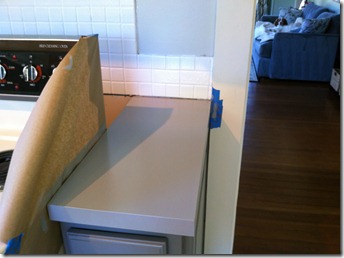
first, i taped & papered the door trim, tops of appliance, anything i didn’t want paint on. i didn’t tape off the tile because when we took out the old caulking, it left me just enough space under the tile to get a paint brush. {sidenote: if you get this paint on tile, immediately remove it with a wet papertowel or rag, or else it won’t come off!}

then, i began painting the edges of the counter with the paint brush. i then moved onto painting the rest of the counter with the roller brush. {sidenote: i recommend using a paint brush as little as possible with this paint because it leaves brush marks. also, i found painting in small sections helped: paint a foot or so of the edge of the counter with a brush, switch to roller & paint the rest of that counter section, move onto the next section & begin with brush, etc.}

IMG_2262

IMG_2263

IMG_2264

IMG_2265

IMG_2266

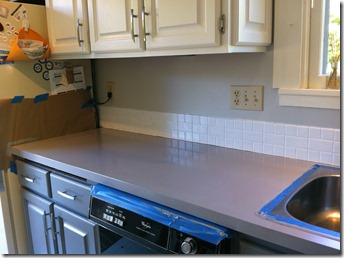
i ended up doing just two coats, letting the first coat dry 24 hours before beginning the second. then, the paint needs 3 full days to fully cure.

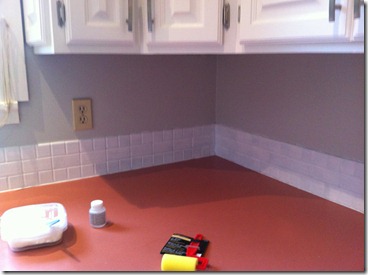
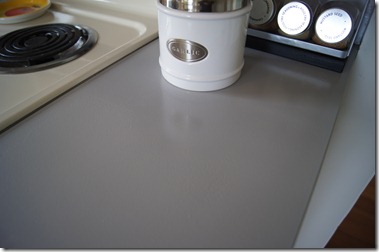
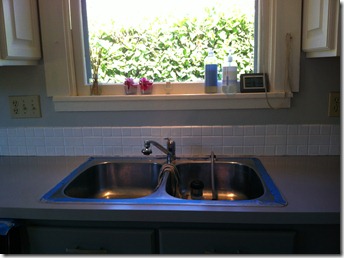
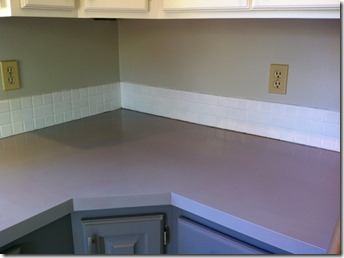
i am pleasantly surprised with the finish as it is really smooth & even. there are a few places where you can see brushstrokes, or where something stuck to the paint & dried, but all-in-all i am really happy. this countertop paint is a really great & economical way to update & change the color of your laminate countertops.

IMG_2298

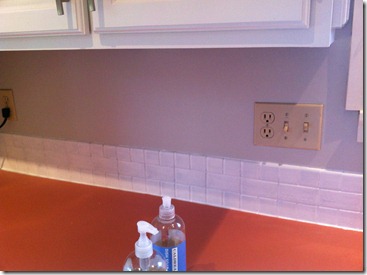
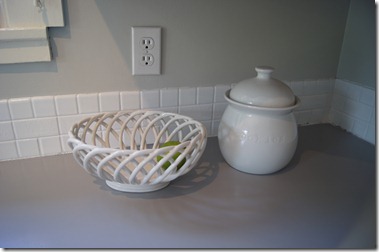
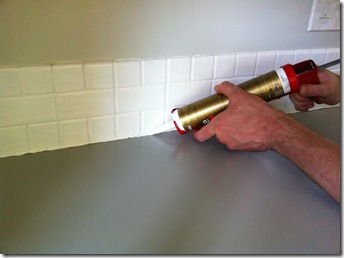
{we also began the caulking process once the counter was dry. this was sort of a fail & we still need to caulk under the tiles.}

stay tuned next week for a total kitchen reveal! it is really amazing how much a few coats of paint have completely transformed our kitchen.

are you looking to upgrade your countertops? have you considered painting them (if they are laminate)?

M


disclaimer: i was not paid by rust-oleum for this post. i used its new countertop coating product & was happy with the results.

kitchen backsplash update.

if you have been following the blog over the past couple of weeks, you know that i am in the process of updating our kitchen. no big remodel, just paint!

a few weeks ago, i started by painting the walls a light blue-ish grey – moonshine by benjamin moore – but the actual paint i used was the new valspar allergy & asthma, which i also used for the living room, that i had lowe’s colormatch for me.

then, i sanded, primed, & painted the kitchen cabinets as seen in this post.

next step: painting the backsplash tile.

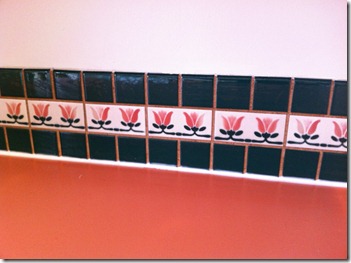
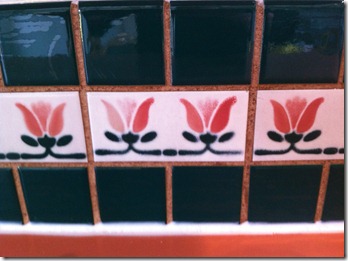
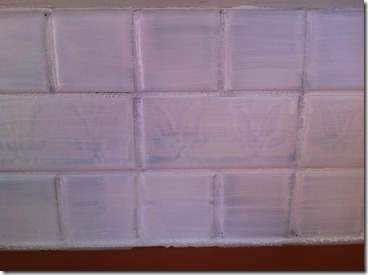
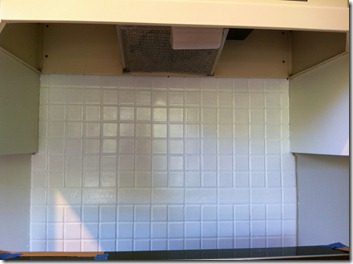
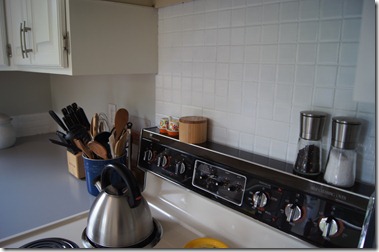
we had this really lovely backsplash tile that was forest green & pink tulips. while it matched the pink laminate countertops really well, there was no room for flowers in our kitchen update & it had to go! i knew it would be really expensive to rip out the old tile & replace it with new (& tiling isn’t something i am quite ready to learn how to do yet), so i was going to try my hand at painting it. i figured, worst case, we would have crazy-looking tiles for a while until we saved up our pennies to re-tile. it seemed worth the risk.

i started googling (aaron, pretend i said binging) a phrase like “how to paint kitchen tiles” & i found this tutorial on painting backsplash tile. perfect i tell you, like it was meant to be!

i pretty much followed her tutorial, including cleaning supplies & paint supplies. in the end, i needed many, many, many more coats of paint than the original tutorial called for, but that was likely because i was trying to make such dark tiles a very light color (read: white). honestly, this was a big project & took many hours & lots of patience, but it was SO worth it!

supplies:

after my order from misterart.com came in (where i ordered the surface conditioner, enamel paint, enamel paint dilutant, gloss finish, & foam roller), i gave myself a little pep-talk & went for it.
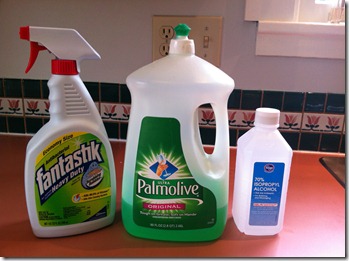
IMG_2208

{deep clean of the tiles}

IMG_2209

IMG_2210

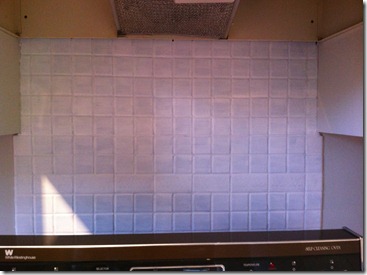
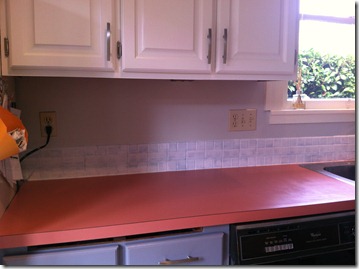
{this is what i was working with. it is crazy to see these pictures after seeing the tile after the painting process!}

after a good clean, i started with the surface conditioner. i used a small craftbrush & coated the tiles with the surface conditioner. then i let it dry.
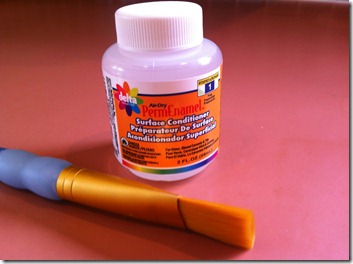
IMG_2211

after the quick drying process on the surface conditioner, i got ready to start with the first coat of white paint. i put a glob of paint into an old GladWare container & then added drops of the dilutant until it was the consistency of Elmer’s Glue. {sidenote: the first few coats i diluted down to a glue consistency, but on the later coats i kept the paint a bit thicker.} then i started painting. i used the same small craftbrush so i would have more control on the edges. i painted in small sections, & found that painting the grout first & then going back & painting the tiles made the process a lot easier. once i started the second, third, etc. coats, i didn’t focus on the grout & just painted the tiles.
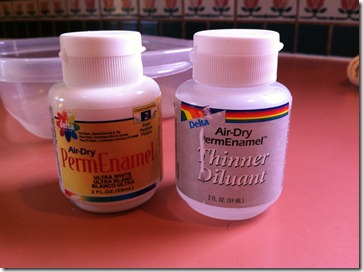
IMG_2212

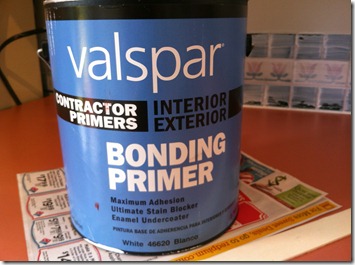
after one coat of paint, i noticed a lot of the paint on the edges wasn’t sticking. boo. i briefly considered re-cleaning the tiles & then adding another coat of surface conditioner, but then i remembered the bonding primer that i used to prime the kitchen cabinets. when i bought it, the gal told me it would basically prime to anything. sure enough when i went to the basement to check the label, it listed ceramic tile as one of the bonding surfaces.
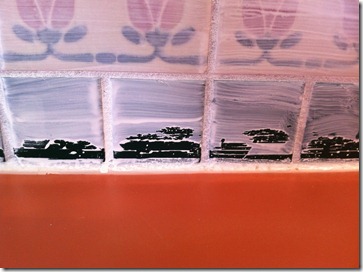
IMG_2213

so i went off-tutorial & painted a (thick) coat of bonding primer. after the primer was dry (i waited at least 12 hours between coats for the entire project), i started in – again – with the enamel paint.
IMG_2214

IMG_2215

IMG_2216

IMG_2217

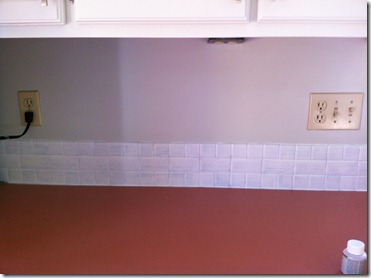
after about the second coat of enamel paint, i knew that i would need many more coats than the three that the tutorial suggested. so, i kept painting. & painting. & painting.
IMG_2218

IMG_2219

IMG_2220

IMG_2222

IMG_2223

IMG_2224

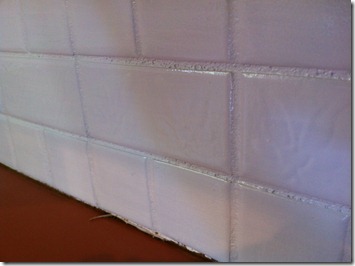
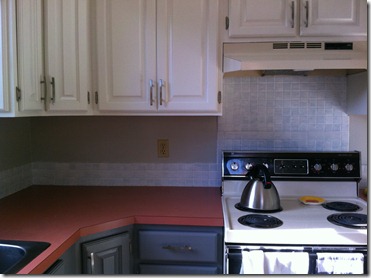
aaron & i figured out pretty quickly that i was never going to be 100% satisfied with the whiteness of our tiles regardless of the number of coats i painted. the tiles that had tulips were still showing an outline of the tulips, but the dark green color was slowly starting to fade. i finally had to call it after seven coats. yep, seven. i still had almost a full bottle of white enamel paint left (i had already used three) but wanted to make sure i had some paint around for touch-ups in the future.
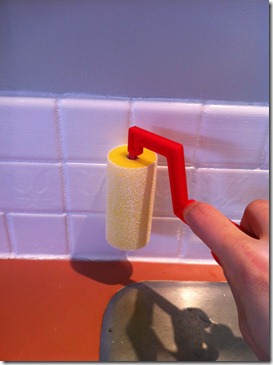
IMG_2238

as per the tutorial instructions, after my seventh – & final! – coat, i quickly went over my freshly-painted tiles with the foam roller in order to smooth out the brushstrokes.
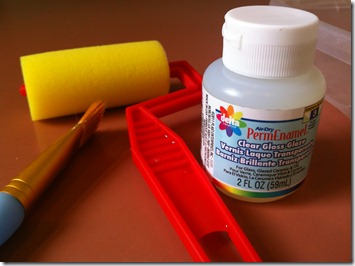
IMG_2239

after the paint was dry, i let it dry almost a full 24 hours, i put on two coats of gloss glaze, allowing for drying time in-between coats.
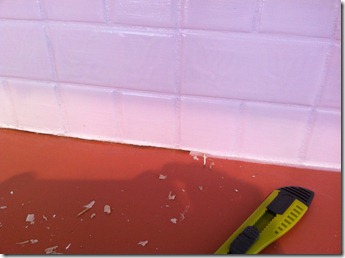
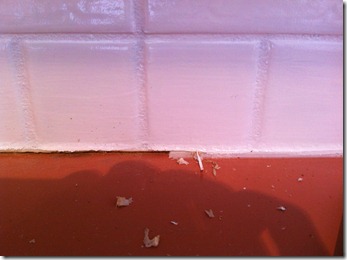
IMG_2252

IMG_2253

after the glaze was dry, aaron & i used a small razor to cut away the old caulking from between the tile & the countertop. this was mostly in preparation for my next step: updating the laminate.
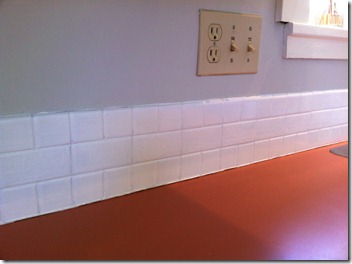
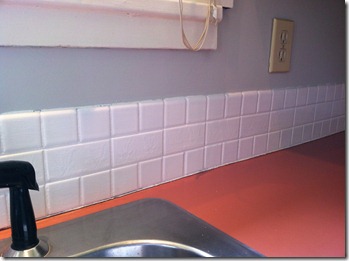
IMG_2254

IMG_2255

IMG_2256

IMG_2257

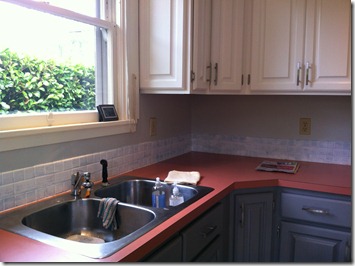
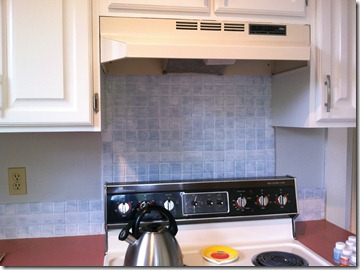
it is easy to be picky about the tiles not being perfect (i.e., look like brand new white tiles), but for $30 in supplies we have a new backsplash & i couldn’t be happier. the change from the forest green & flowers to the bright white made such a huge difference in our kitchen. really, it was an amazing transformation.

the downside: it highlighted our very pink laminate countertop. boo. one of our friends commented that we had a nice colorblocking going on with the grey cabinets, pink countertop, & white backsplash & upper cabinets, but we weren’t really diggin’ it.

up next, an update to the countertop!

have you ever considered painting a backsplash?

M

pinspiration: hanging jewelry storage.

here is another project that has been done for some time, but i have been delinquent about posting…

when we moved in – which was ten weeks ago! – i didn’t unpack my jewelry right away. in fact, it sat in the bags & boxes i had packed it in for weeks. weeks! i have a pretty good sized jewelry box that holds earrings (that is basically all that is in it), but nothing to hold bracelets, bangles, necklaces, etc. i knew i didn’t want to unpack & have it be a mess, so i waited.

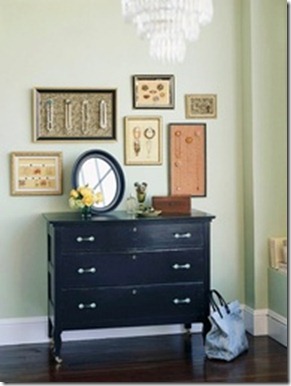
then i found some inspiration on pinterest. {surprise, surprise!} i fell in love & knew this is exactly what i wanted to do. it was simple, but also displayed jewelry like art. perfect!

75716837455256646_ORS4SN3p_b

{the image is originally from bhg.com}

i was a bit bummed when the link from pinterest was just a bunch of images on another blogger’s website. i even enlisted aaron to help me search for the original image online. we ended up finding that the source was better homes & gardens, but it was just an image, no tutorial. sadly for you, this is also not really a tutorial post as aaron really ended up doing the work on this project. i can, however, walk you thru his process.

supplies:

  • frame(s)
  • plywood
  • paper to cover the plywood (or you could paint it instead)
  • knobs
  • dremel tool
  • washers
  • heavy duty glue
  • ribbon
  • craft glue

IMG_2003

IMG_2004

IMG_2006

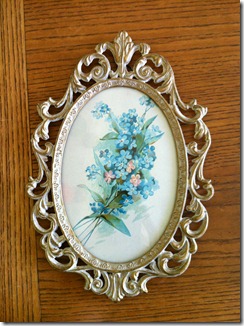
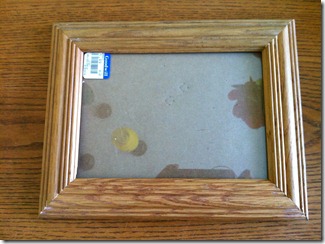
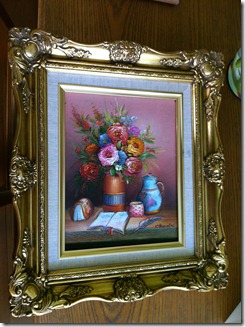
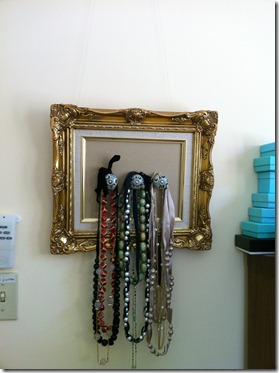
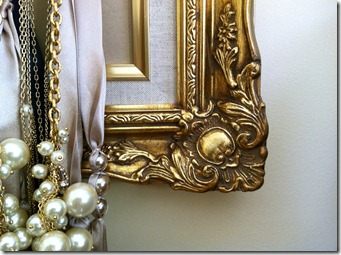
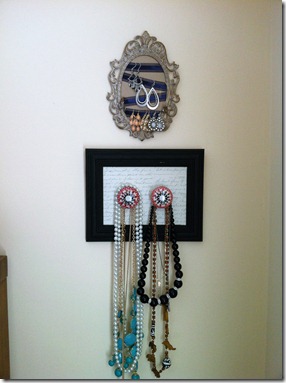
i bought three frames: the two rectangular ones to hold necklaces & the oval one to hold earrings. the oval frame is from this etsy store & the other two frames are from the goodwill (you will likely have to dig a bit, like i did).

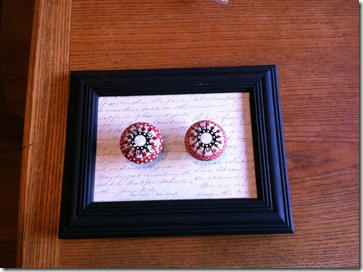
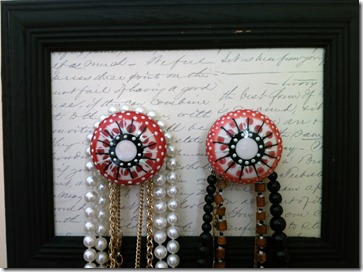
first, i took apart the frames. i didn’t need the glass, or the frame backs, just the frame. then, i spray painted the smaller rectangular frame with chalkboard spray paint. {sidenote: i realize that i won’t be able to write on the frame, but i like the matte black color of chalkboard paint.}

after the paint was dry, aaron took over. i will do the best i can to summarize what he told me he did. {sidenote: aaron’s work was on the two rectangular frames, the oval frame was all me & i will describe that process below.}

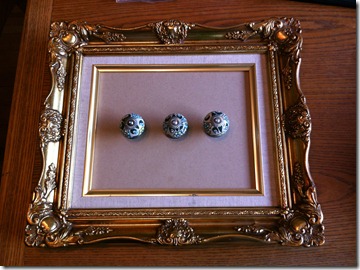
first, he cut plywood pieces to fit inside of the frames. then, i glued paper onto the front of the plywood with craft glue. both pieces of paper are from michael’s; the big frame’s paper is just cardstock that looks almost like a brown paperbag & the small frame’s paper is white with dark grey cursive writing.

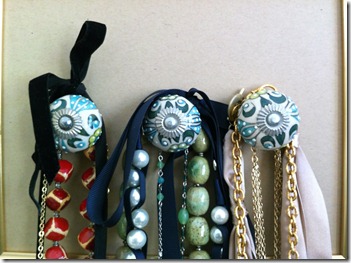
after the glue had dried, aaron worked his magic. i bought ceramic knobs from anthro; two for the small frame & three for the big. {sidenote: knobs from anthro are a bit pricey, but i figured since i got such a great deal on the frames, i could splurge a little on the knobs.} aaron drilled holes into the plywood for each knob. i decided i wanted them centered in the frame, but you could also put them up towards the top too. then, he had to cut down the metal rods that extend out the back of the knobs (what are they called?) with the dremel so they were flush with the back of the plywood. he used big washers (about as big as the knobs) to help keep the knobs in place, along with a nut, & then he added heavy duty glue to the end of the metal rod where it met the plywood.

it was a bit of a process & one that aaron probably doesn’t want to repeat, but it was so worth it. take a look…

IMG_2120

IMG_2121

IMG_2122

IMG_2125

IMG_2124

IMG_2127

the oval frame, as i mentioned above, was going to hold earrings, so the process was different. obviously knobs are not the most effective method for hanging earrings, so i used ribbon instead.

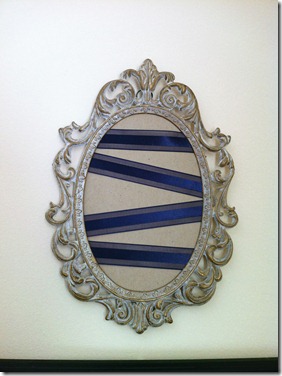
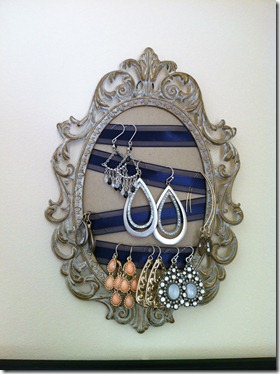
i took the back off of the frame & removed the glass. then i covered the back with paper (the same paper i used for the big frame above). i cut lengths of ribbon & laid them across the frame back & then glued the ends to the back of the frame with craft glue. i didn’t do perfectly straight lines because (1) it was easier to do diagonals because the frame was oval, and (2) i thought it might be good for different earring lengths. once i was done with the ribbon, i just put the back back into the frame.

IMG_2131

IMG_2132

IMG_2133

IMG_2129

IMG_2130

IMG_2134

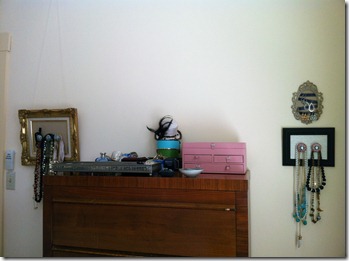
{my jewelry all organized. i am in desperate need of a mirror for above the dresser, but i think i may be getting a new dresser in the near future since i am too short to see the top of it. {hence, why the frames are on the sides of the dresser & not above it.) sad, i know. so, i am hoping to find a shorter dresser that will give me as much storage space & then find a fun mirror for it.}

how do you store your jewelry?

M
pinspiration: wine box garden.

this is a bit of a belated post, especially since it was completed back in may!, but better late than never, right?

as soon as we moved into our house i knew i wanted some kind of a garden. since i didn’t want to take on too much (like building raised garden beds), a small herb garden seemed fitting for our first garden. especially since i am not exactly known for having a green thumb.

almost as soon as i pinned this idea on pinterest, my friend amanda commented that she had two wine boxes that would be perfect for the project. i knew it was meant to be!

bandage

{the original tutorial link: diy wine box vegetable garden.}

supplies:

  • wine box(es)
  • dirt
  • seeds or plants
  • drill for making draining holes
  • 1×2 & screws if you want legs
  • cork, sharpie, & bamboo skewer if you want to make signs

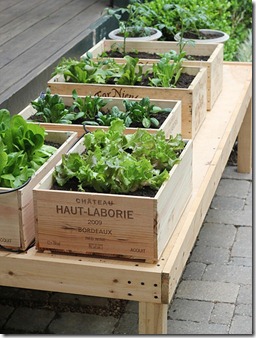
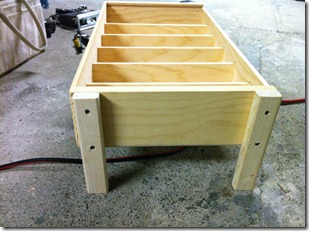
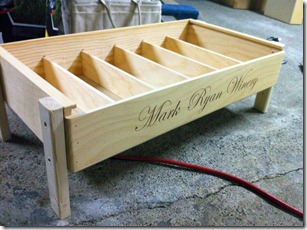
the wine boxes that amanda gave me were gorgeous. they were high quality & already had the dividers inside. my dad added the wooden legs by screwing on pieces of a 1×2 (i think) & then snapping off the end of the top screw so that i wouldn’t cut myself when i was planting. my mom drilled a couple of drainage holes in each section as well.

IMG_1966IMG_1967

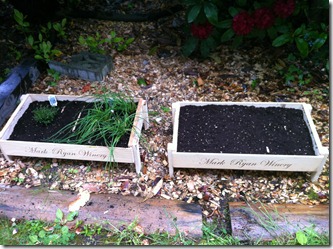
my mom & i decided the best place to put the garden boxes was over on the side yard (east of the house). here, it would get sun & rain, but not be in the way (like they would have been on the porch, which was the original spot for them).

we filled the boxes up with dirt, & then planted seeds for basil & baby greens, & plants for thyme & chives. we also added a rosemary plant in a separate planter as it was too big for the wine box.

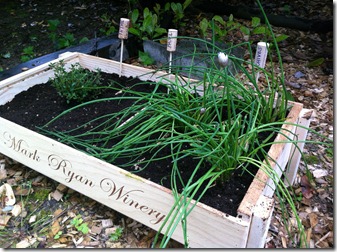
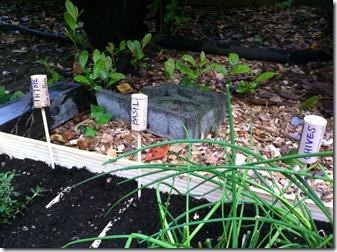
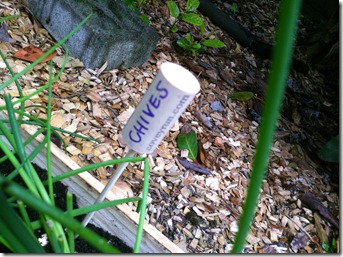
i had some corks lying around from our wedding (we used them in our centerpieces & in the bulletin board my mom made for our seating chart) & we used those for marking the different herbs. i used a (purple) sharpie marker to write what the name of the herb was, & then we stuck the cork onto a bamboo skewer, & then stuck the skewer into the dirt near the plant.

IMG_1968

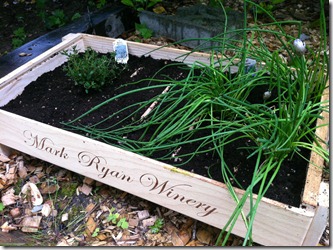
{left box from l to r: thyme plant, basil seeds, chive plants. right box: baby greens seeds.}

IMG_1969IMG_1970IMG_1971IMG_1972

it has been really fun to have our own herb garden & be able to use the herbs in our cooking. it is so much cheaper to grow an herb plant than to buy the cut herbs at the store. i think next year i will also add parsley to the mix.

IMG_2101

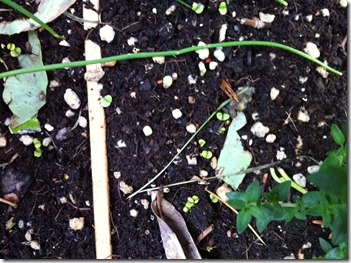
{those tiny little green leaves are my basil plants! once they start growing more, i will have to thin them out.}

IMG_2103

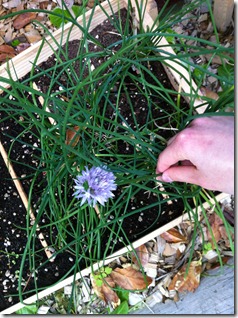
{the chives are flowering!}

IMG_2104

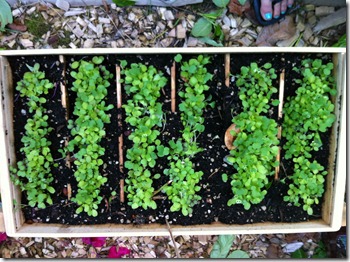
{the baby greens!}

do you have a garden – herb, veggie, fruit, or otherwise? what is your choice of planter?

M
diy baby shower gift: baby swaddler.

when it came down to the gift that i wanted to give amanda at her baby shower, i knew i wanted to make something. amanda is one who loves things handmade – you should see the beautiful cards she makes! – plus, i liked the idea of hand making something for the new baby (seems more personal).

this could be considered another pinspiration project because i found the idea from pinterest!

from the very little that i know about infants, i do know that swaddling is a way to help them feel like they are back in the womb. however, amanda & her husband are first-time parents & the process of swaddling a baby seems, well, difficult. a wailing infant with flailing arms & legs? no thank you.

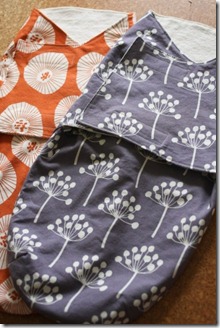
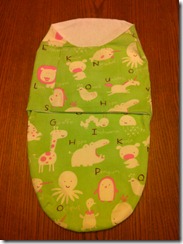
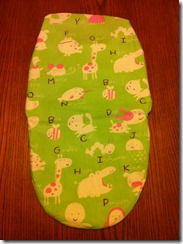
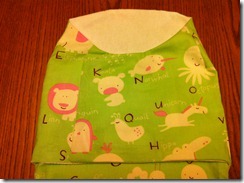
so, why not a swaddler. an infant-sized sleeping bag that allows those arms & legs to be gently velcro-ed in. genius! {sidenote: i really hope this was a thoughtful present after all, meaning that i hope it really works!}

*update: the little babe i made this swaddler for was only about 7 pounds when she was born, so the size of this swaddler is too big. if you know how big the baby is, you can adjust the size accordingly.*

75013150013202738_ruNM1tJg_f

{original tutorial: snuggler}

{sidenote: the gal’s blog who posted the original tutorial makes an amazing amount of things by hand. if you want some inspiration, definitely check out her blog!}

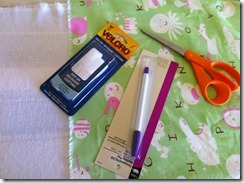
supplies:

  • pattern printed {updated link!}
  • instructions (attached to the pattern pdf)
  • 1 yard fabric – fun fabric for outside of swaddle (i used fabric from pacific fabrics)
  • 1 yard fabric – flannel or soft cotton fabric for inside swaddle (i got organic cotton flannel from this etsy seller)
  • pins
  • fabric scissors
  • fadeout marker (the type of marker that either has disappearing ink or disappears with water)
  • velcro
  • thread (i used white)
  • iron
  • sewing machine
  • ruler (i used it to help me transfer the dart pattern)

{sidenote: please excuse the bad lighting in the last set of photos. i was taking them in the evening without sunlight, so the color is funky. the real color of the green fabric is mint green & is best seen in the first part of the tutorial.}

this was the first time i made something from a pattern, so i was a bit nervous. plus, it was intended to be a gift to a crafty girlfriend who was expecting her first baby – no pressure! after my first read-thru (& second & third!) i found some of the instructions a little confusing. my remedy was to just go ahead & start, & i would work out the finer details as i came to them; turns out, this was a pretty good method!

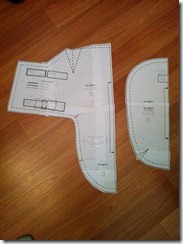
first, print out, cut out & tape together the pattern (there are two main pieces). then iron your fabrics (after pre-washing them in hot or warm water to prevent later shrinking!).

IMG_1508IMG_1568

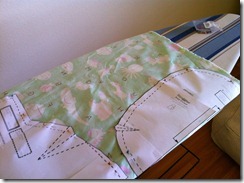
fold the printed fabric in half & pin the patterns to the wrong side of the fabric, lining up the folded edge to the inside of the pattern (there is a note on the pattern where it should line up with the folded edge). cut out the fabric along the pattern.

IMG_1569IMG_1570

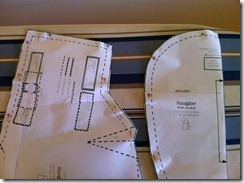
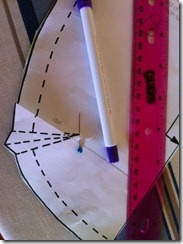
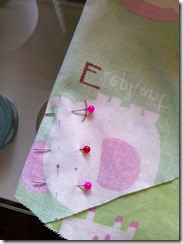
before removing the pins, trace the dart pattern onto the wrong side of the fabric. i placed a pin at the top point of the dart triangle (so that i could lift the paper to expose the fabric) & then used a ruler to draw very faint dotted lines onto the fabric with my fadeout marker.

IMG_1571IMG_1572IMG_1573

the instructions also tell you to transfer dotted lines where the velcro strips will be placed. {sidenote: i did this, but in hindsight i think it is unnecessary. the velcro “placeholders” that i made were much bigger than the velcro i ended up using & so there was a lot of blotting with water to remove the ink from the fadeout marker. i think that once you are at the point where you add the velcro – later in the tutorial – you can look back to the pattern to determine where the velcro strips should be sewn on.}

IMG_1575IMG_1576

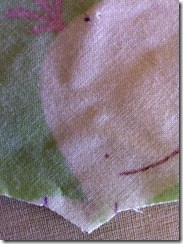
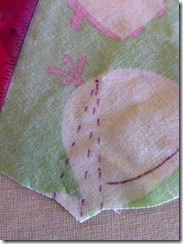
sew the darts into place. this was my first time sewing darts, but it is a fairly easy process. you basically fold the fabric in half (the middle dart line becomes the fold) & pin. then you run a seam towards the raw edge of the fabric. then you cut off the extra fabric.

IMG_1578IMG_1579IMG_1580

IMG_1581

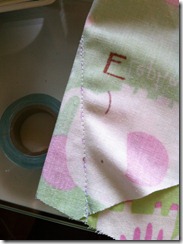
{darts completed on both fabrics. you can see the remaining ink lines here; i blotted the ink with a damp washcloth to make it disappear before i sewed the pieces together.}

repeat all above steps with the flannel fabric. then, you should have two identical pieces, one in printed fabric & the other in flannel fabric.

IMG_1583

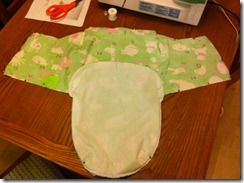
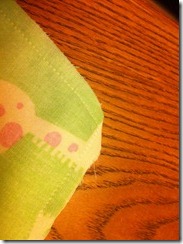
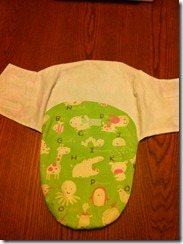
then you place the flannel piece (inside out) into the fabric piece (inside out) & pin the pieces together. then attach the pieces by sewing around the half moon piece, as well as along the arm pieces, leaving a couple inches at the bottom of the left arm open (to flip the fabric). trim the seams.

IMG_1582IMG_1588IMG_1589

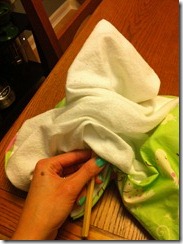
flip the swaddler right-side out. i used a chopstick (clean, of course!) to help turn the corners & edges.

IMG_1590IMG_1591

then hand sew the remainder of the edge shut.

IMG_1592

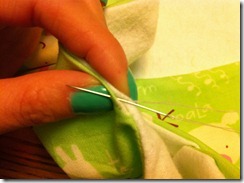
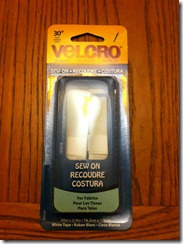
grab your velcro & lay out the pieces. cut three lengths of velcro (both pieces!) a couple of inches long. one piece goes on the front half-moon piece (middle picture) & two go on the outside left arm/inside right arm (far right picture). i sewed the rough piece of velcro to the front half-moon & also to the front side of the left arm; the soft velcro pieces are placed accordingly so that the velcro will properly close.

IMG_1593

IMG_1594IMG_1595

IMG_1596IMG_1597IMG_1598

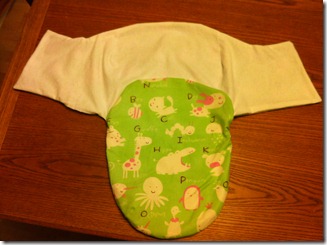
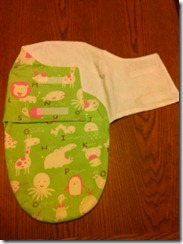
{the final swaddler!}

what do you think of handmade baby shower presents? also, to my readers who have infants or kids, did you swaddle?

M
diy baby shower project: paper flags.

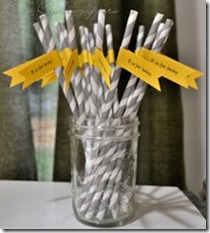
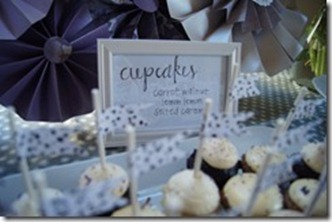
i wanted to add some extras to the baby shower dessert table & thought cupcake toppers & stripey straws would be perfect accessories! {sidenote: we didn’t actually use the straws during the shower, but they were very festive!}

not surprising that i found some pinspiration!

165507355025927754_3LqmWE2F_b

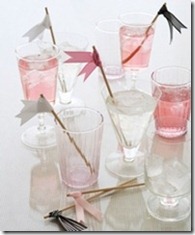
{ribbon flags on drink stirrers: oh joy! blog}

213006257345269853_NY2n9YPO_b

{paper flags on stripey straws: etsy}

amanda (the mama-to-be) loved dalmations as a child – the dog breed, not the movie! – & so i incorporated a bit of animal print into the shower theme.

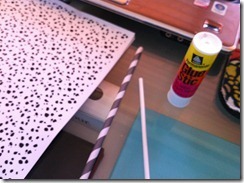
i couldn’t find any dalmation printed paper at my local craft stores, so i scoured the interwebs & found this pdf of dalmation spots. i simply printed a few pages on my home laser jet printer.

supplies:

  • paper for flags
  • glue stick
  • ruler
  • pencil
  • something to glue flag onto (straw, lollipop stick, bamboo skewer)

IMG_1488_thumb

IMG_1489_thumb

IMG_1490_thumb

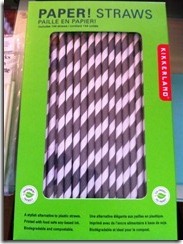
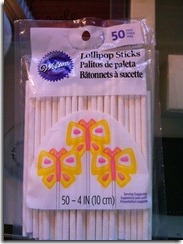
{stripey straws from amazon//lollipop sticks i picked up at michael’s}

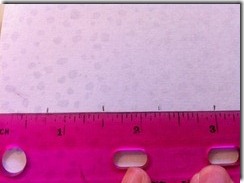
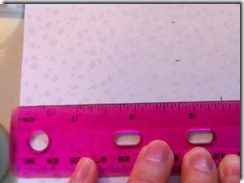
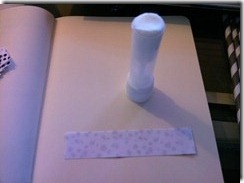
i turned the paper so the printed side was down (this way you can see your pencil marks!) & began measuring. i wanted pretty small flags & ended up cutting paper strips that were 3/4” by 3 1/2”.

IMG_1492_thumbIMG_1494_thumb

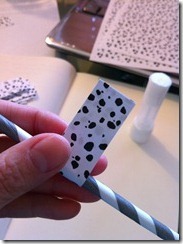
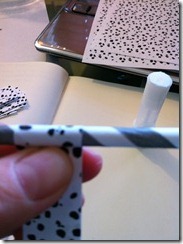
then i ran a glue stick along the entire back of the paper strip & wrapped it around the straw/stick about an inch or so from the top (this is totally a personal preference). i also pinched the paper closed right near the edge of the straw/stick in order to make sure it was well adhered (see last picture below).

IMG_1495_thumbIMG_1496_thumbIMG_1497_thumb

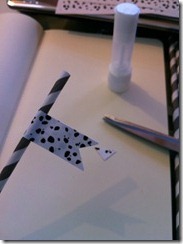
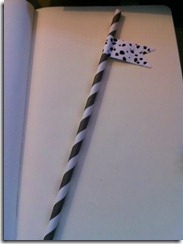
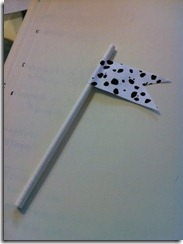
finally, i cut a small triangle from the outside edge of the paper strip. you could use a pencil & ruler to mark this, but i did it just with scissors since it was such a small cut.

IMG_1498_thumbIMG_1499_thumbIMG_1500_thumb

VOILA!

DSC00738_thumb

{sorry this isn’t a better picture of the cupcake toppers, but you get the gist!}

what do you think of paper flags to decorate cupcakes & straws?

M
diy baby shower project: paper pinwheel board.

i had a few requests for the projects that were part of amanda’s baby shower. as i mentioned in the original post, i looked to pinterest for inspiration and ideas, so these are all definitely pinspiration projects (this will be a series of project posts).

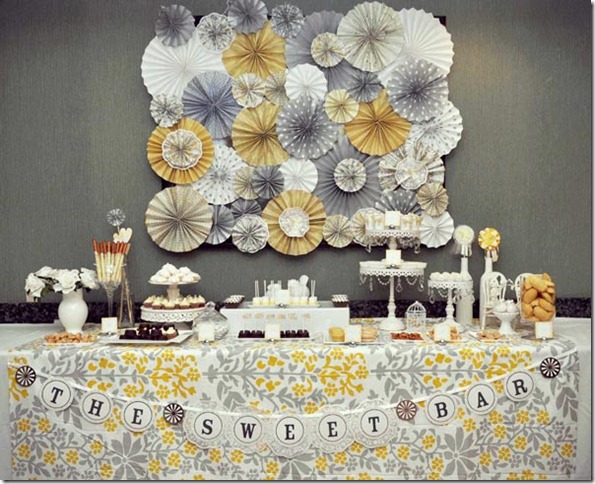
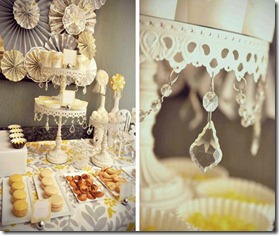
i was fortunate because very early on in the shower planning process i found the ultimate inspiration on pinterest & pretty much ran with that idea. i loved the look of white serving dishes & stands & i knew that i wanted to create a paper pinwheel board that would be the focal point for the dessert table.

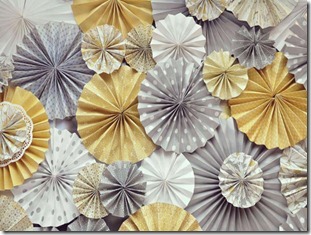
KaLiceEvents-VintageYellowGrayKaLiceEvents-VintageYellowGray1KaLiceEvents-VintageYellowGray6

{original post here: vintage themed dessert table.}

gorgeous, huh? i hadn’t made pinwheels before, but just a few days later i was catching up on blogs and found this tutorial on making paper pinwheels. it was definitely a sign that i had to at least attempt this project. {sidenote: this was a bit of a time-intensive project that spanned over about five evenings spent in front of the TV.}

supplies:

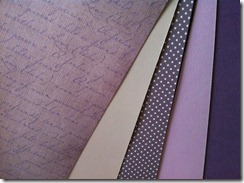
  • paper or colored cardstock (i used three different scrapbook papers, plain white computer paper & two different cardstocks; the paper is definitely easier to fold!)
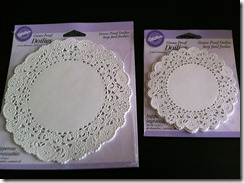
  • doilies (optional)
  • hot glue gun & lots of glue sticks
  • thick cardboard (i cut apart two boxes i had from amazon.com)
  • thick poster board with a foam core
  • scissors
  • medium-sized circle punch (optional)
  • ruler
  • pencil

IMG_1445IMG_1446

i don’t have any pictures of the process & i apologize. i really didn’t think i would be doing a tutorial of this project, plus my fingers were covered in hot glue which is not conducive to taking photos.

i followed the tutorial from the lovely cupboard: cut strips of paper, fold & glue. the paper strips i used were between two and five inches. i also learned that the bigger the pinwheel, the more strips of paper that you need to glue together before making it into a circle.

perhaps it was because my folds were not always perfectly the same, but my pinwheels didn’t want to lay flat on their own. i remedied this by gluing a small (about one inch by one inch, or so) piece of cardboard to the back of the pinwheel in the center. this kept most of them together & lying flat on their own, & also gave me a good flat surface to attach it to the poster board.

i am not sure how the pinwheel board in the inspiration picture was constructed, but once i started laying out my pinwheels on the poster board, i figured out that i would need to elevate some of them in order to get the right effect (i.e., no white poster showing thru) & to get the pinwheels to overlap. i made about a quarter of the pinwheels before i glued any of them to the poster board, just so i could make changes in the positions of the pinwheels to get the right look. only a few of the pinwheels are actually glued directly to the poster board; most of them are raised up by cardboard. in order to get the pinwheels up off the board, but still attached, i cut lots of little cardboard squares (like the ones i talked about for the back of the pinwheels) & stacked & glued them together into little cardboard towers until i had the right height. {sidenote: if you are interested in seeing more pictures, let me know and i will update the post.}

some of the larger pinwheels also have doilies & smaller pinwheels on top of them; i liked the look of this layering, but you could skip this part. also, i added a paper circle in the middle of each pinwheel in a contrasting paper to give it a more finished look (but also to hide the imperfect folding!). i just cut out circles by hand so they aren’t perfect, but if you had a circle punch that was big enough, you could use that too.

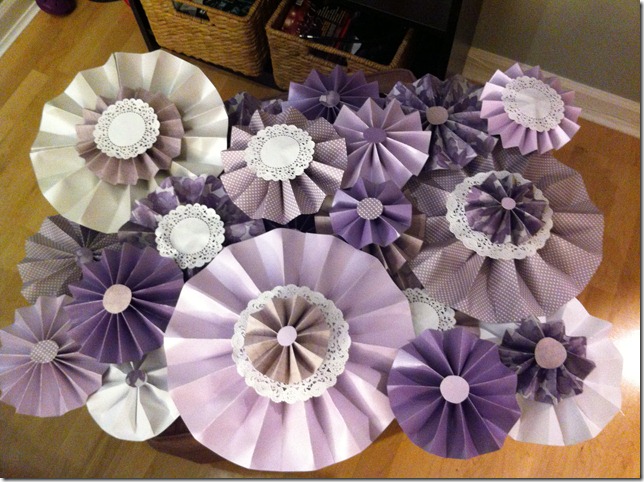
IMG_1483

{the pinwheel board right after i finished it. the colors in this picture are really close to what they are in real life.}

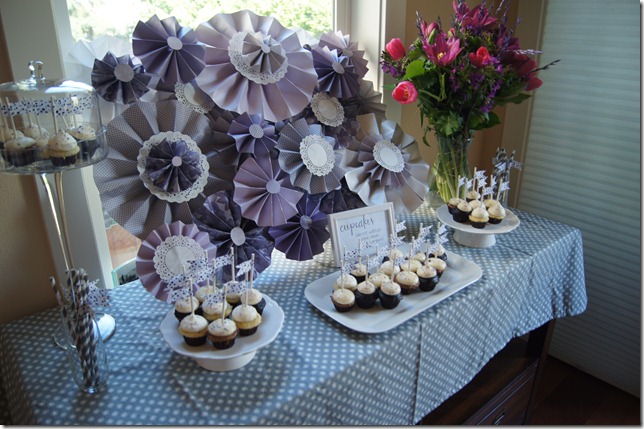
DSC00731

{the pinwheel board on the dessert table}

in order to make it stand (it was quite heavy considering it was made out of paper!) i had aaron add cardboard triangles to the back to prop it up; you could also hang it from a wall with poster hangers (like the ones made by 3M) which is probably how it will be displayed at the new house once i find a place for it {anyone have ideas as to where it should go?}.

if you end up making a paper pinwheel board, i would love to see it, so please share pictures!

would you make a pinwheel board for a shower, party or just a fun house decoration?

M